
In this post, we'll be setting up a Google Analytics 4 event to track your Webflow form submissions in Google Analytics as a conversion. You'll also be able to use the trigger we'll be setting up for the form submission to track ad lead conversions for platforms like Facebook, LinkedIn and Google Ads etc.
**Update** We've added some video content to this post that'll hopefully make it easier to follow along and show you some more advanced ways of doing this than detailed in the post below when it comes to tracking only specific forms or multiple different forms separately. Please subscribe to the channel to stay up to date on our latest how-to's and updates.
Depending on your form settings in Webflow there are basically two easy ways to track a form submission. If you've set up a redirect URL for your form you could track visits to the destination URL as a conversion, alternatively you could track the submission event, which is what we'll be doing.
This will we quite a quick post, but it's especially useful as this trigger and event can be used for more than just seeing how many form submissions there have been in Google Analytics. Milk Moon Studio is a small design focussed Webflow Studio, we're Webflow designers, we want things simple and if you use Google Ads or Facebook Ads etc. and want to run ads optimised for lead conversions you can use the trigger we'll be setting up in the post to track the leads generated by your ads, which will not only help your ad platform optimise for conversions, but allow you to see the cost per conversion for your campaigns and keep you Webflow project clean.
We won't be covering how to set up Google Tag Manager, Google Analytics or how to add them to your Webflow Project. To do that you can go check out our previous posts:
Installing Google Tag Manager and Google Analytics in Webflow - Part 1
Installing Google Tag Manager and Google Analytics in Webflow - Part 2
Step 1 - Create your Tag
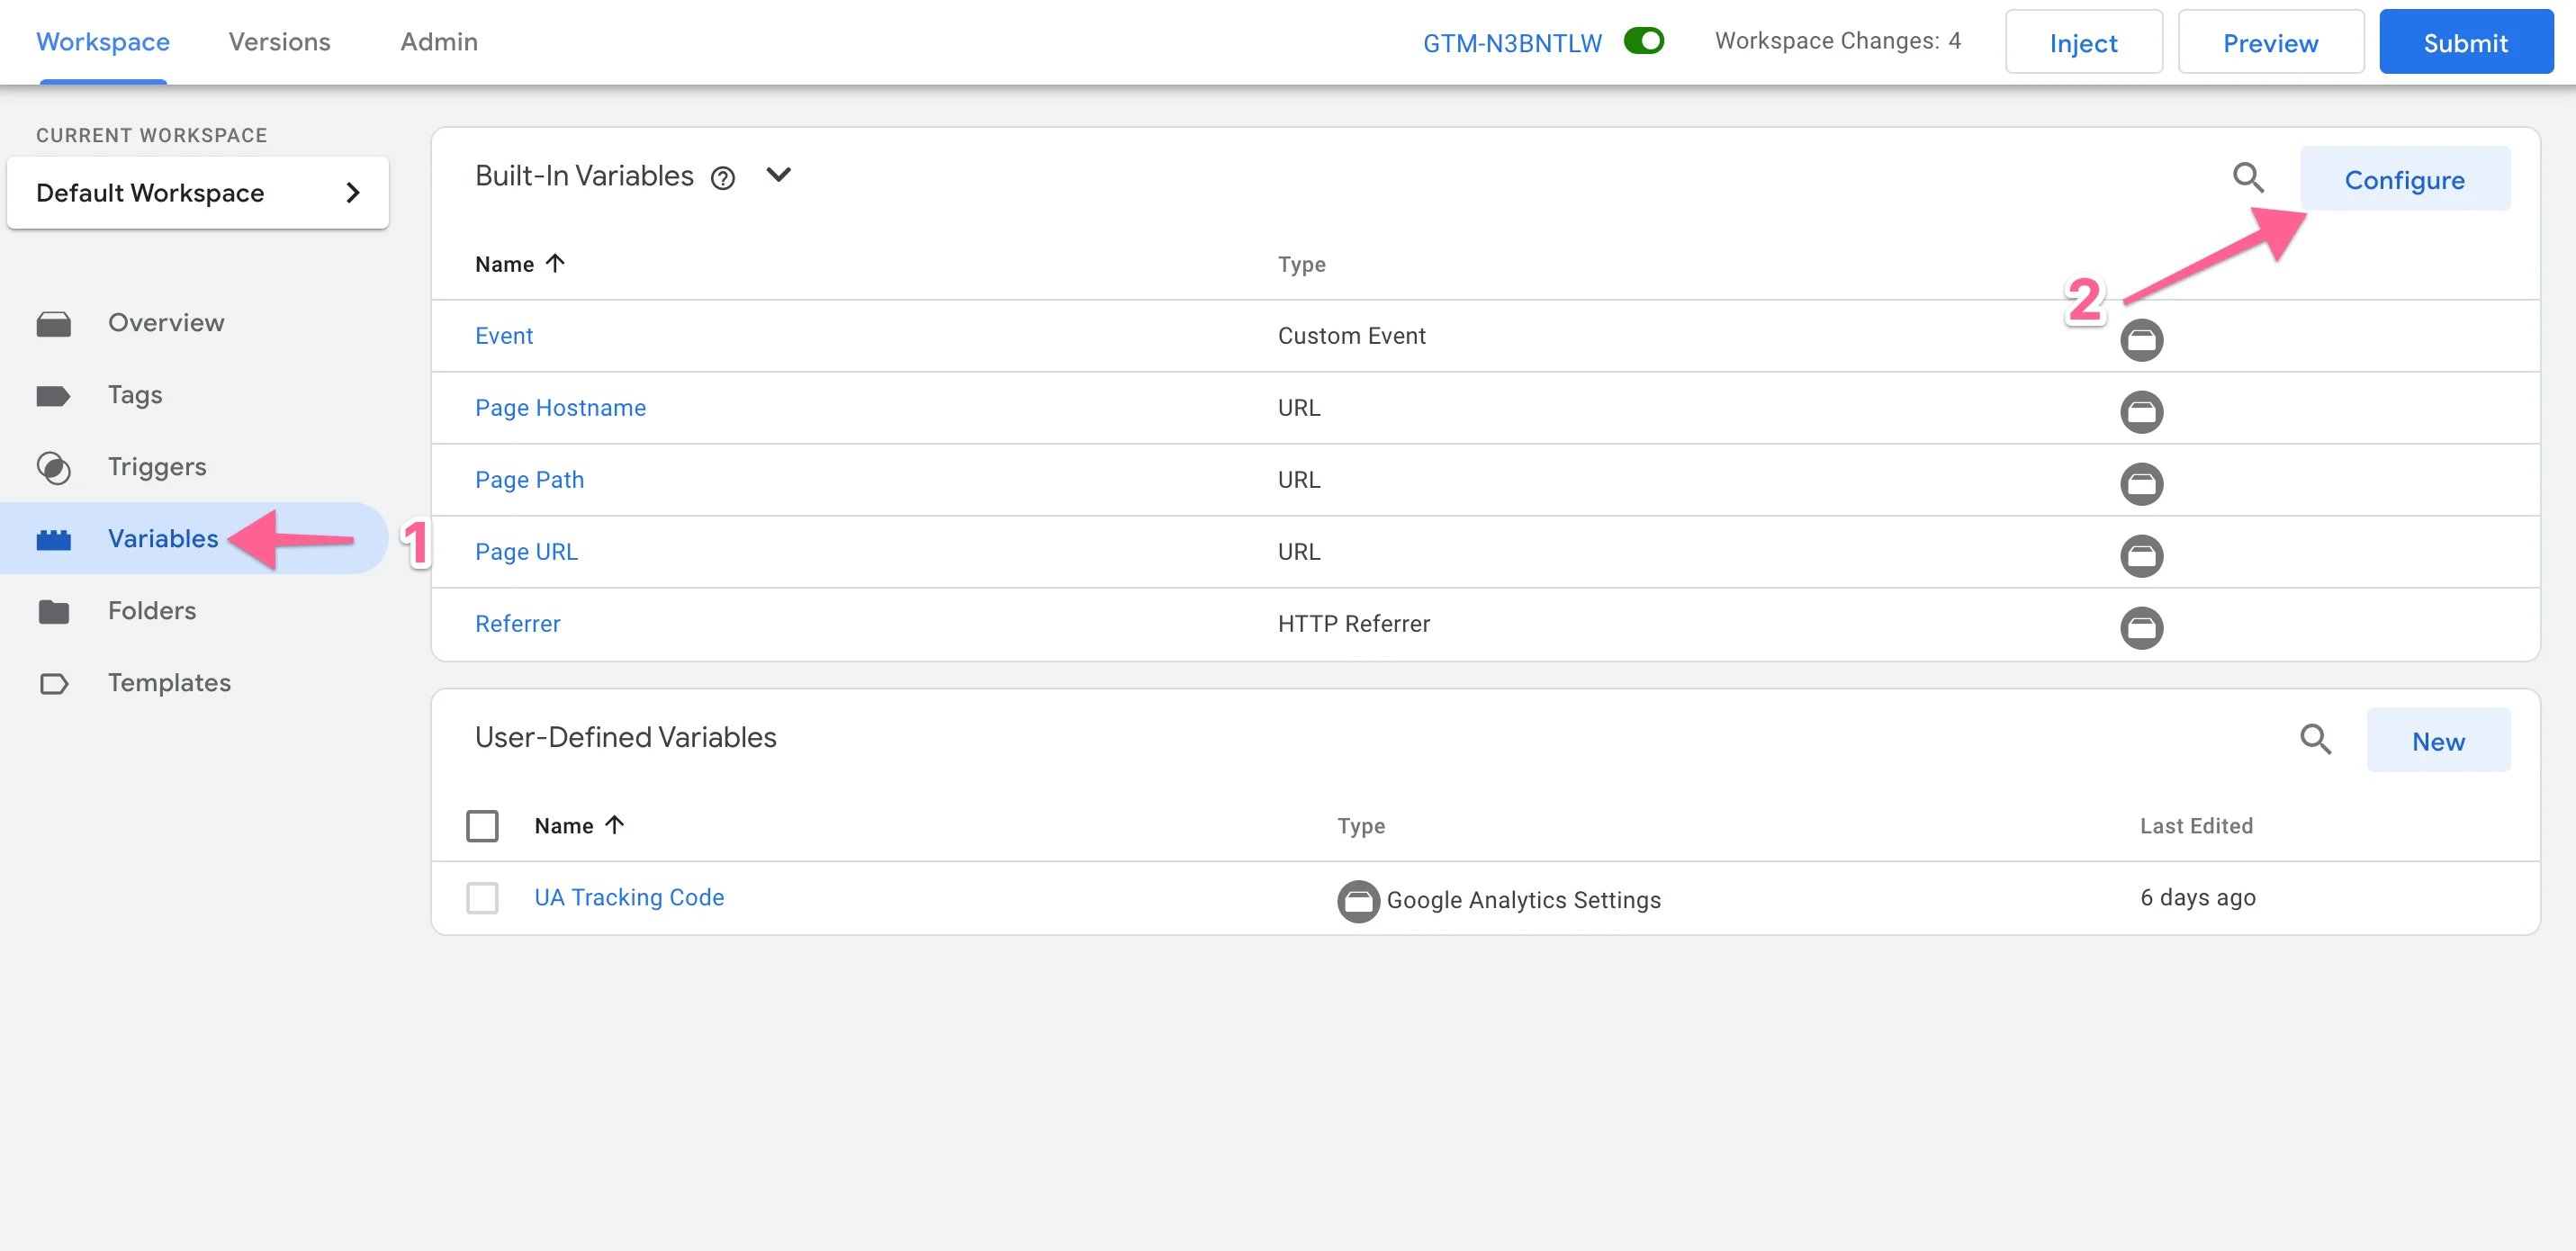
Head on over to Tag Manager, open your Webflow Project Container, hit Variables and Configure.
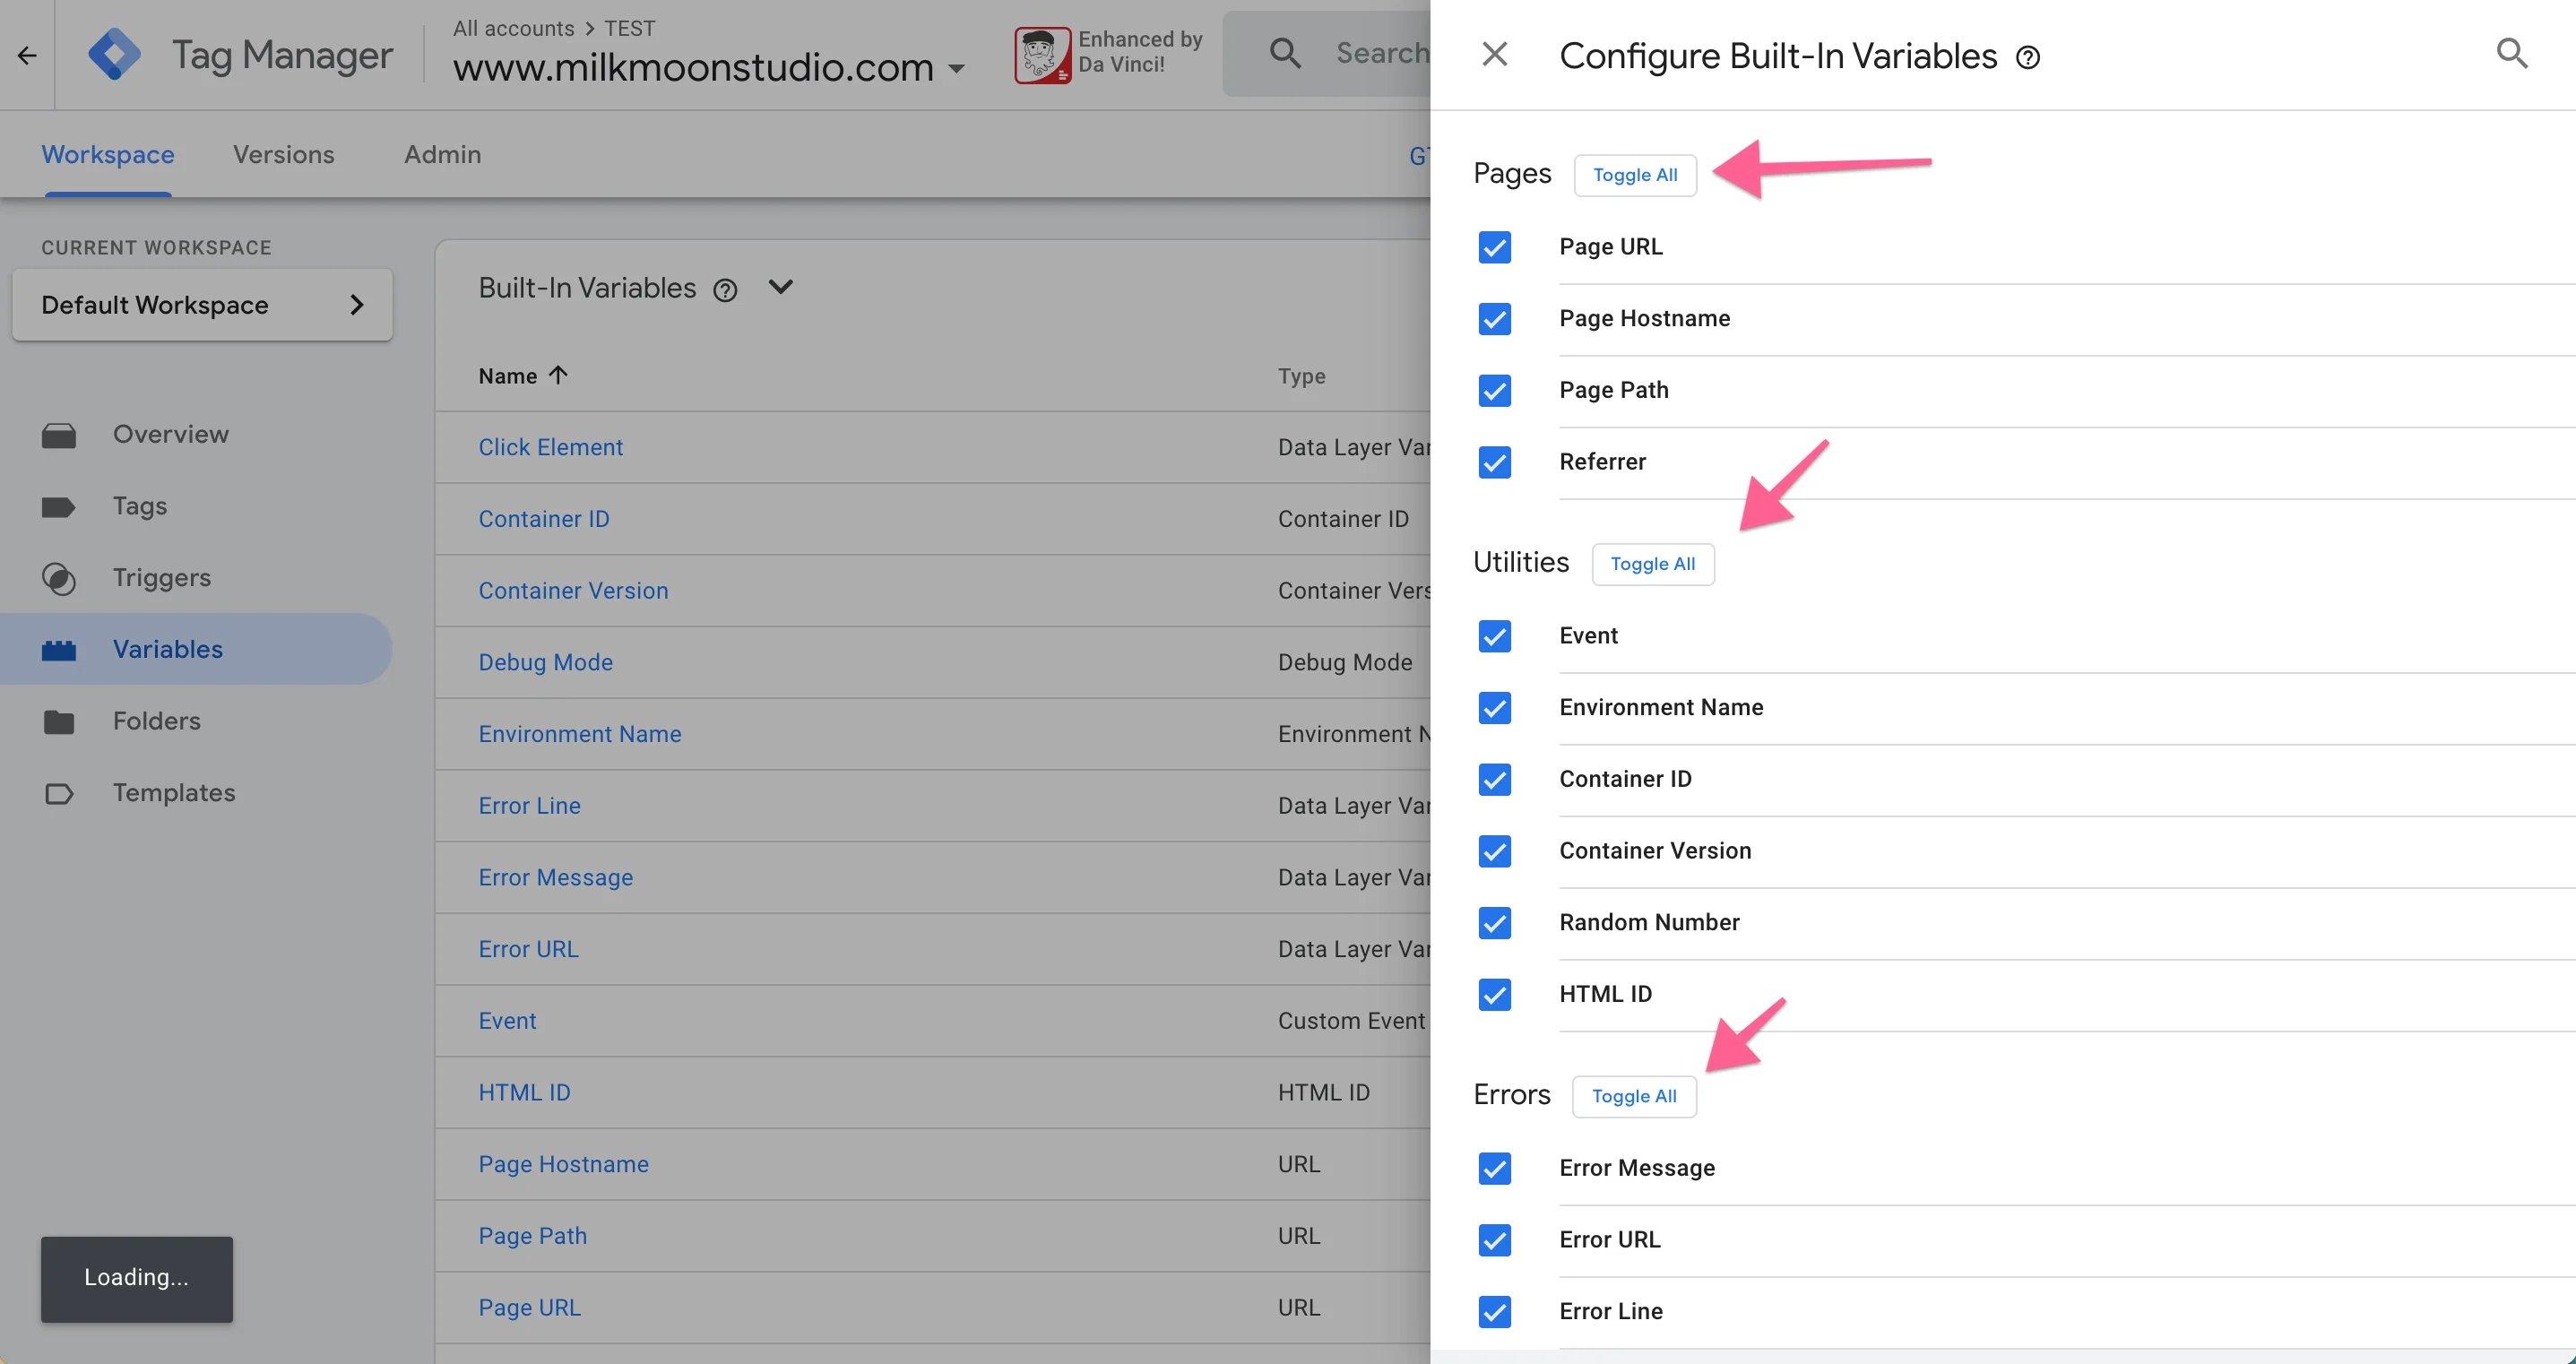
Now go ahead and toggle all, you're not gonna need 'em all but just makes things easier when you're creating other triggers.
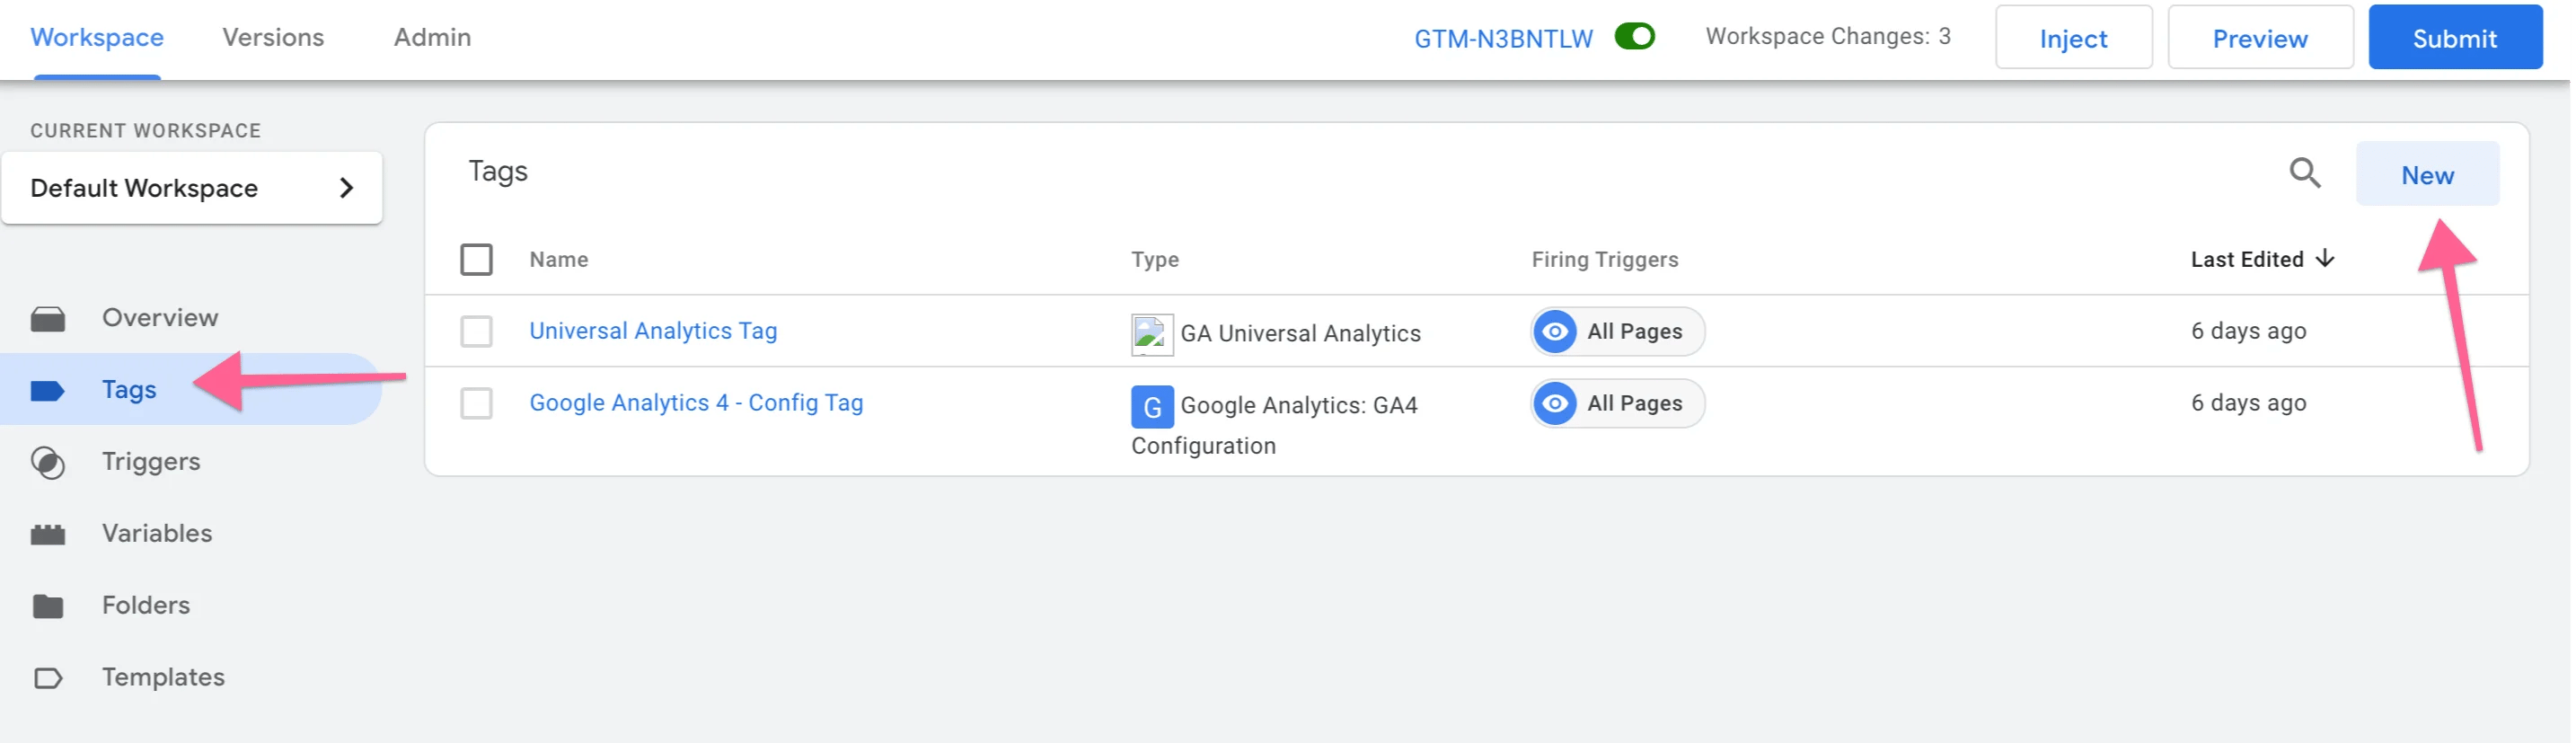
Head to Tag and hit New.
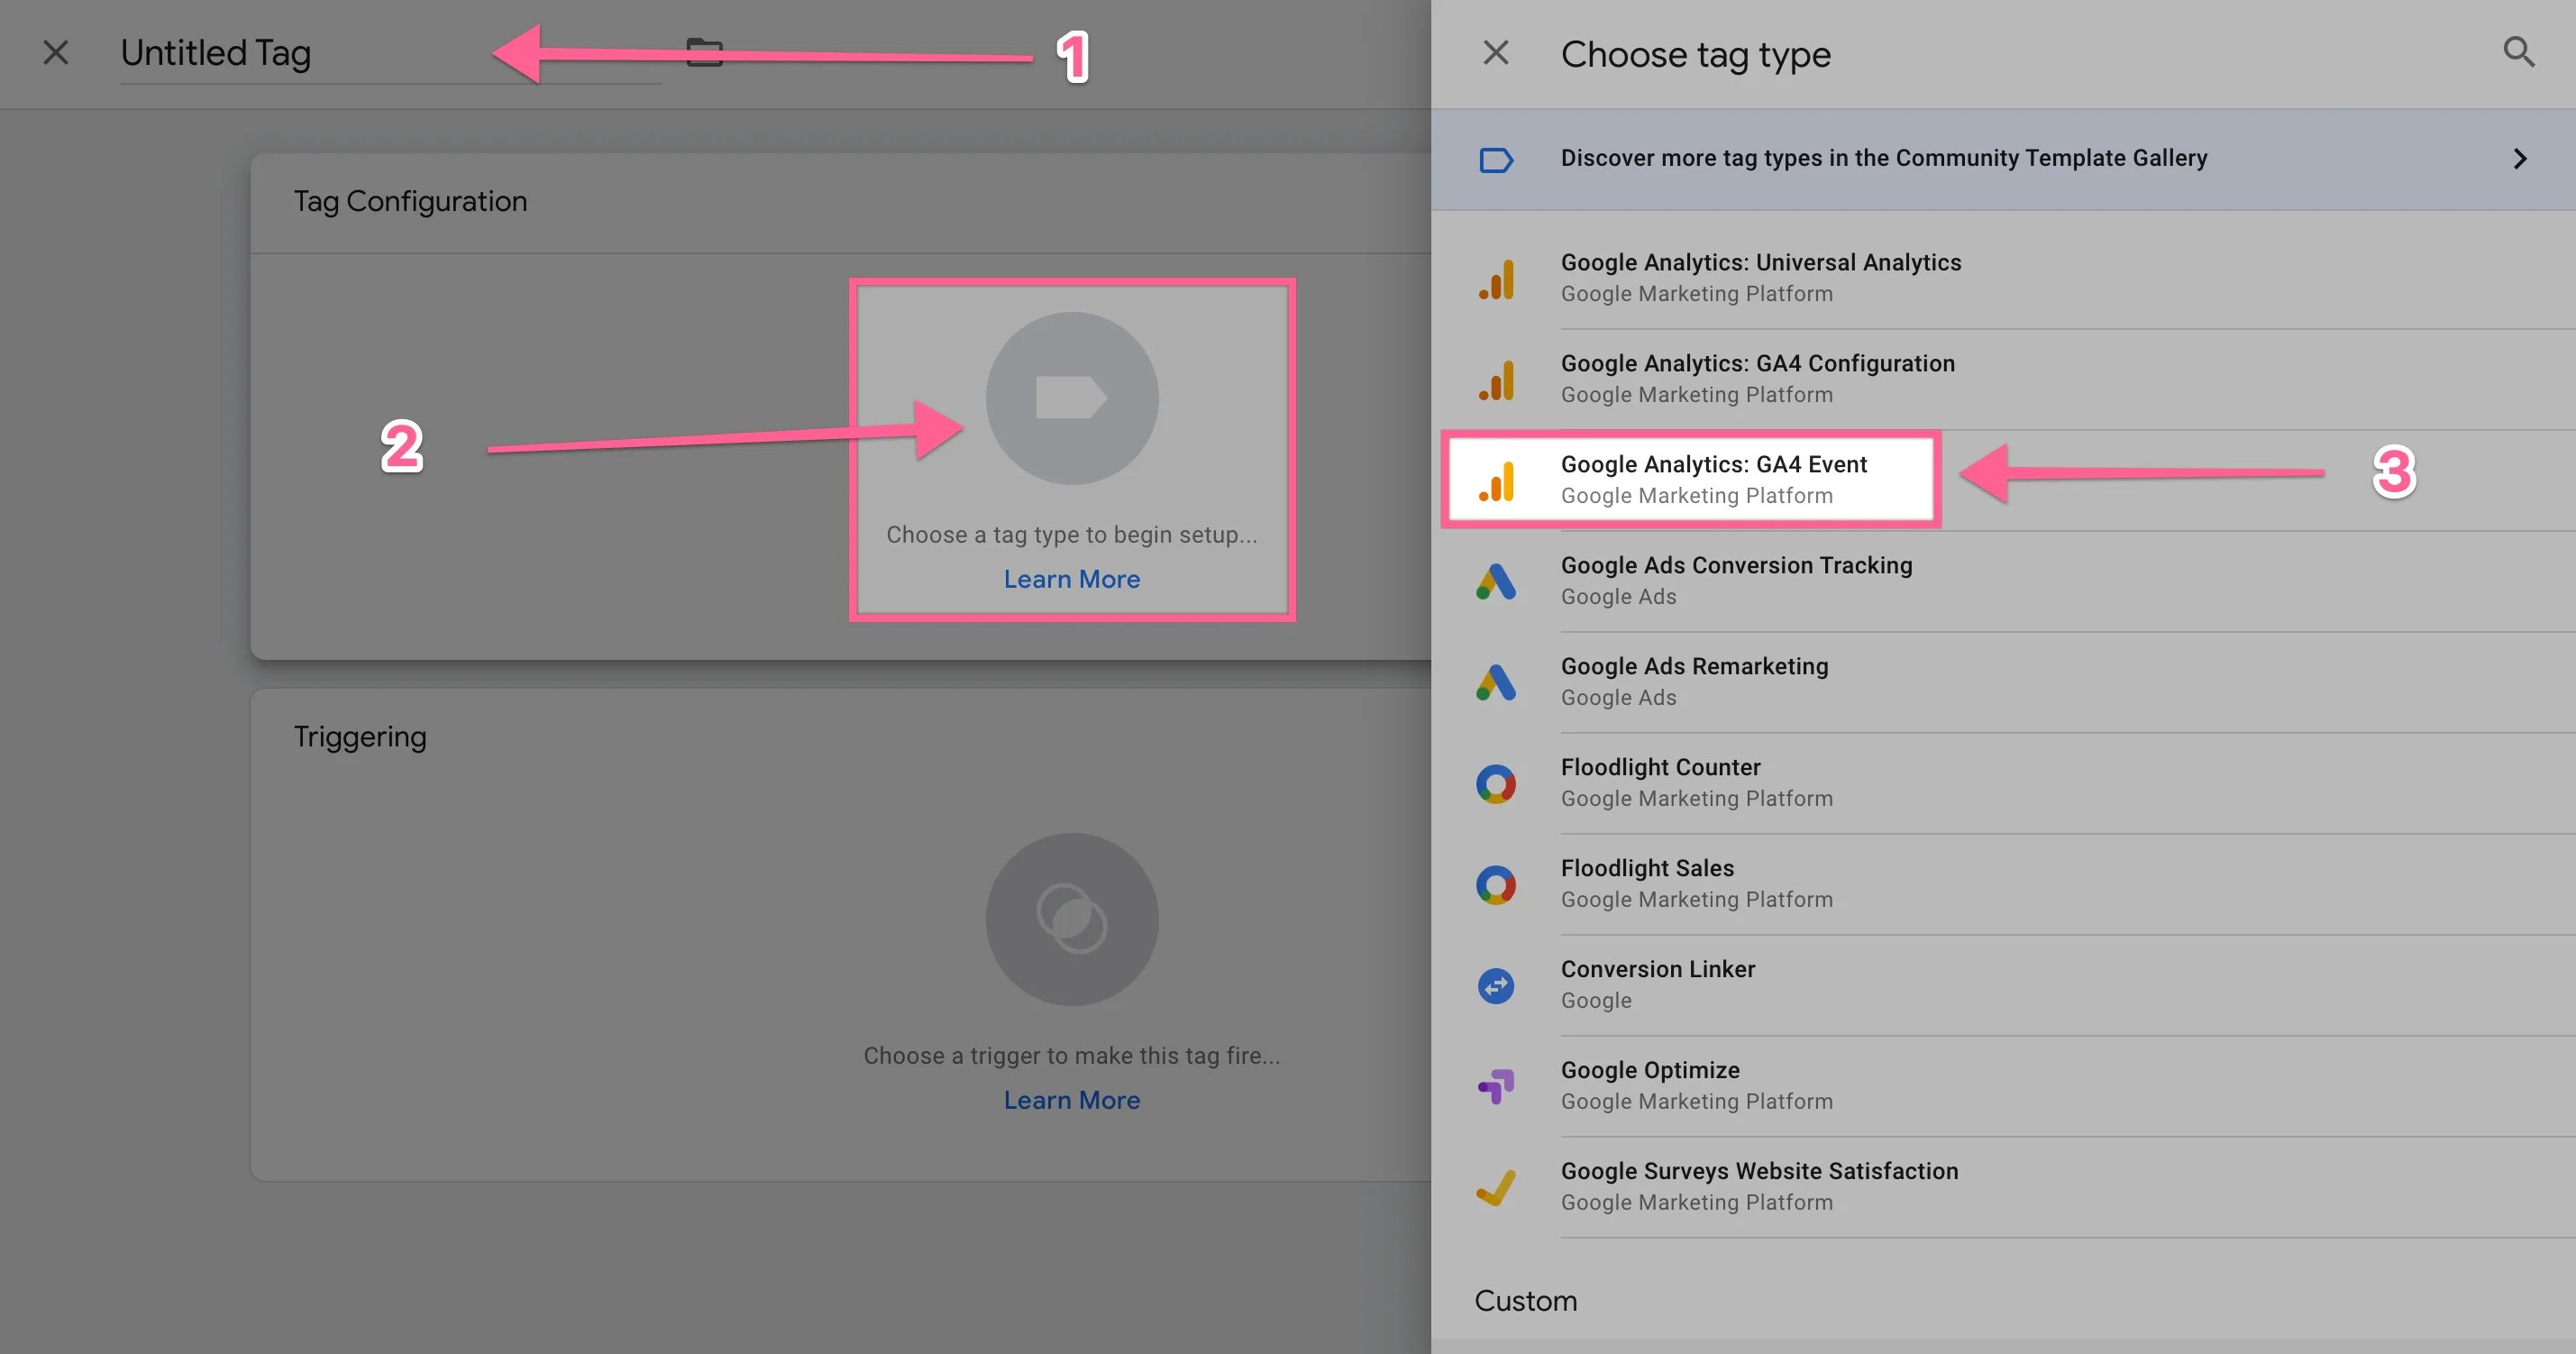
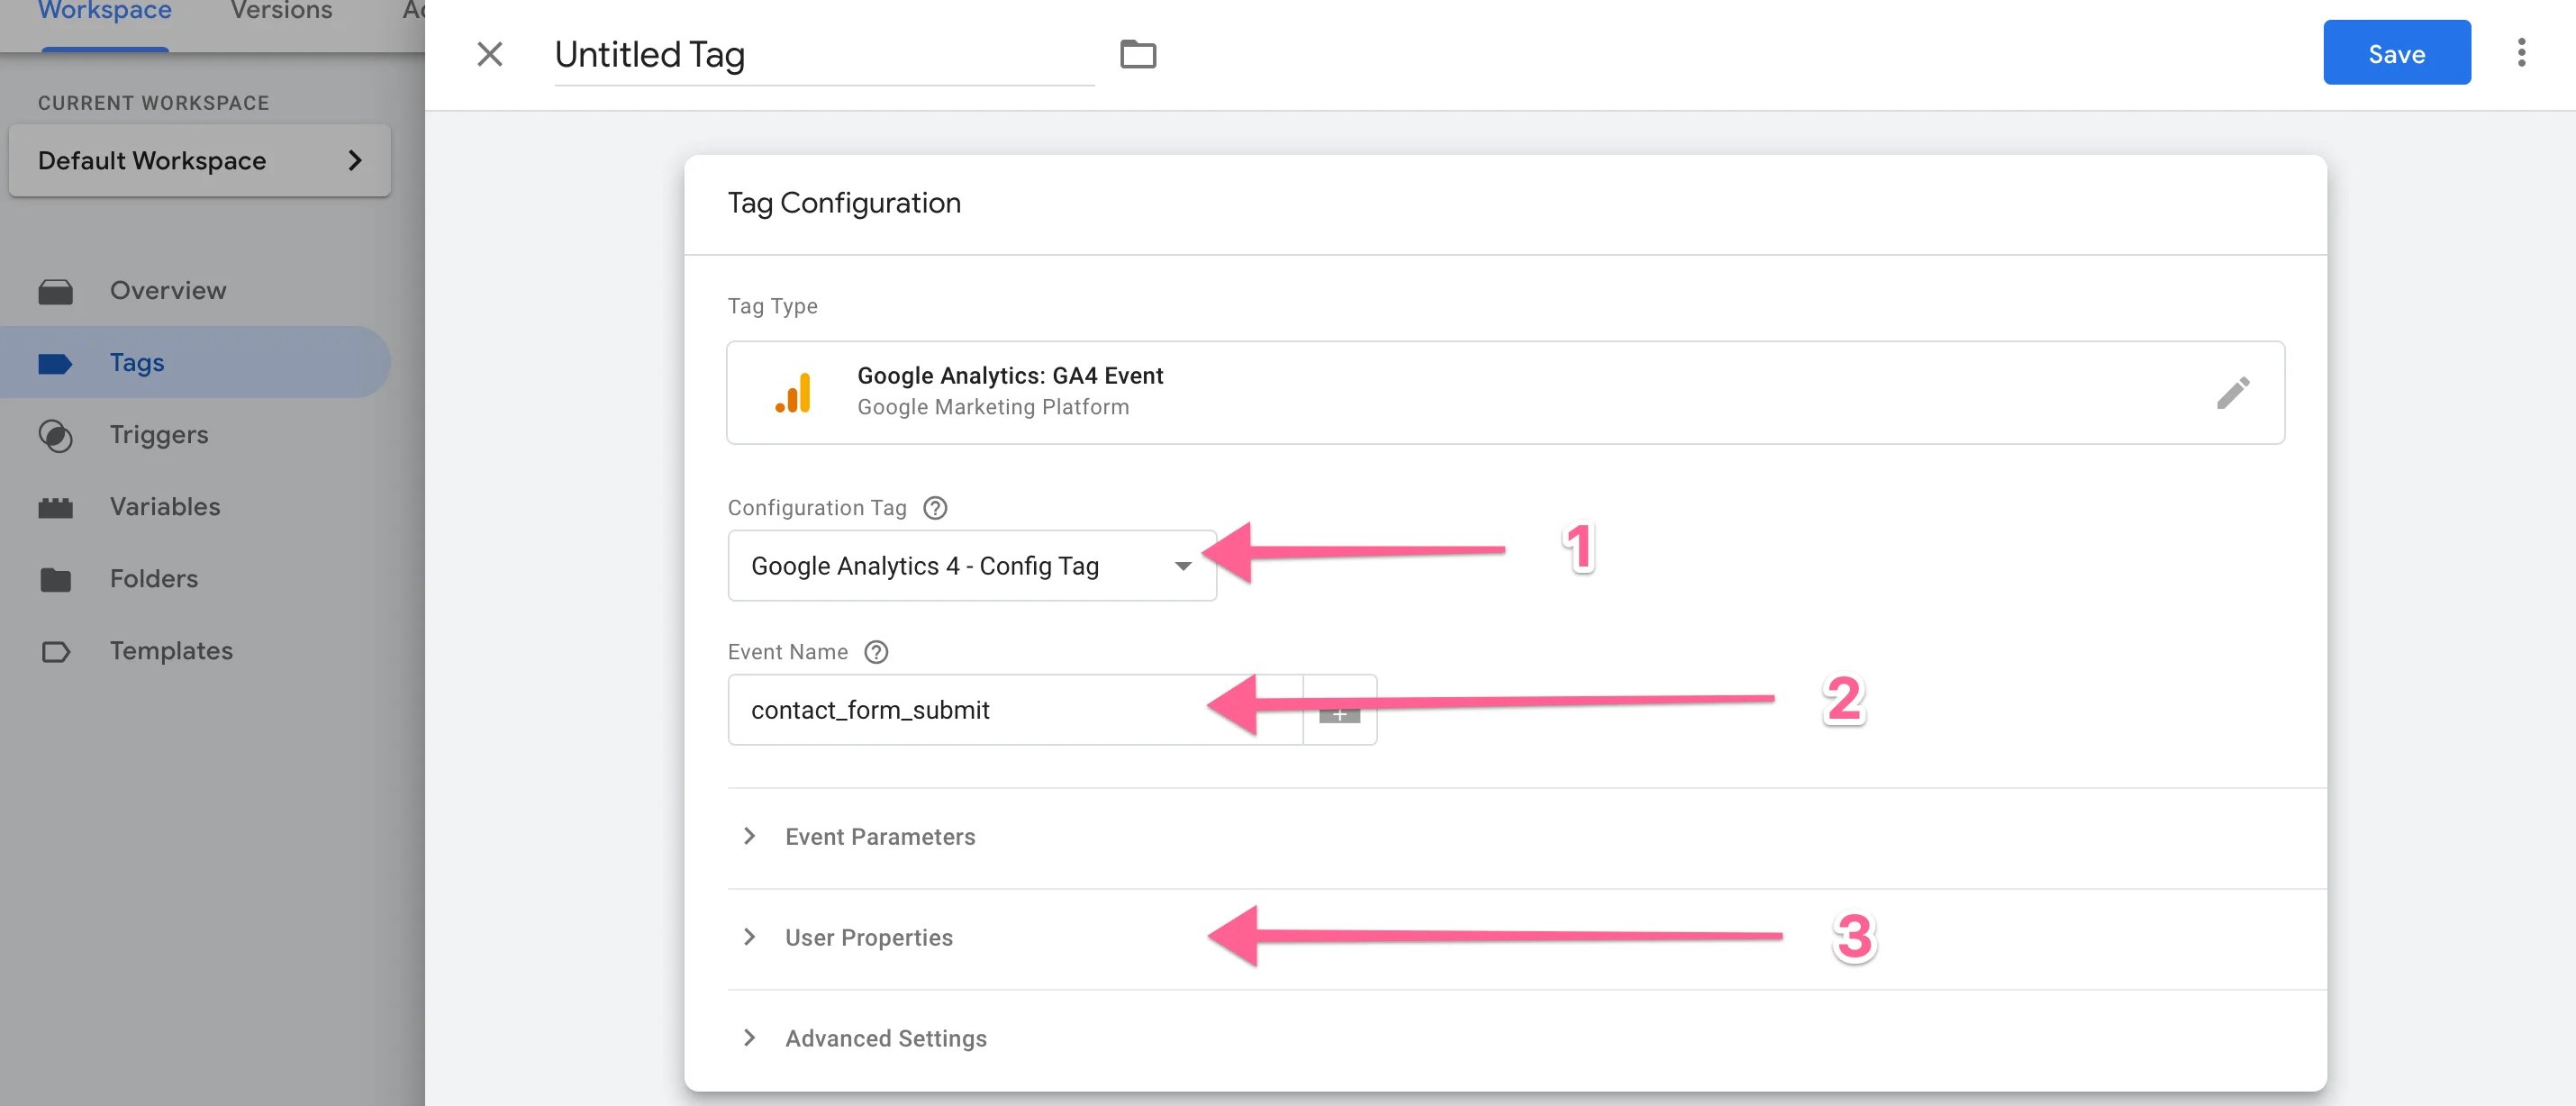
Give your Tag a name and choose the GA4 Event Tag.
Now go ahead and select the config tag you set up in our other post. This is the GA4 account you want to send the event to. Give the event a name (this is what'll show in Google Antics). Finally, if you'd like to create Audiences in GA you can add a user parameter like (like lead_submit or whatever under User Properties).
Now the important bit, the tigger. We say important as this is what you'll not only use for GA, but for any other lead tags you'd like to create for platforms like Facebook or Pinterest etc.
Hit Triggering and the +

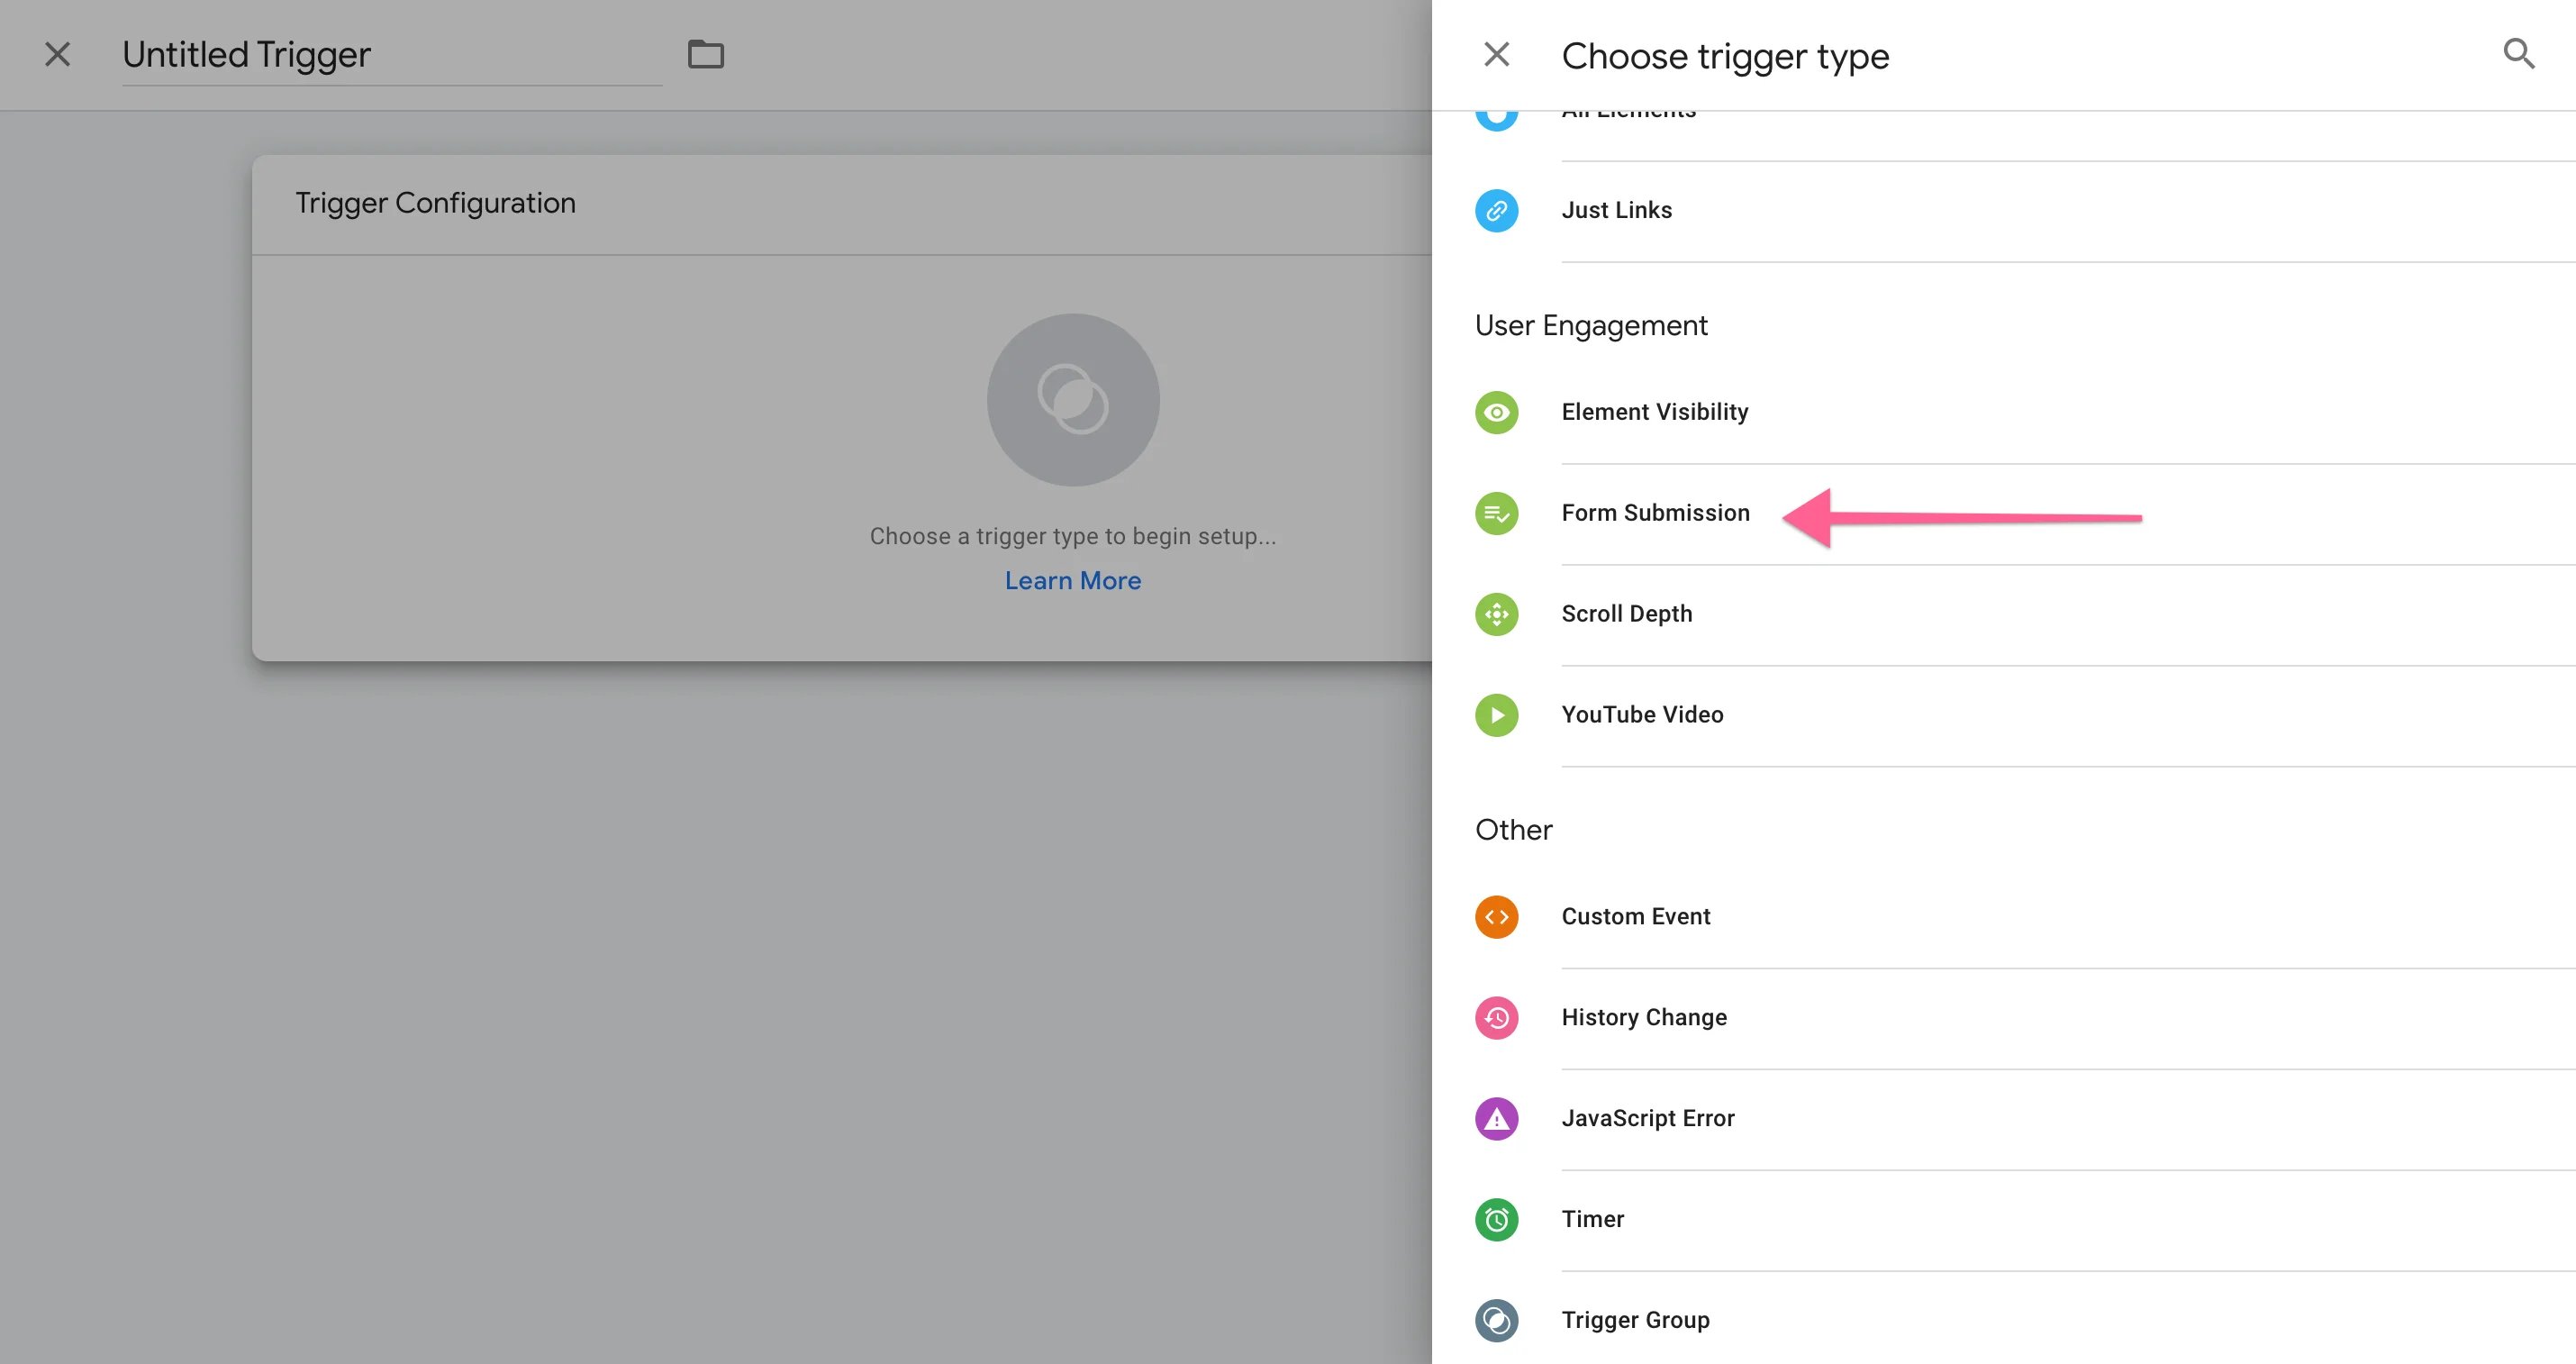
Give your Trigger a name and choose the Form Submission trigger under Trigger Type.
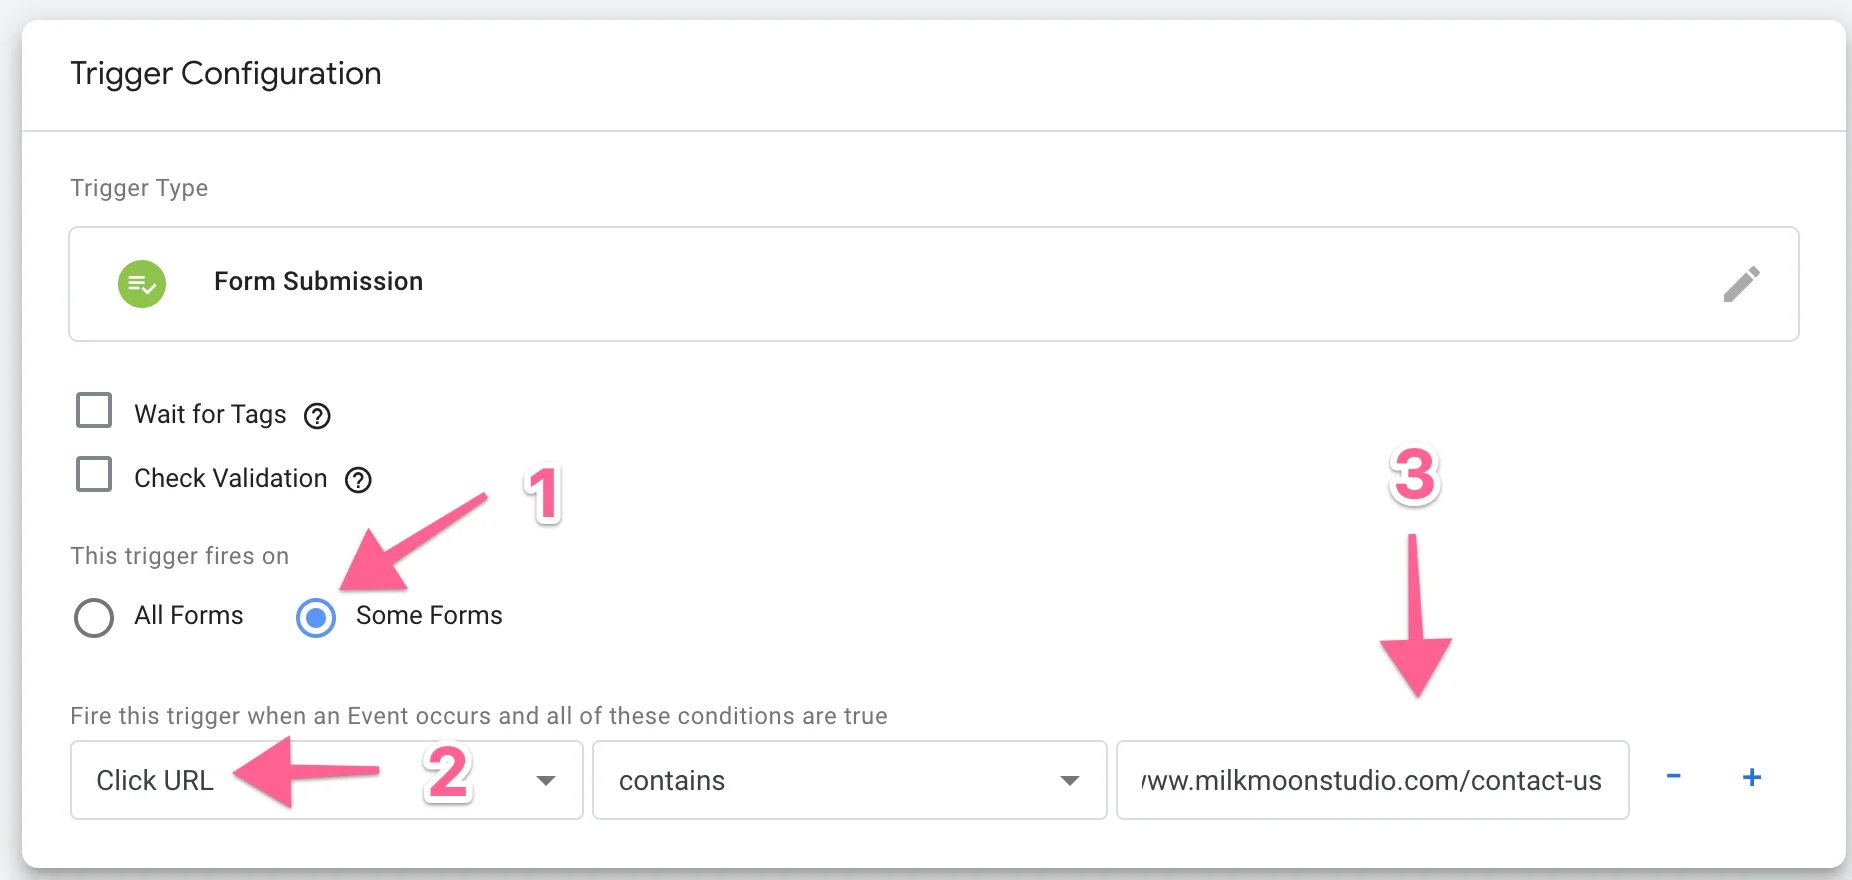
You could stop the process here, but what if you have more than one form in your project? We're gonna narrow things down by only triggering on forms that are on the contact page. You could use other variables like Click Text etc. etc. but that's another post and can get super granular.
Let's select Some Forms, then Click URL, Contains and the URL of the contact us page.
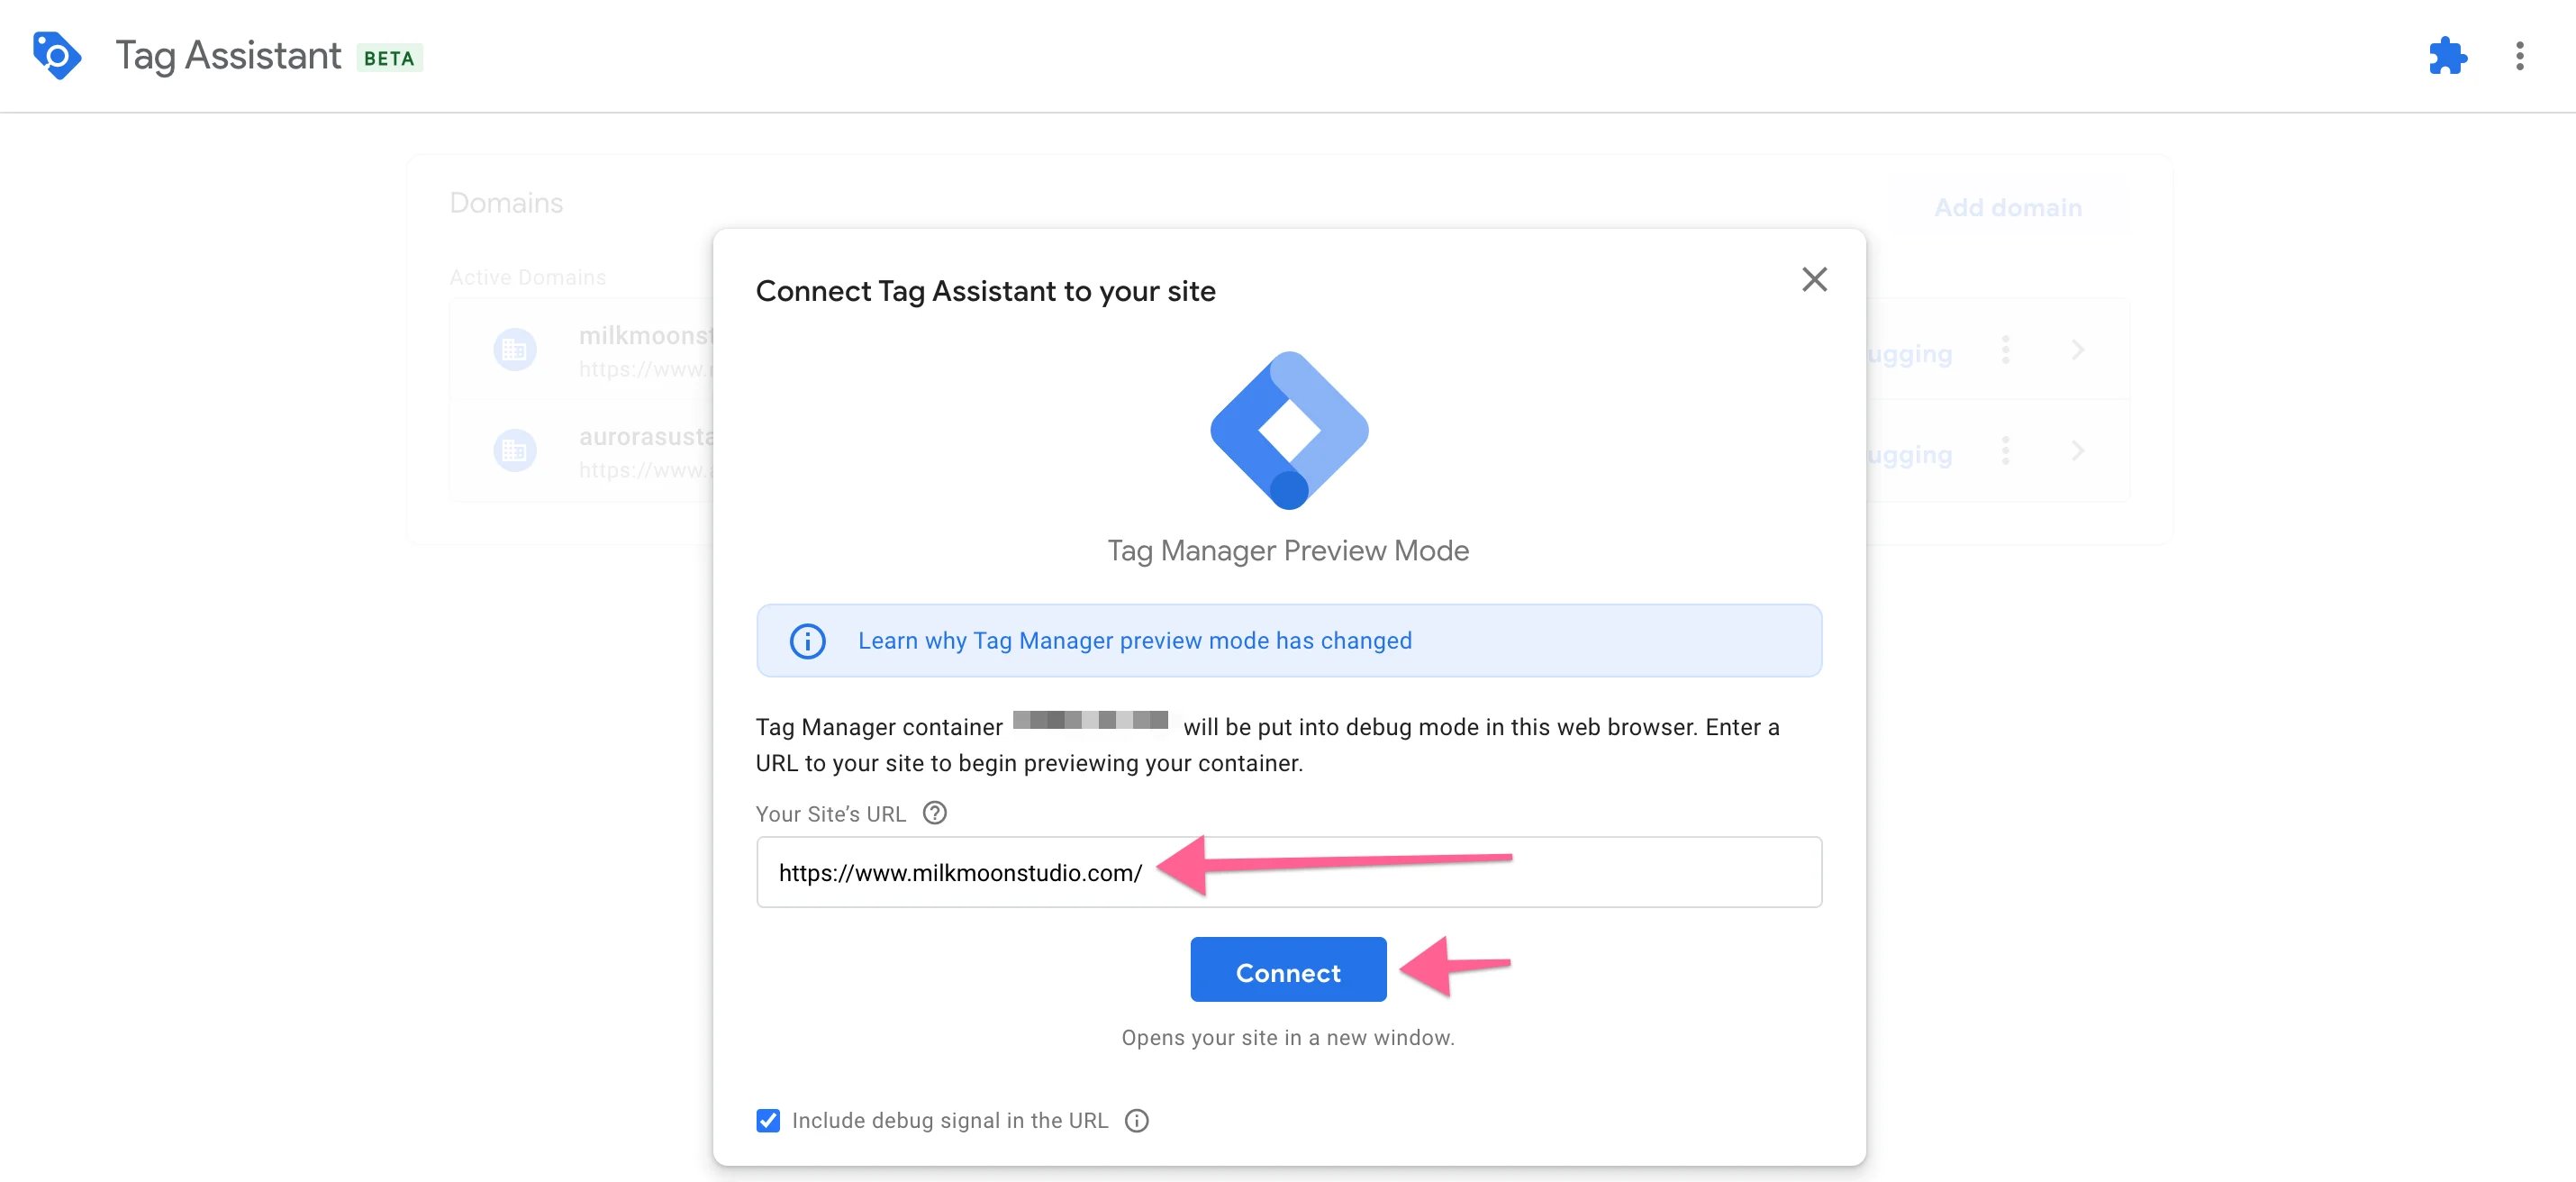
And that's it for the tag setup, Submit, Publish and then test by hitting Preview.

Stick in your URL, and Connect. You'll now have the Preview Tab and your Site tab, head to your contact form, fill it in and submit, then switch back to the Preview Tab to see if everything's firing properly.
And there's our Tag.
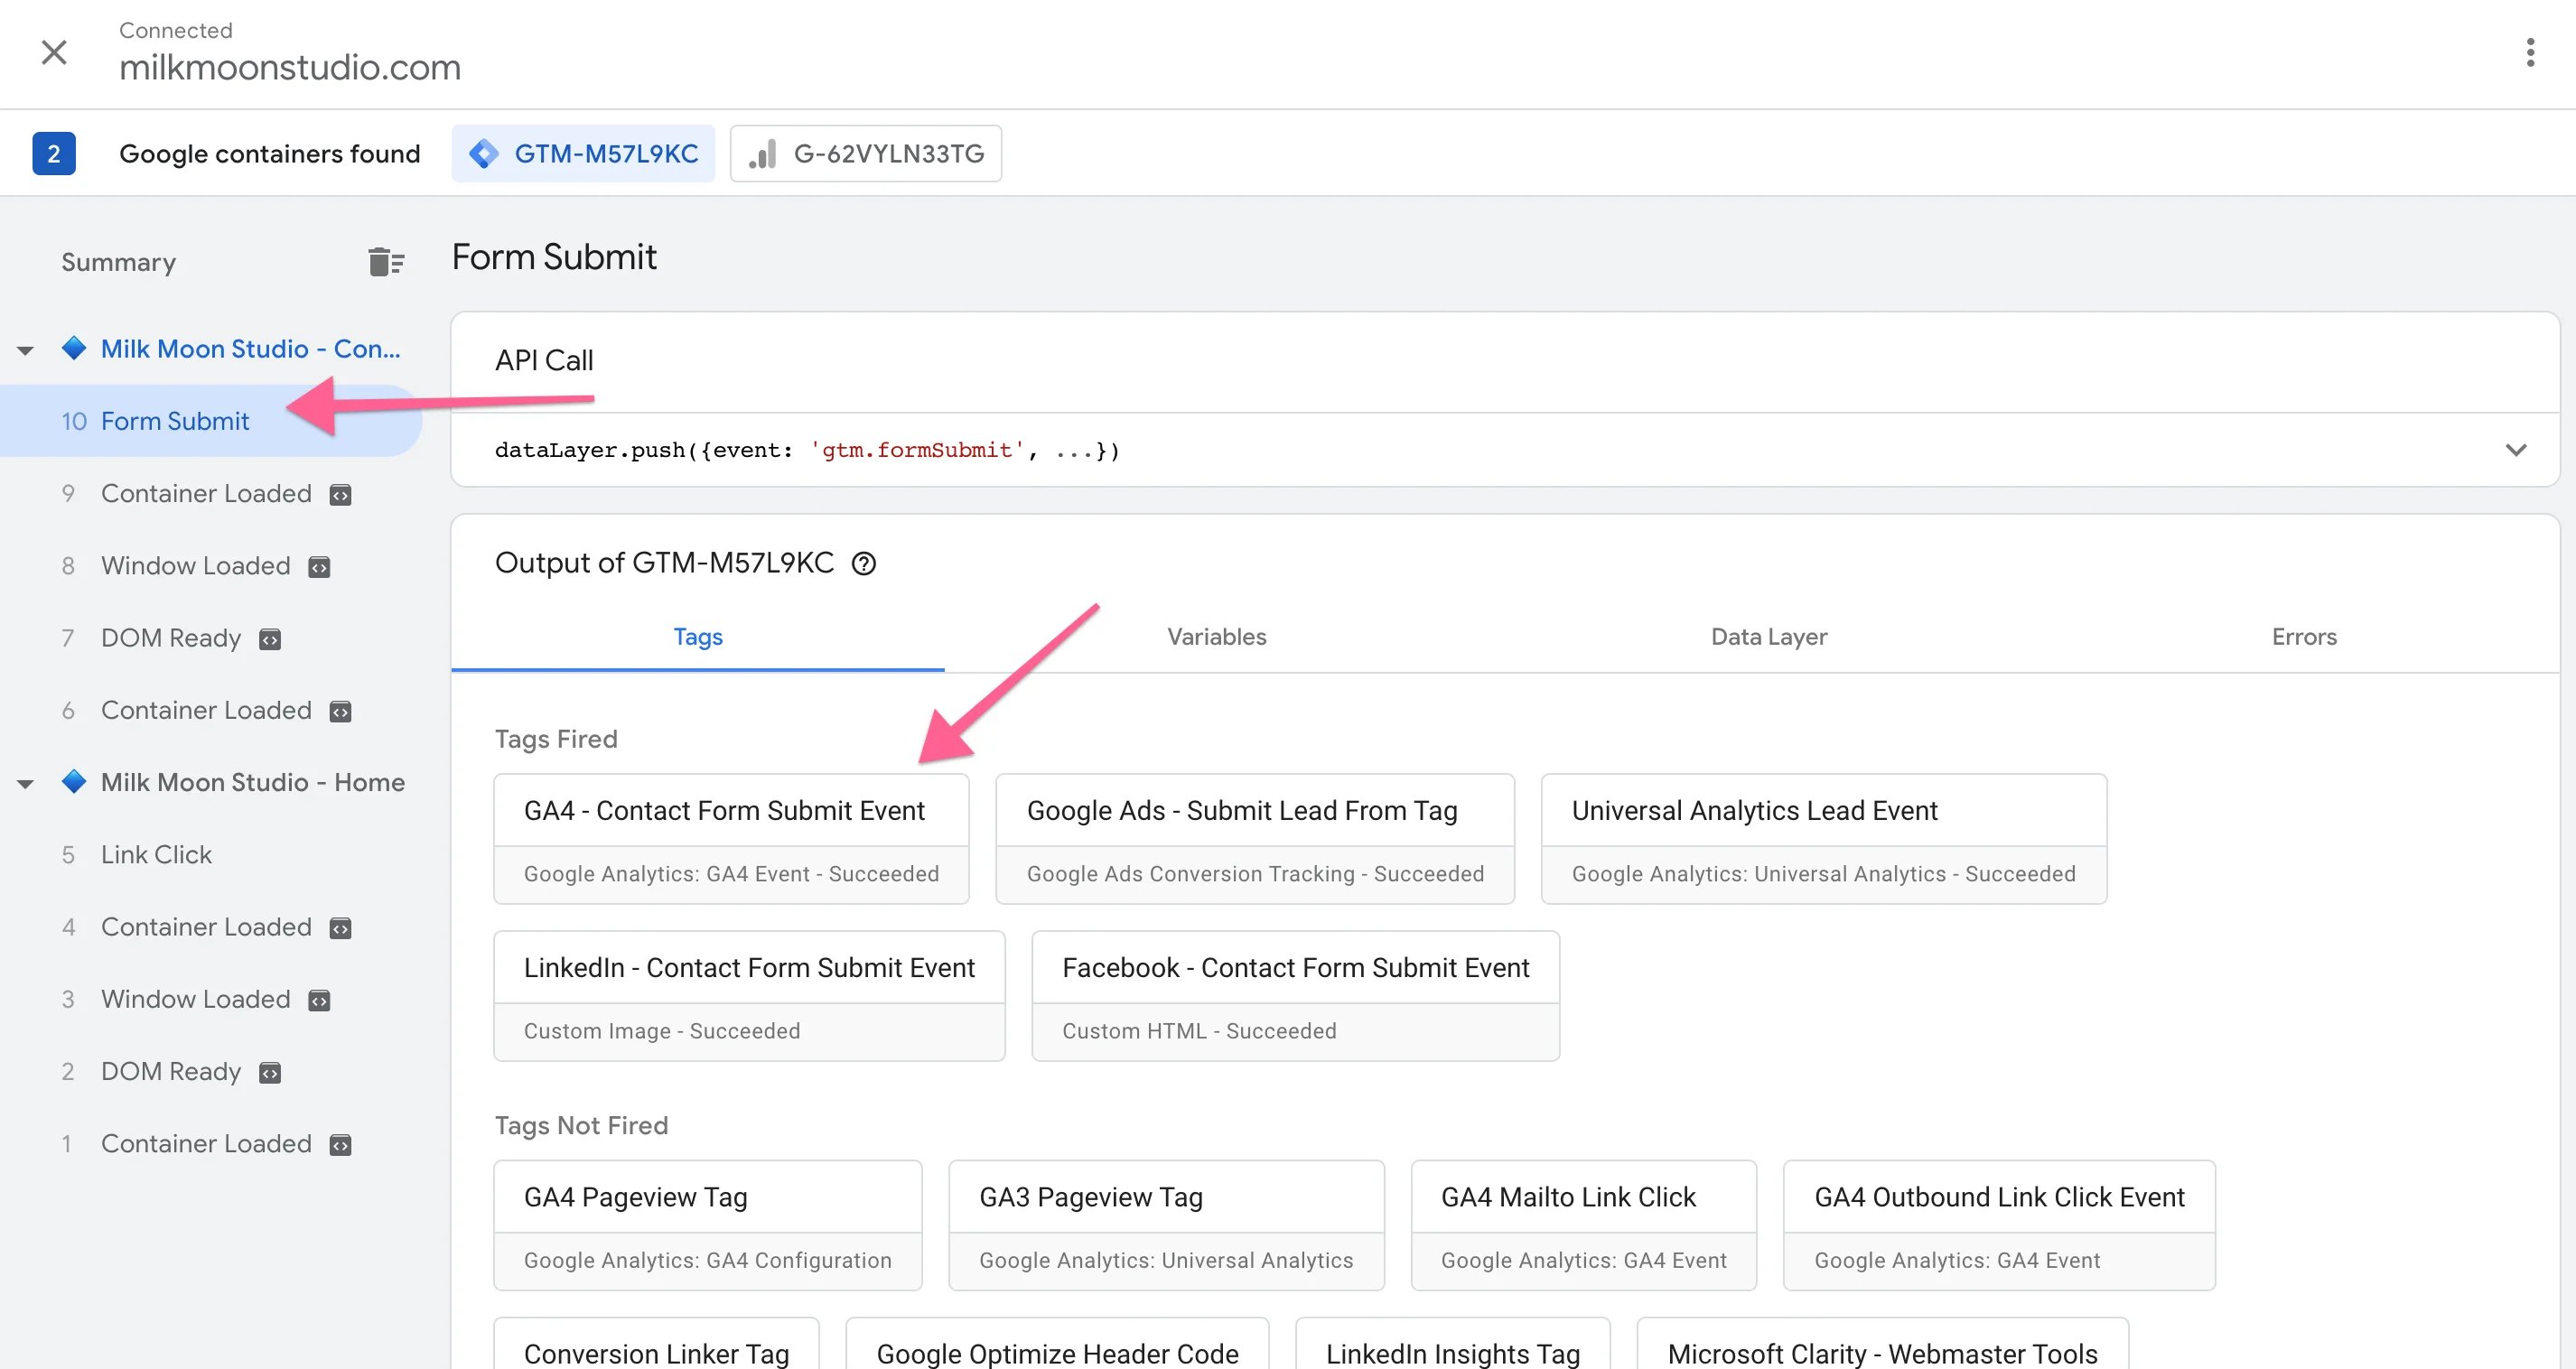
Let's take a closer look by clicking the Tag.
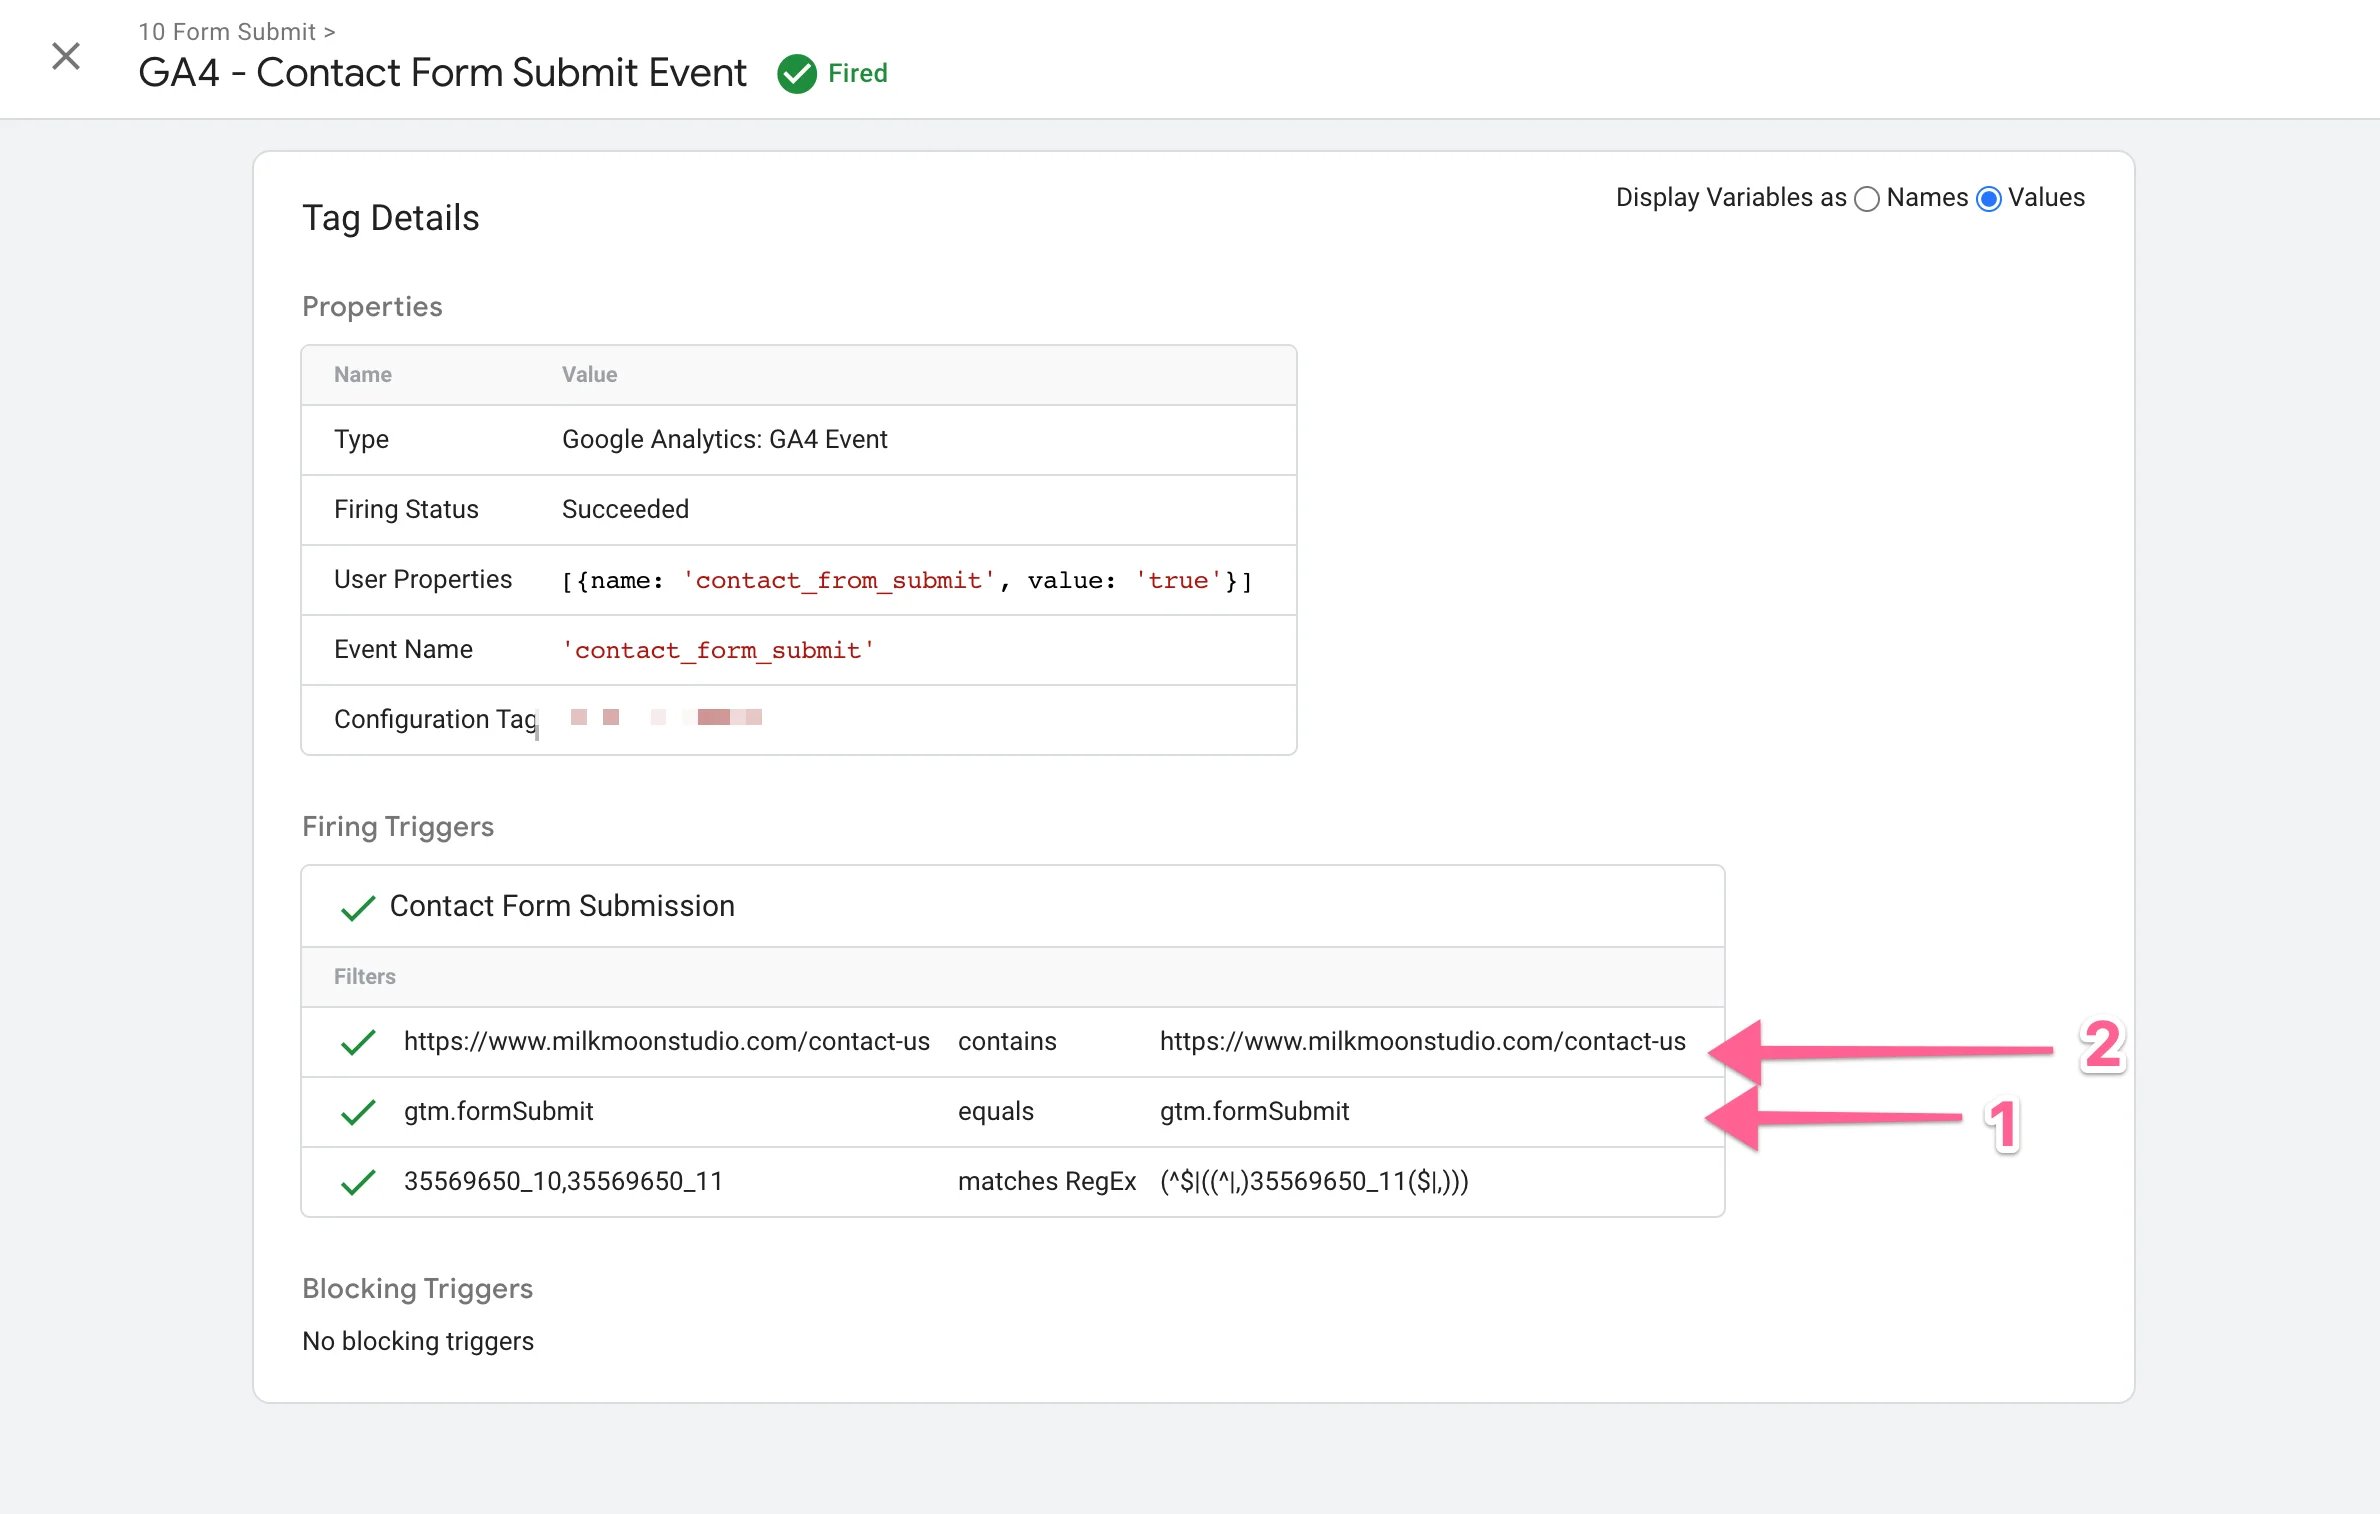
Here we can see the Triggering filters we selected, the form submit event and the Click URL for the contact us page.
Now you can head to Google Analytics, you won't have anything yet, but once the events starts showing (wait a day), go to Events in GA4 and tick the conversion button next the contact form submit event to have it show under conversions.
And you're done! Congrats. We'll cover how to reuse this Trigger for lead events in your ad platforms in another post.
Drop your questions in the comments if you get stuck, and remember to check out the How-To section of our blog for more tutorials.