
In Part 1 we covered installing Google Tag Manager in your Webflow Project. In part 2 we'll cover adding both Google Analytics 4 and Universal Analytics to your site using Tag Manager.
Usually it's very simple adding Google Analytics to a Webflow Project, you copy the tracking ID, open up your Webflow settings and paste in the tracking ID. With the launch of Google Analytics 4 things have however changed a bit, most notably because Webflow's easy implementation doesn't support Google Analytics 4 yet, you can only add Universal Analytics.
Update - GA4 works fine in Webflow these days, but Tag Manager still offers so much more flexibility.
Here at Milk Moon Studio, we're a design focussed Webflow Studio and as a Webflow designer you're going to want the neat solution, and Tag Manager is it. Apart from the fact that using Google Tag Manager gives you a ton of freedom when it comes to advanced tracking features and easily implementing event tracking etc, it keeps things clean, no more junk in you <head> tag, just Tag Manager, the rest, in Tag Manager. We'll cover why you should always use Tag Manager in another post and some more posts about using events in Tag Manager and advanced ad and conversion tracking, but that's for another day. For Part 1 of Installing Google Tag Manager and Google Analytics in Webflow head here.
But first:
Step 1 - Setting up Google Analytics
We'll take a quick look at setting up your Google Analytics 4 account and your Universal Analytics account (Stay tuned for another post about the advanced settings for GA4 and UA).
Creating a Google Analytics 4 account. (and if you want an Universal Analytics Account)
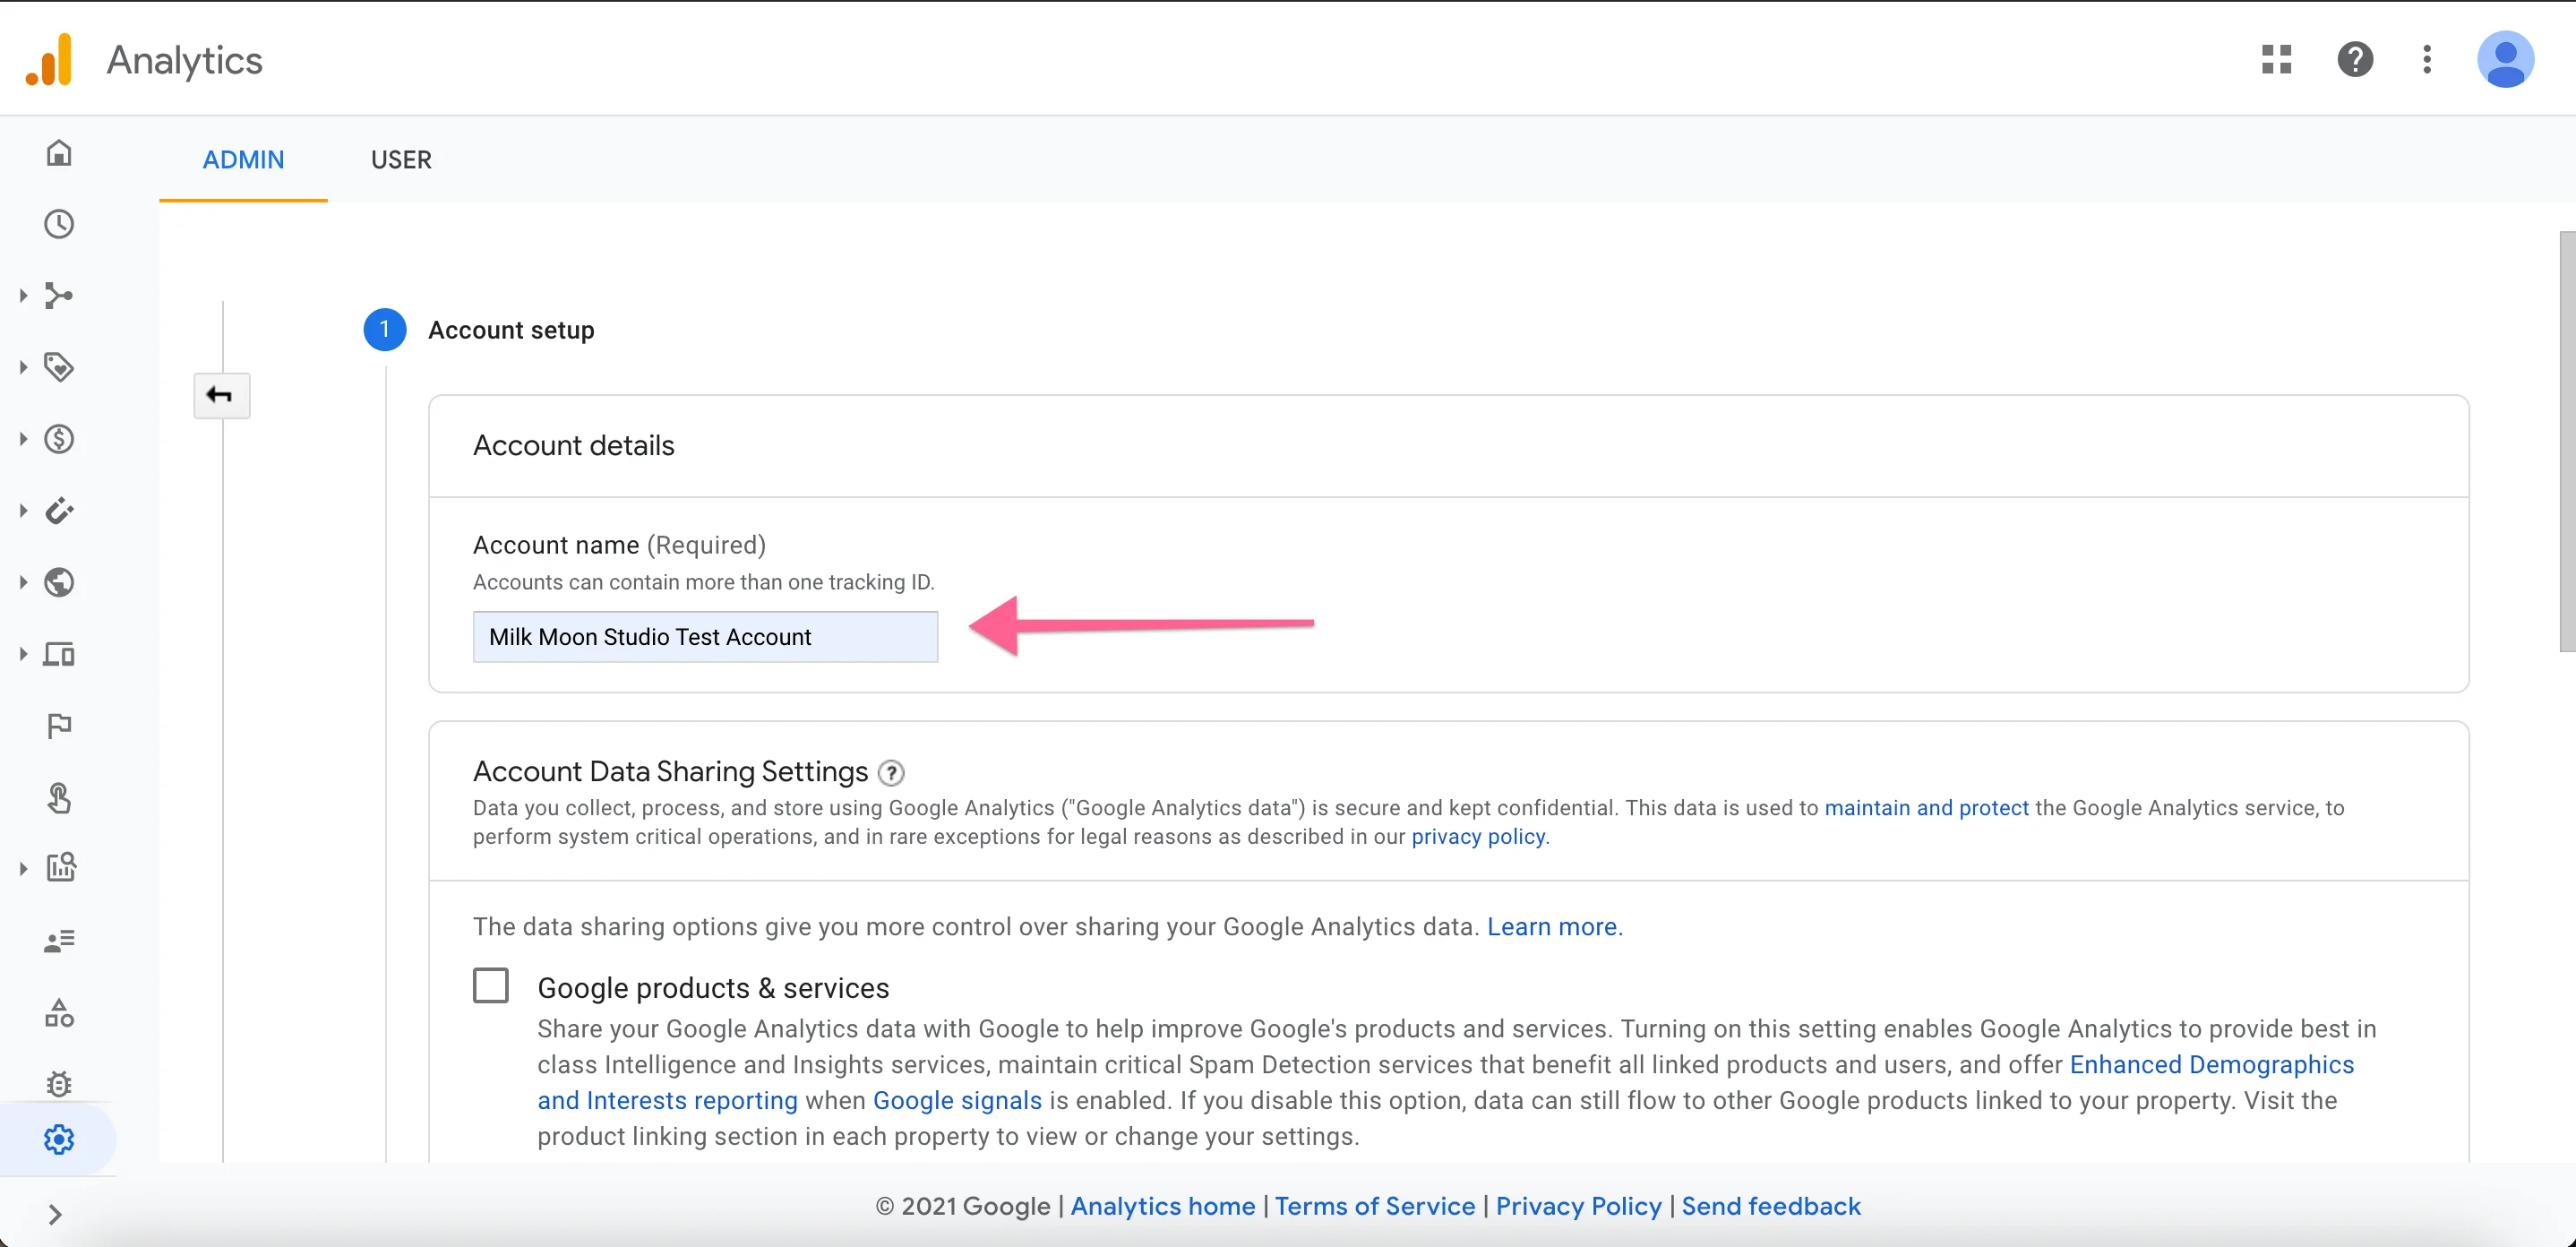
Sign up and hit Create Account, then give it a name.
Now hit next and enter a name for the property, select your country (country of the site), timezone, currency and hit advanced if you'd like to set up a UA (Universal Analytics account, you'd want this if you're gonna be using things like Google Optimise and Google Ads' Smart Ads, yet another post coming on these).
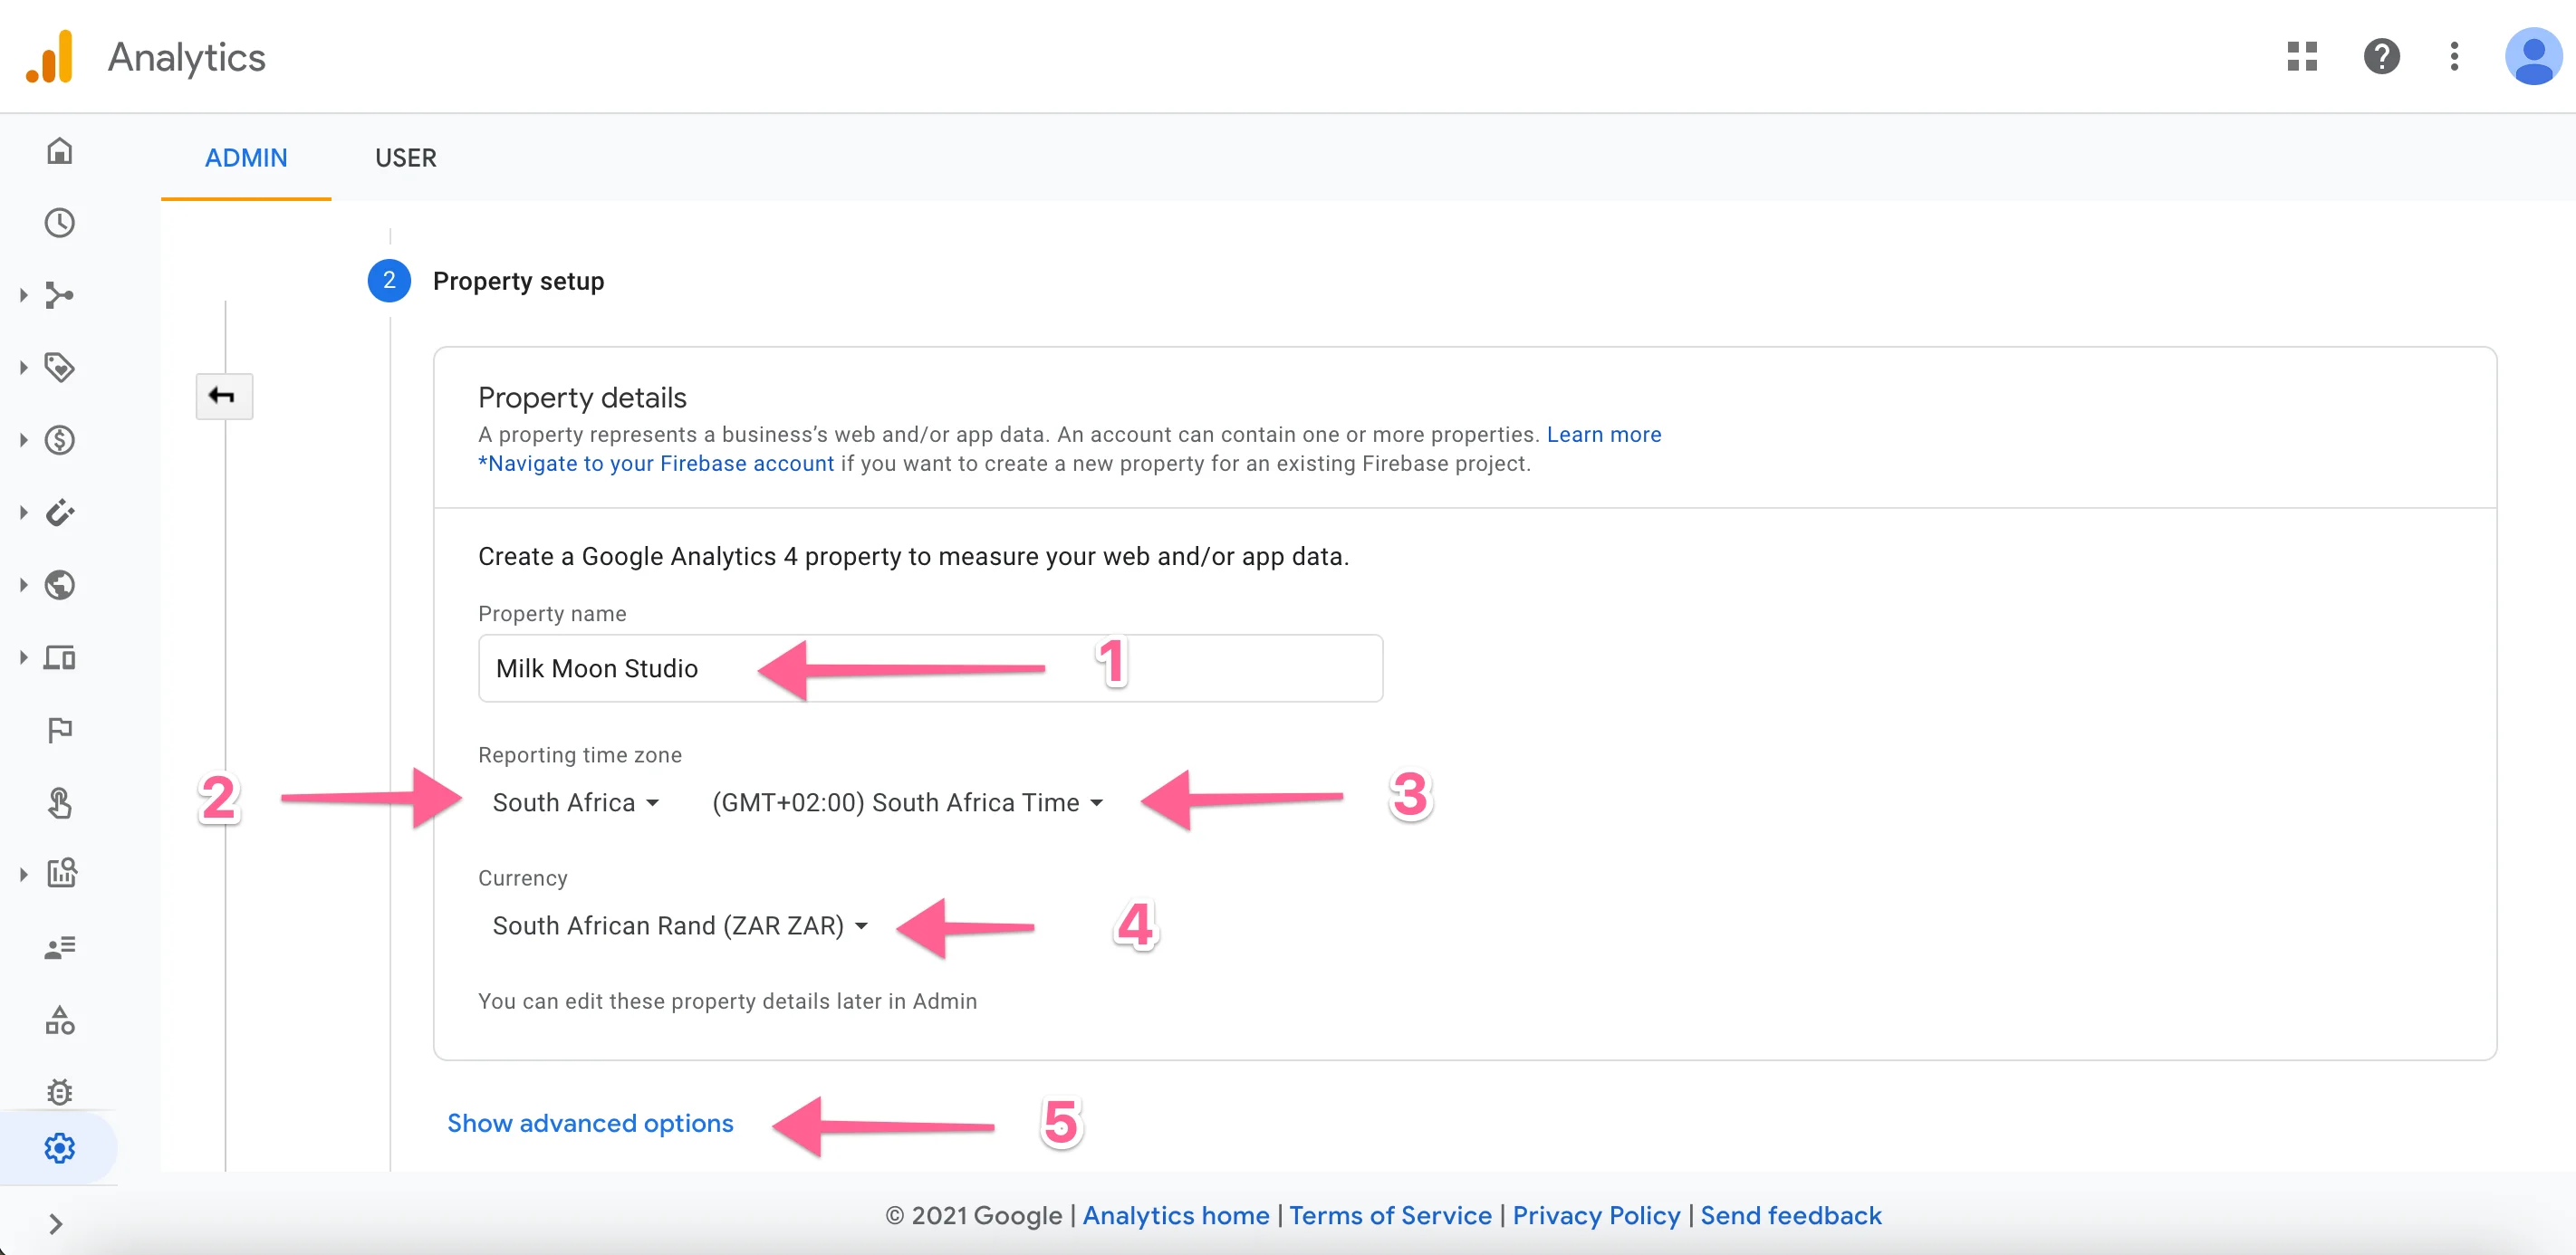
Go ahead and tick the box under advanced for the UA Account if you're gonna need that (may as well go ahead, not gonna cost you anything).

I'm just gonna skip the next step, but you should go ahead and tick the boxes that apply, then hit create.
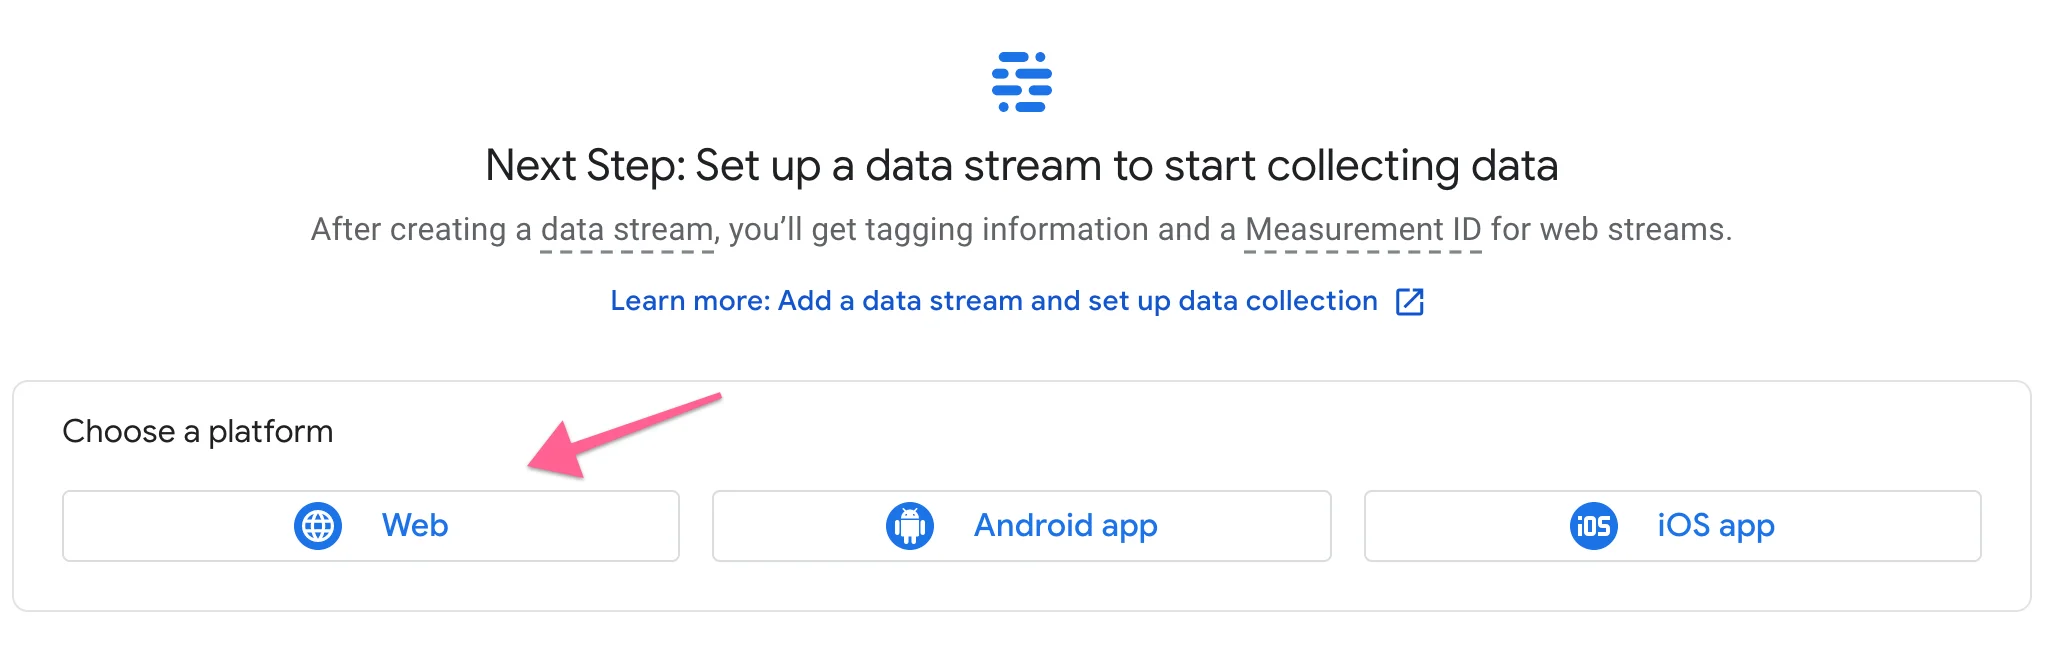
Now we're gonna create your data stream, select Web.
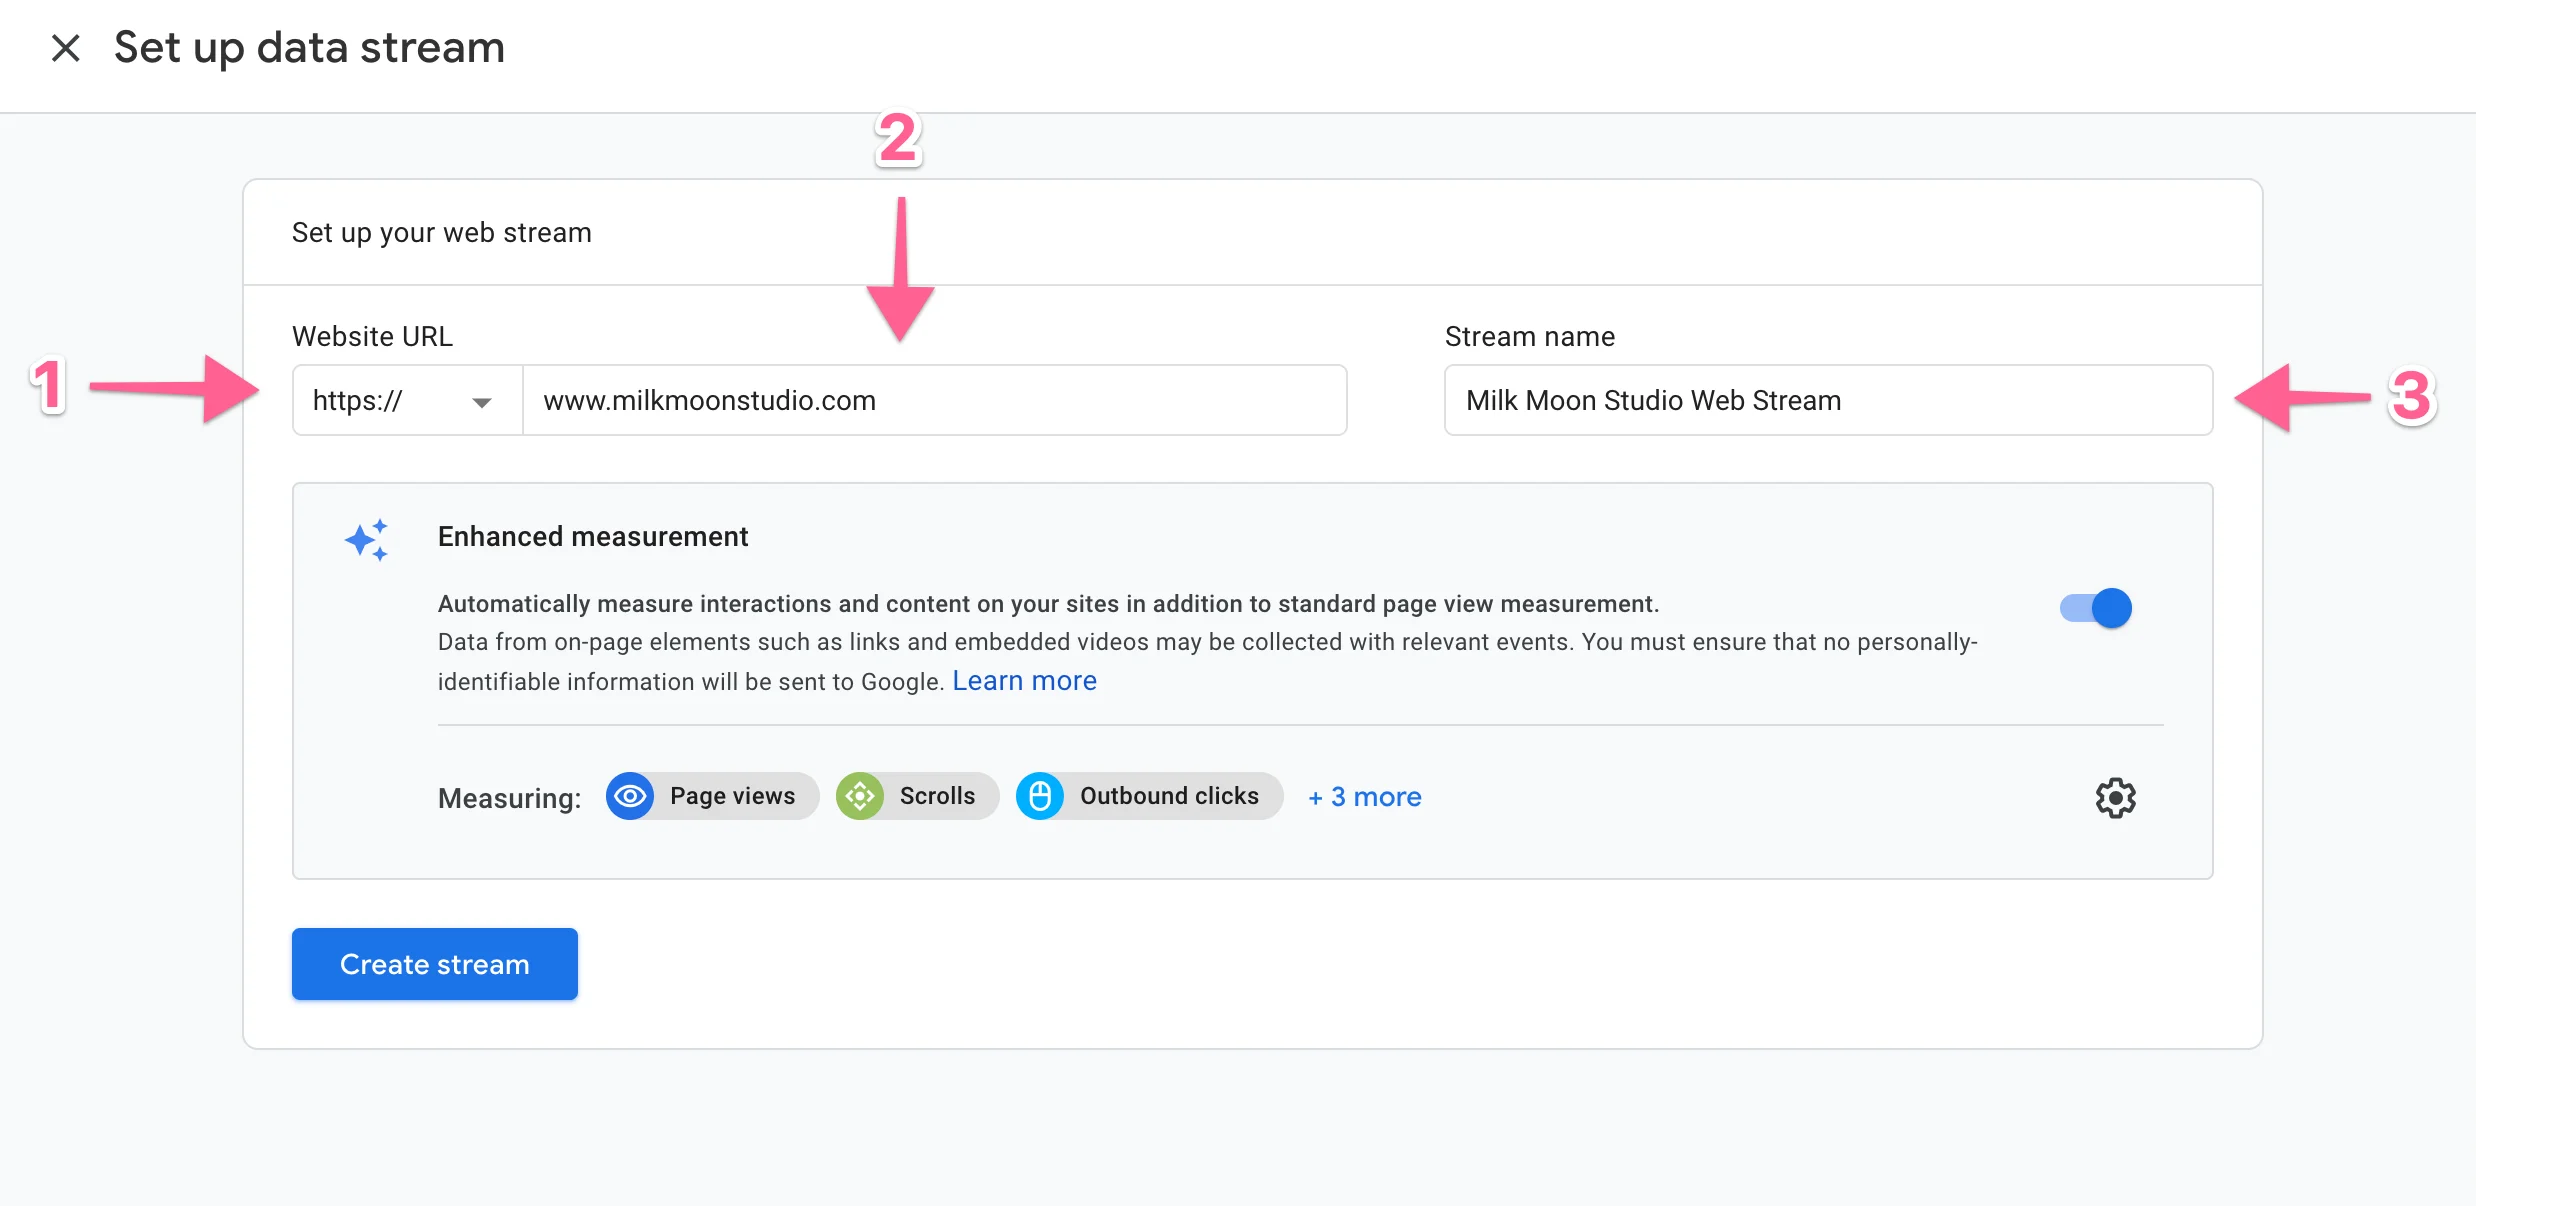
Now you can go ahead and enter your URL, select https for Webflow as you get an SSL certificate, and another name. Everything else you can keep checked, you'll need them.
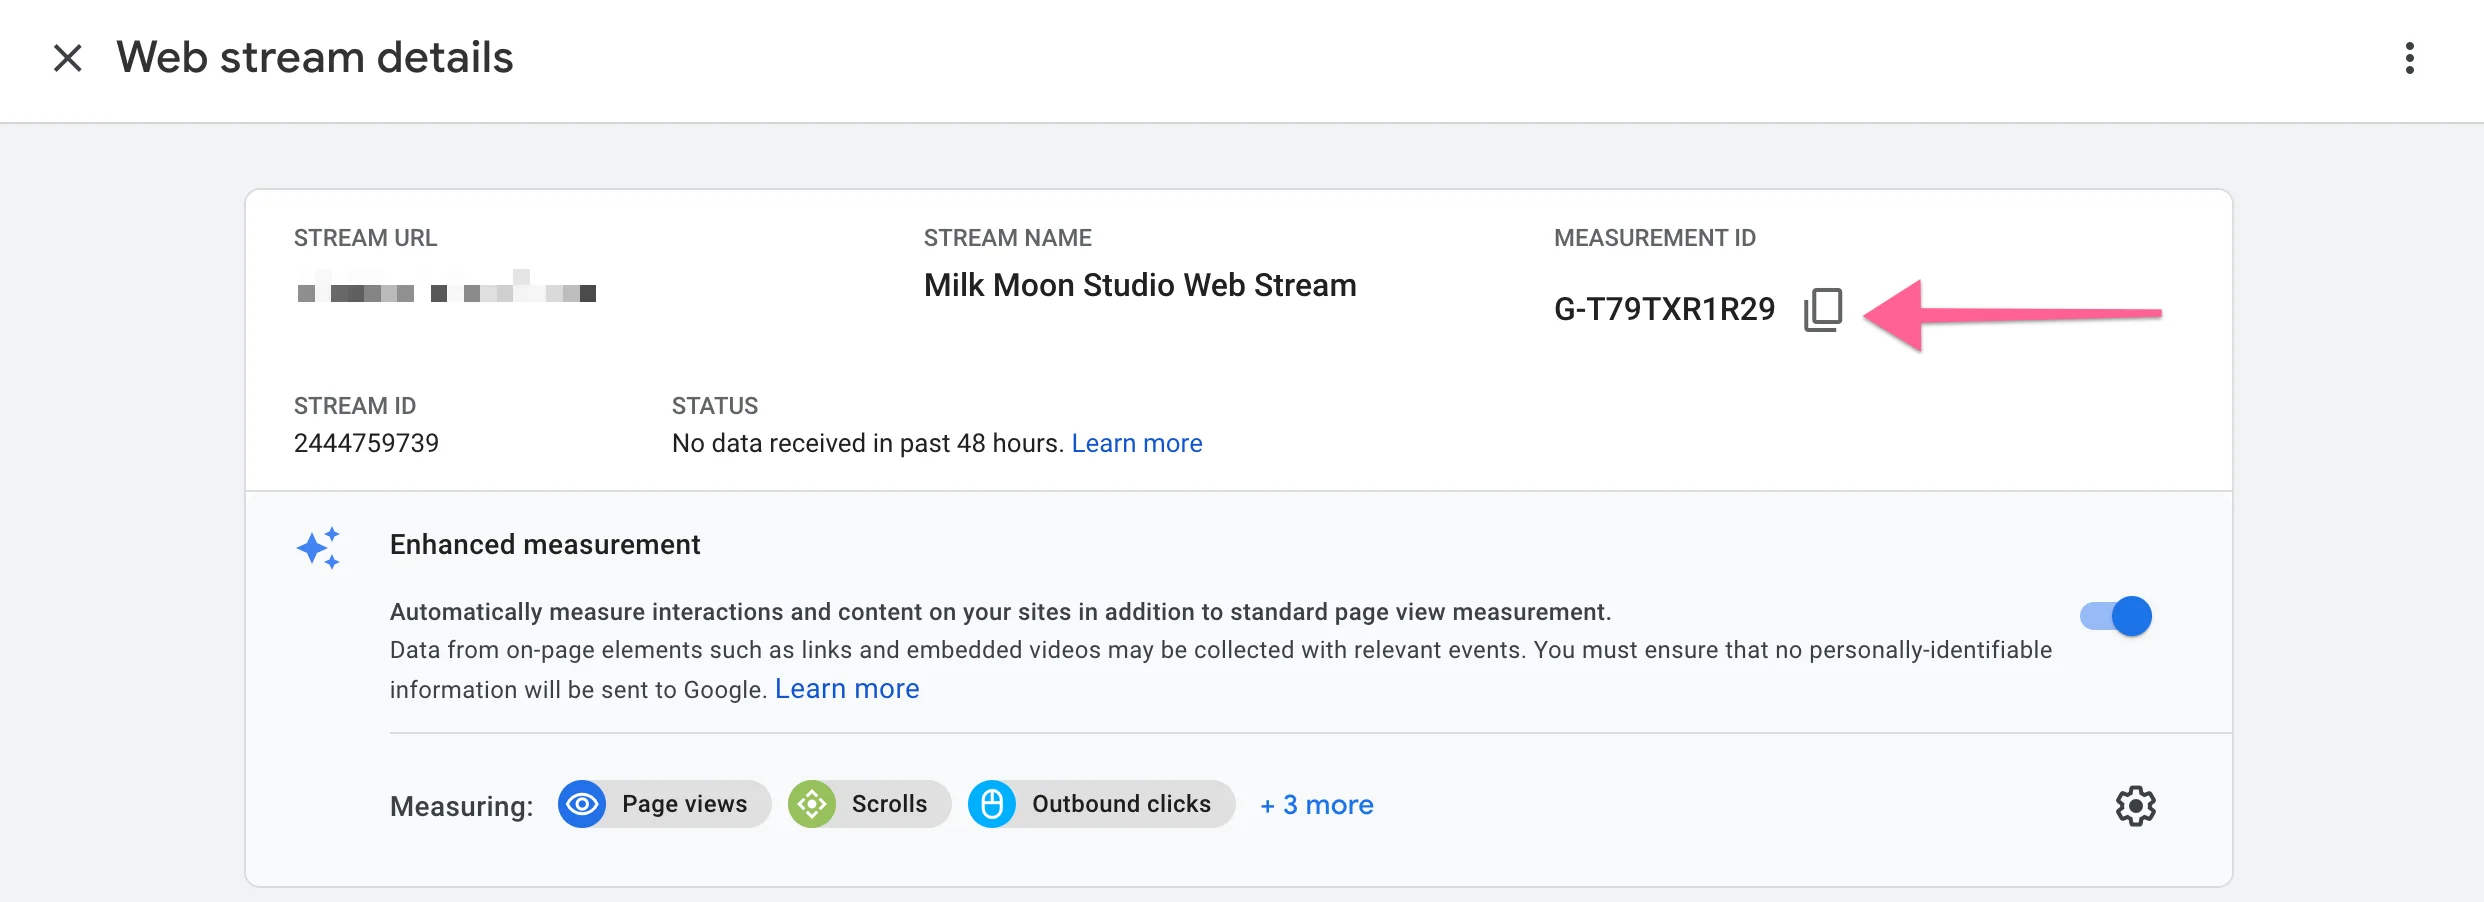
And you're set up, copy the Measurement ID on the next page and head to Tag Manager.
Step 2 - Setting up your Google Analytics 4 Tag
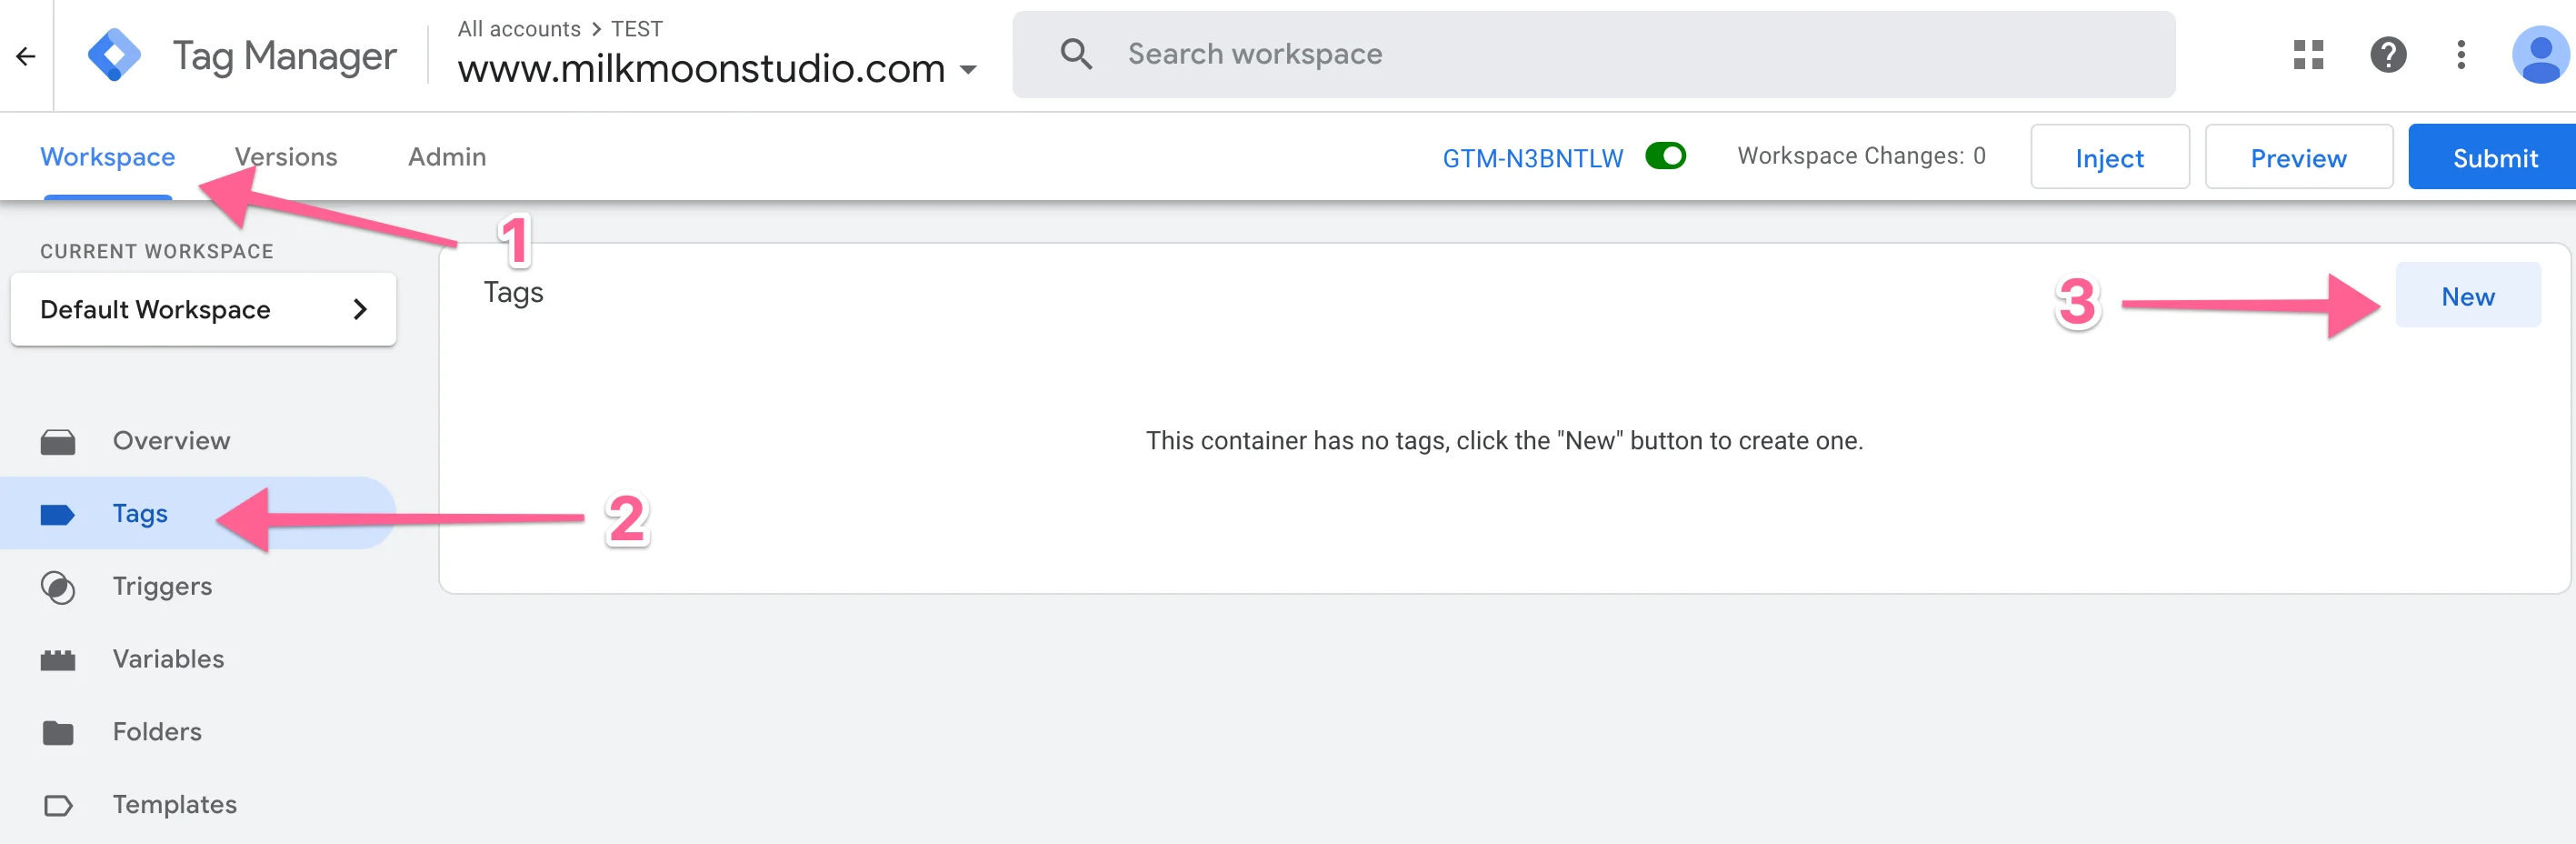
Open up the Tag Manager Container from the 1st post. Now go to the Workspace, then Tags and create a Tag.
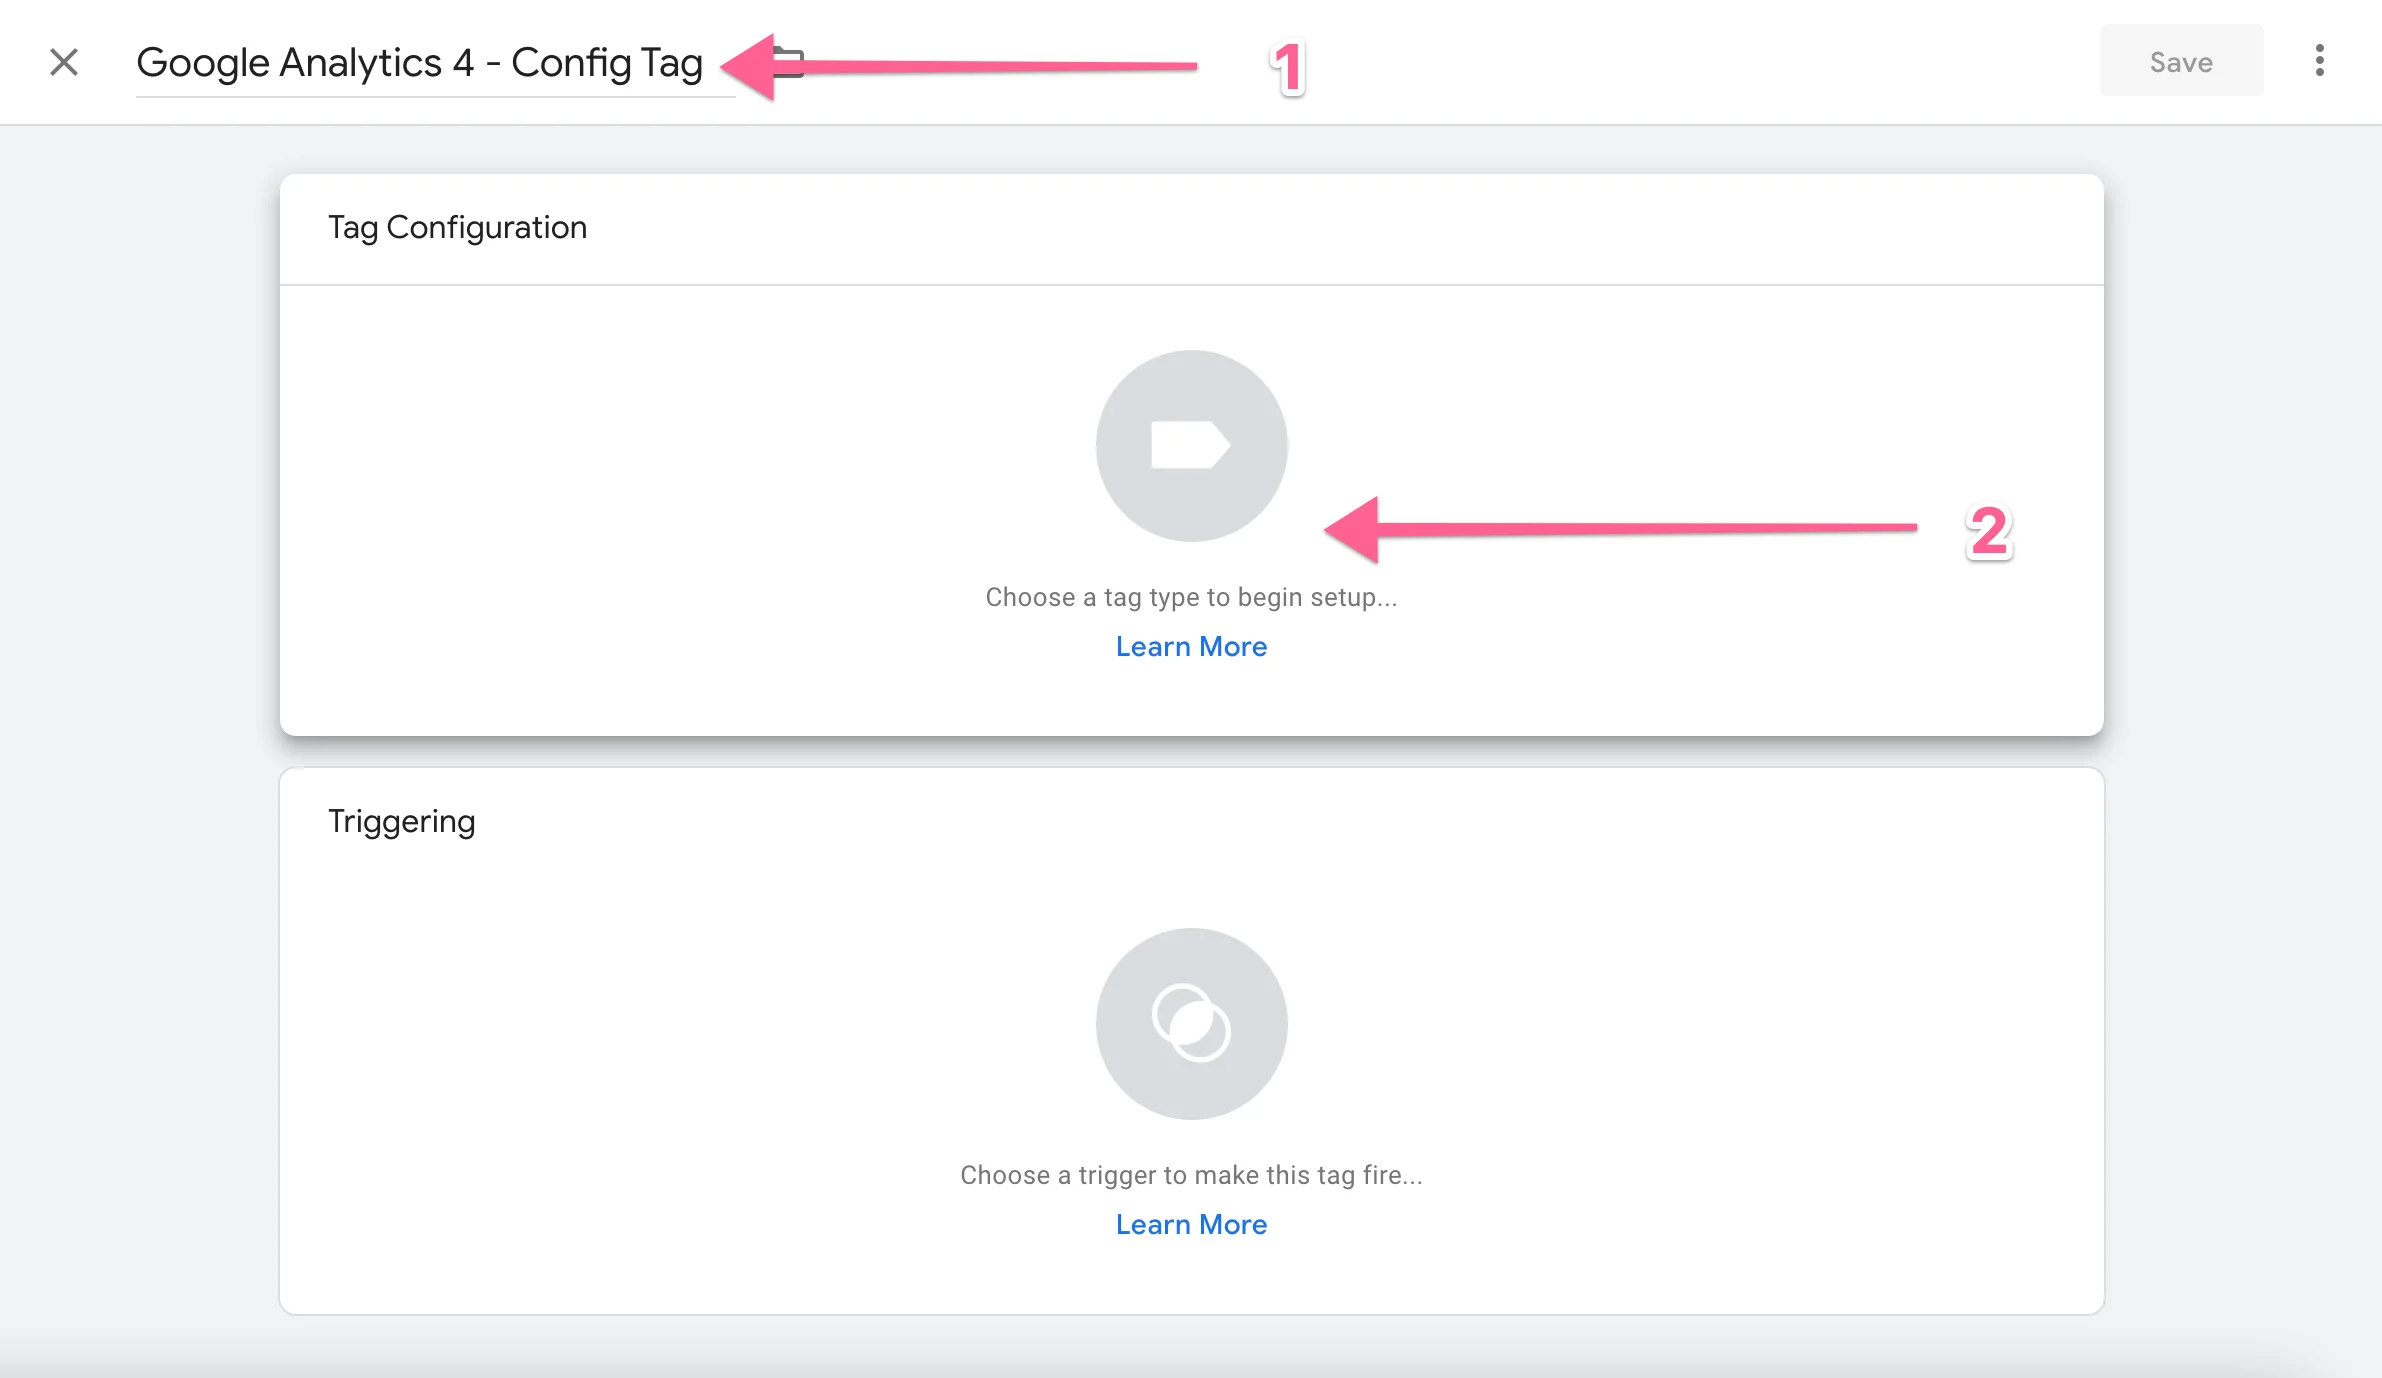
Now give your Tag a name and choose the type of tag you'd like to add.
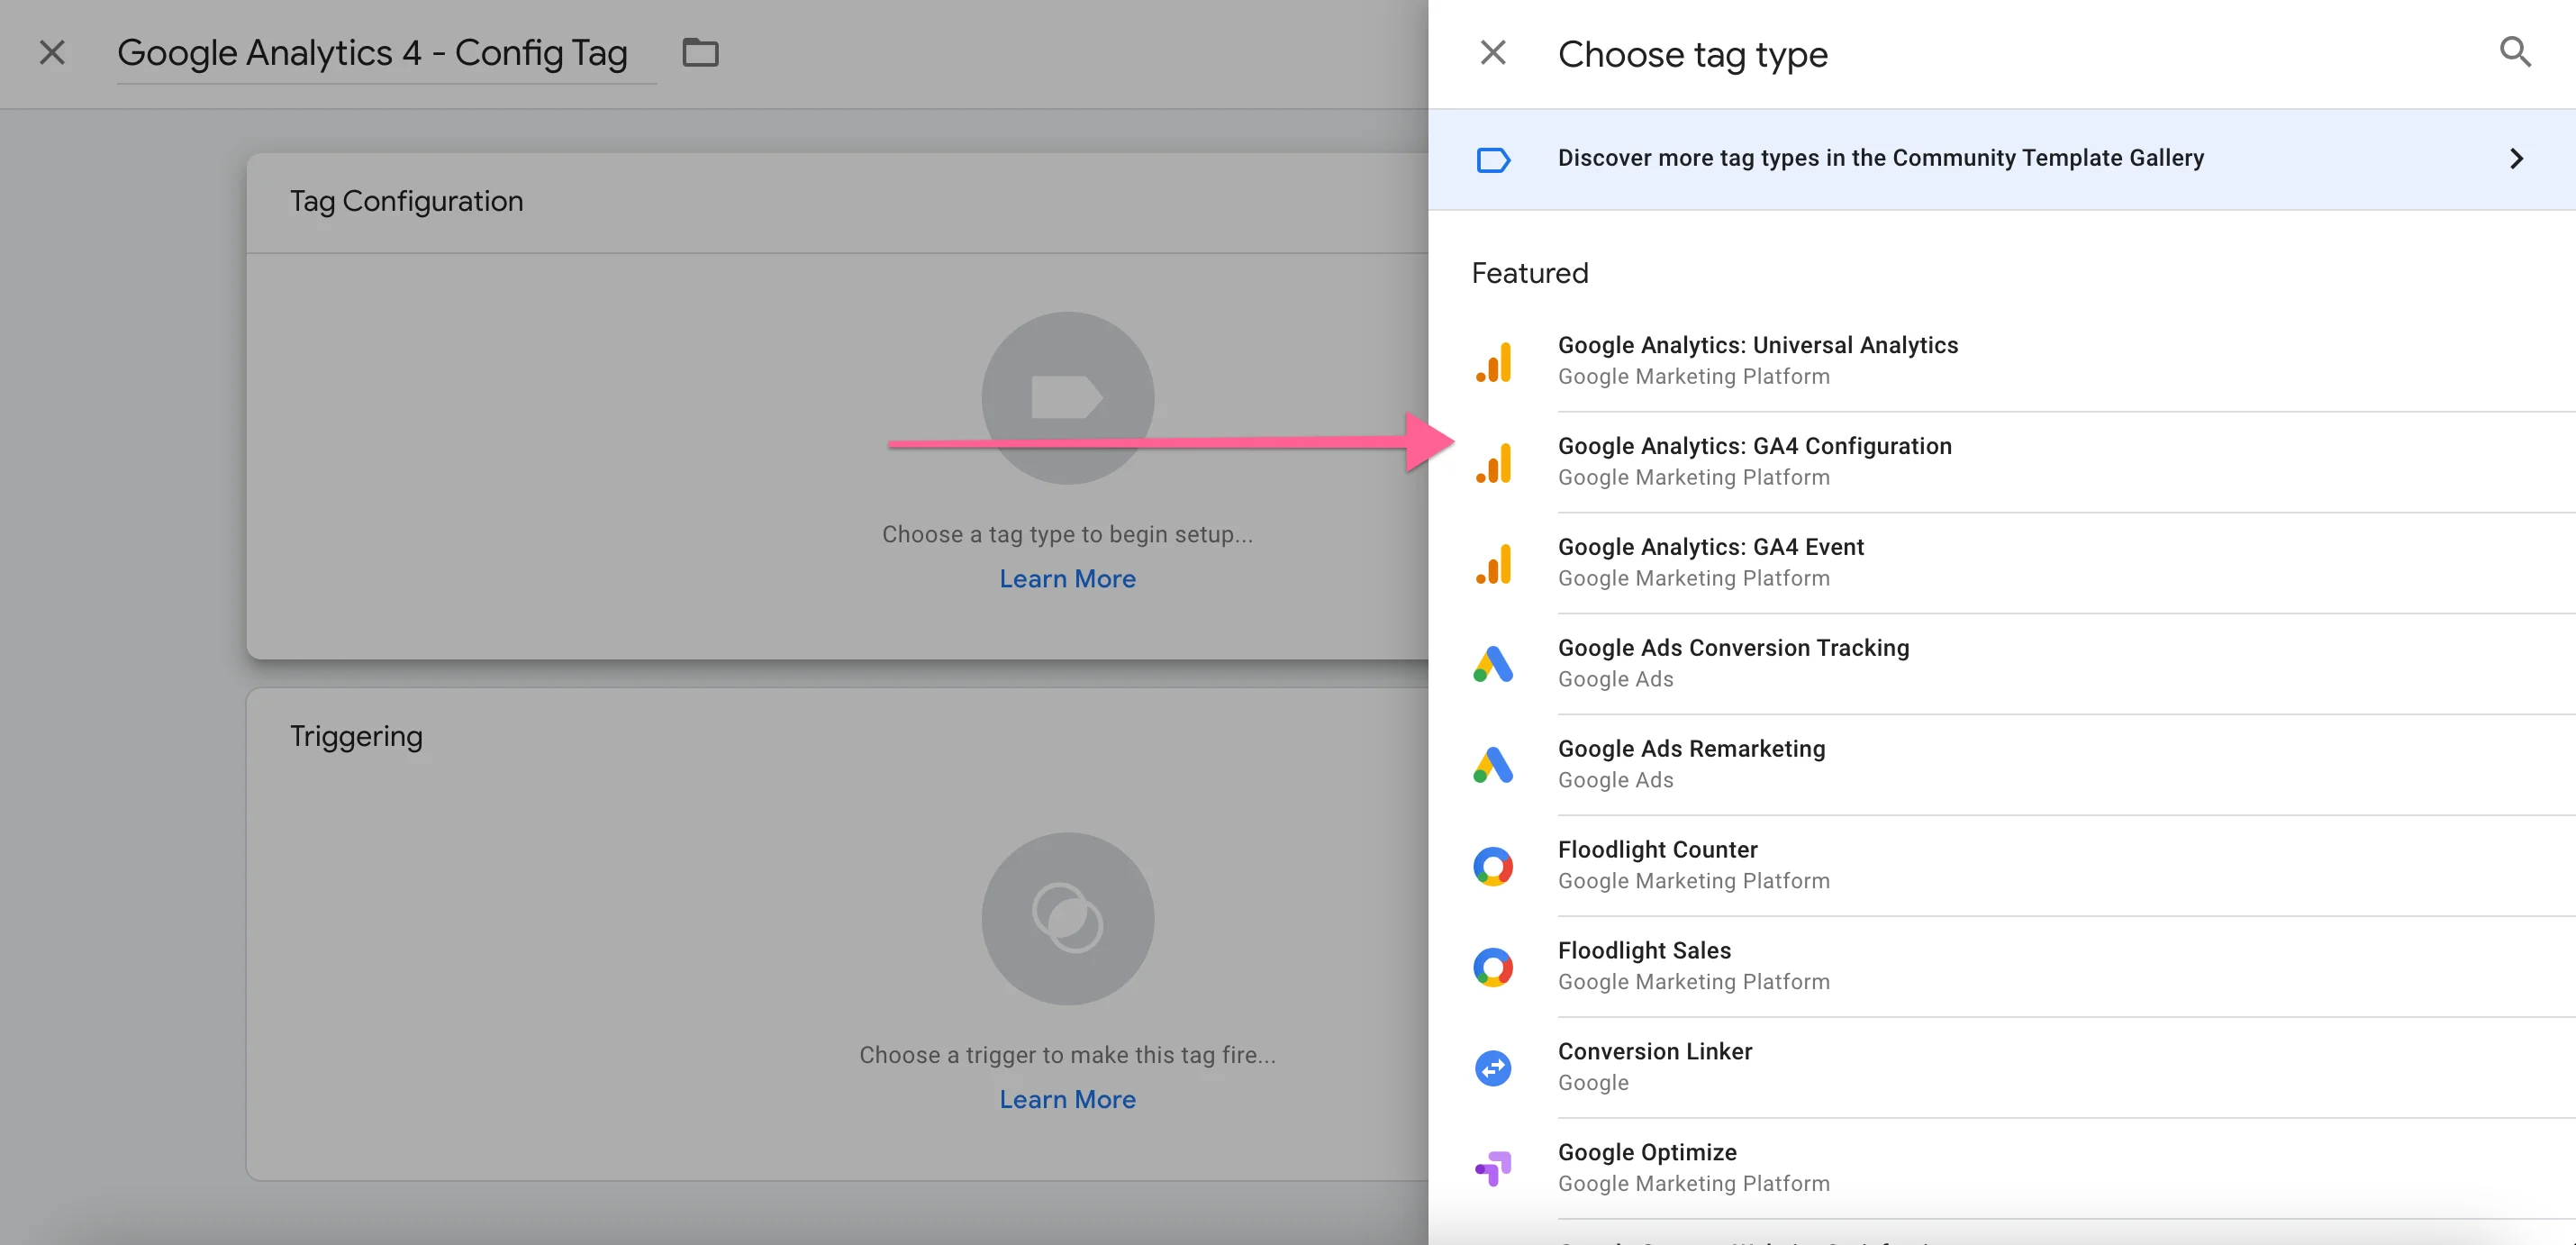
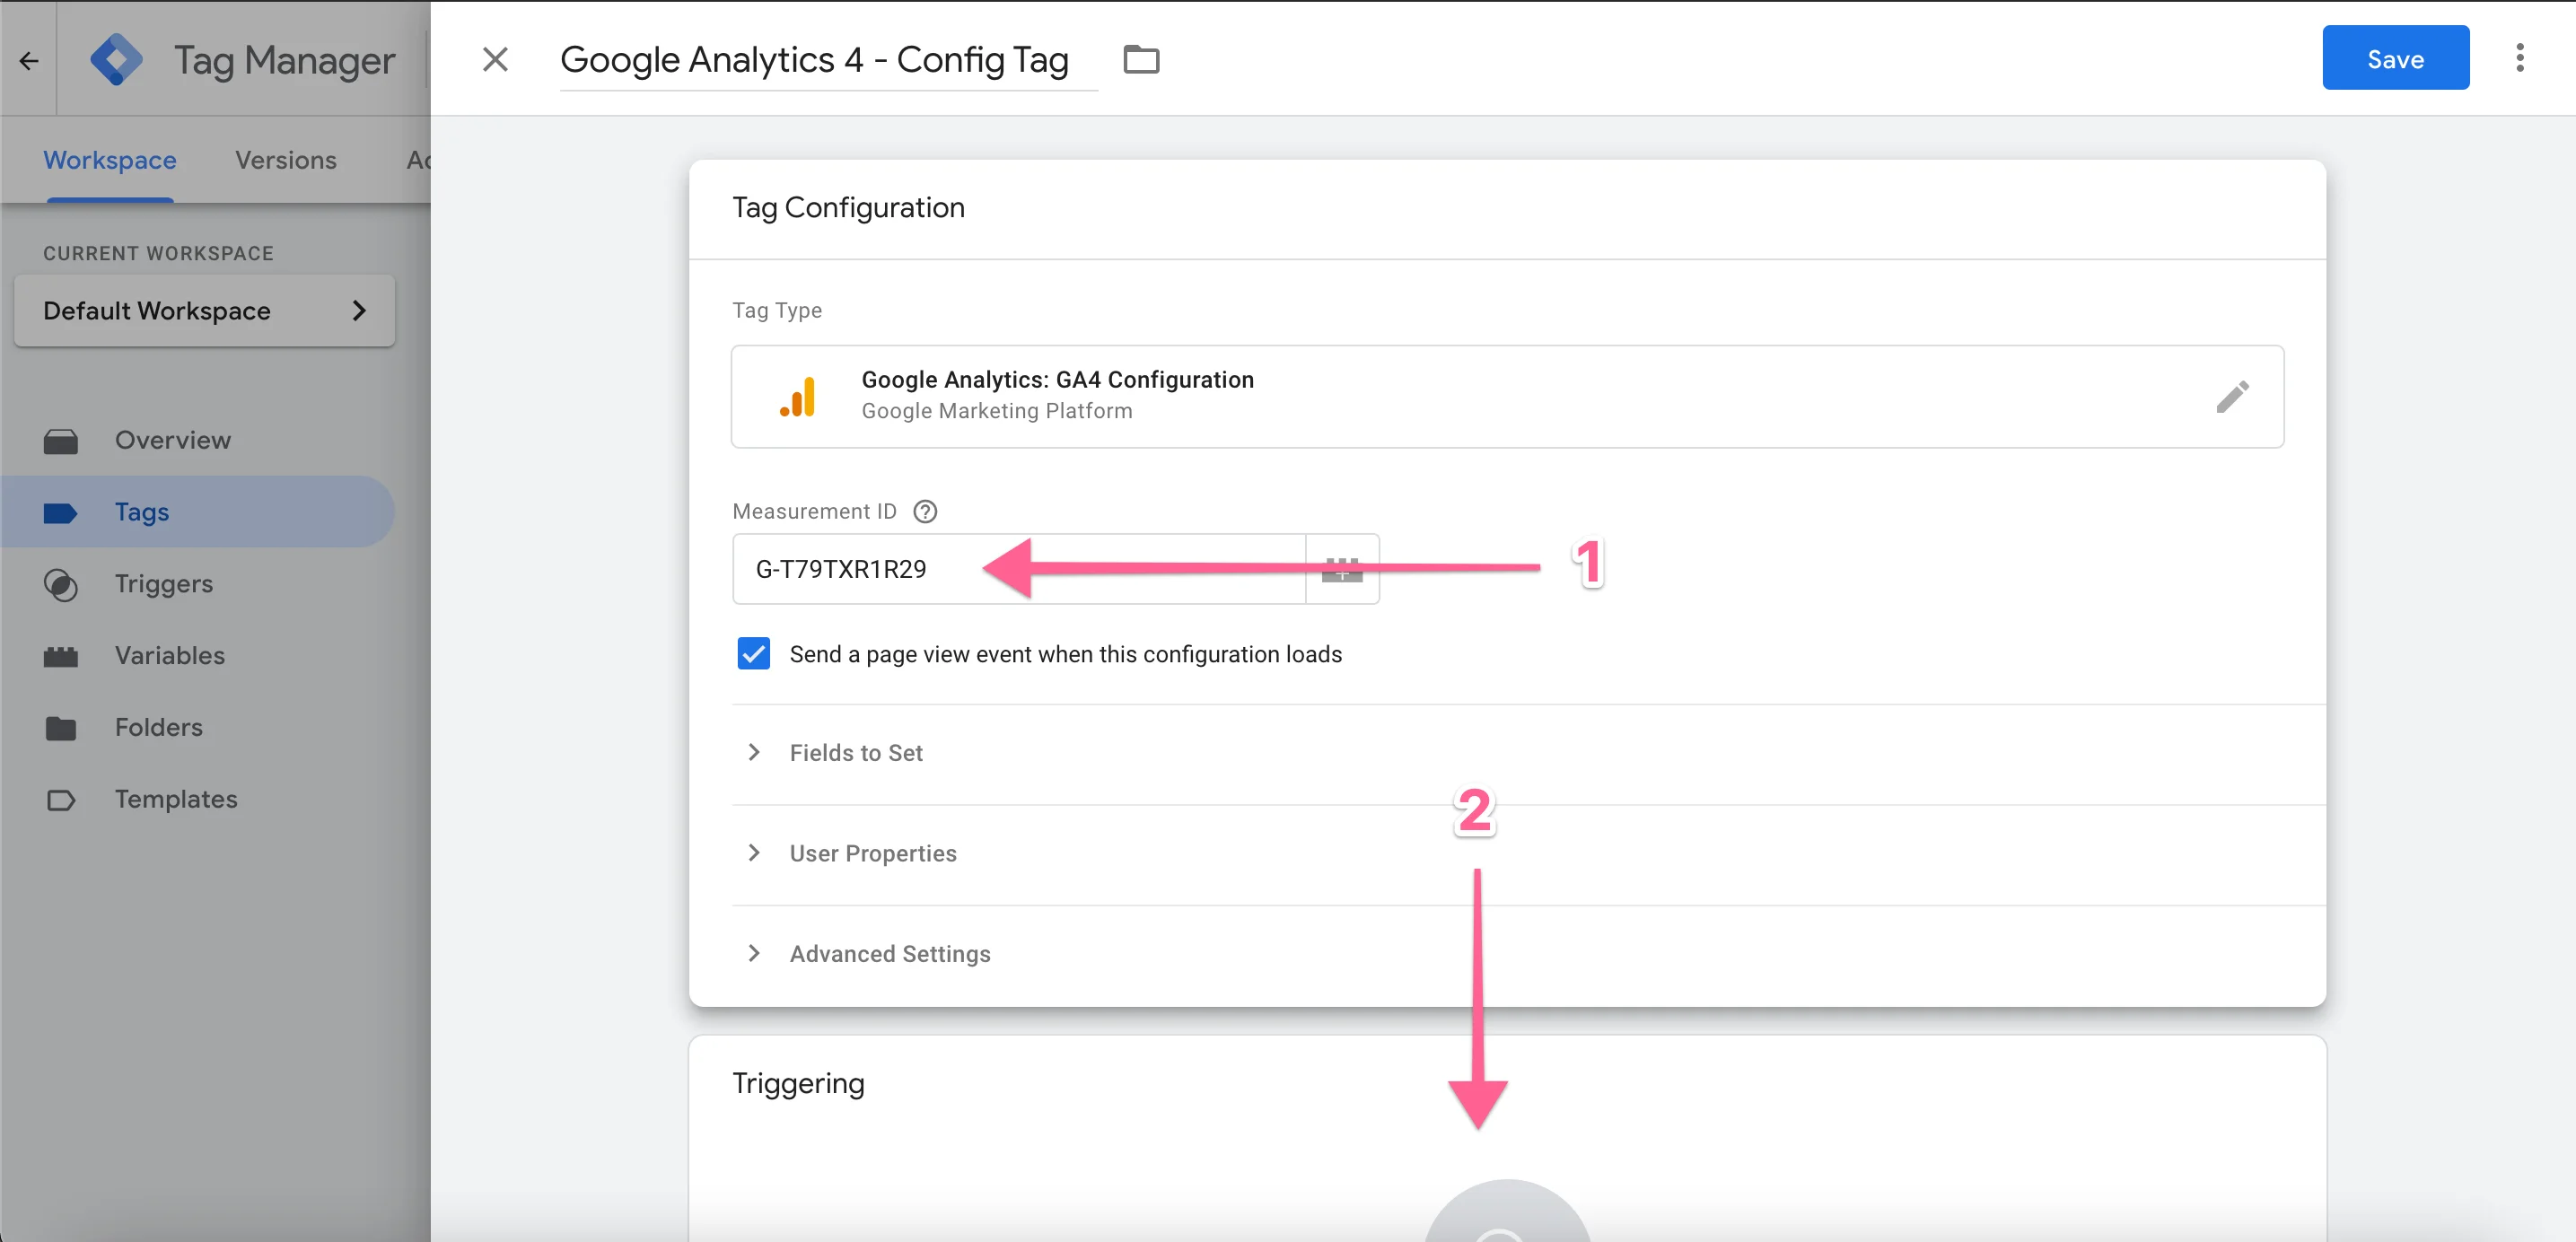
Select the GA4 Configuration Tag.
Paste in the Measurement ID from GA4 and select a Trigger.
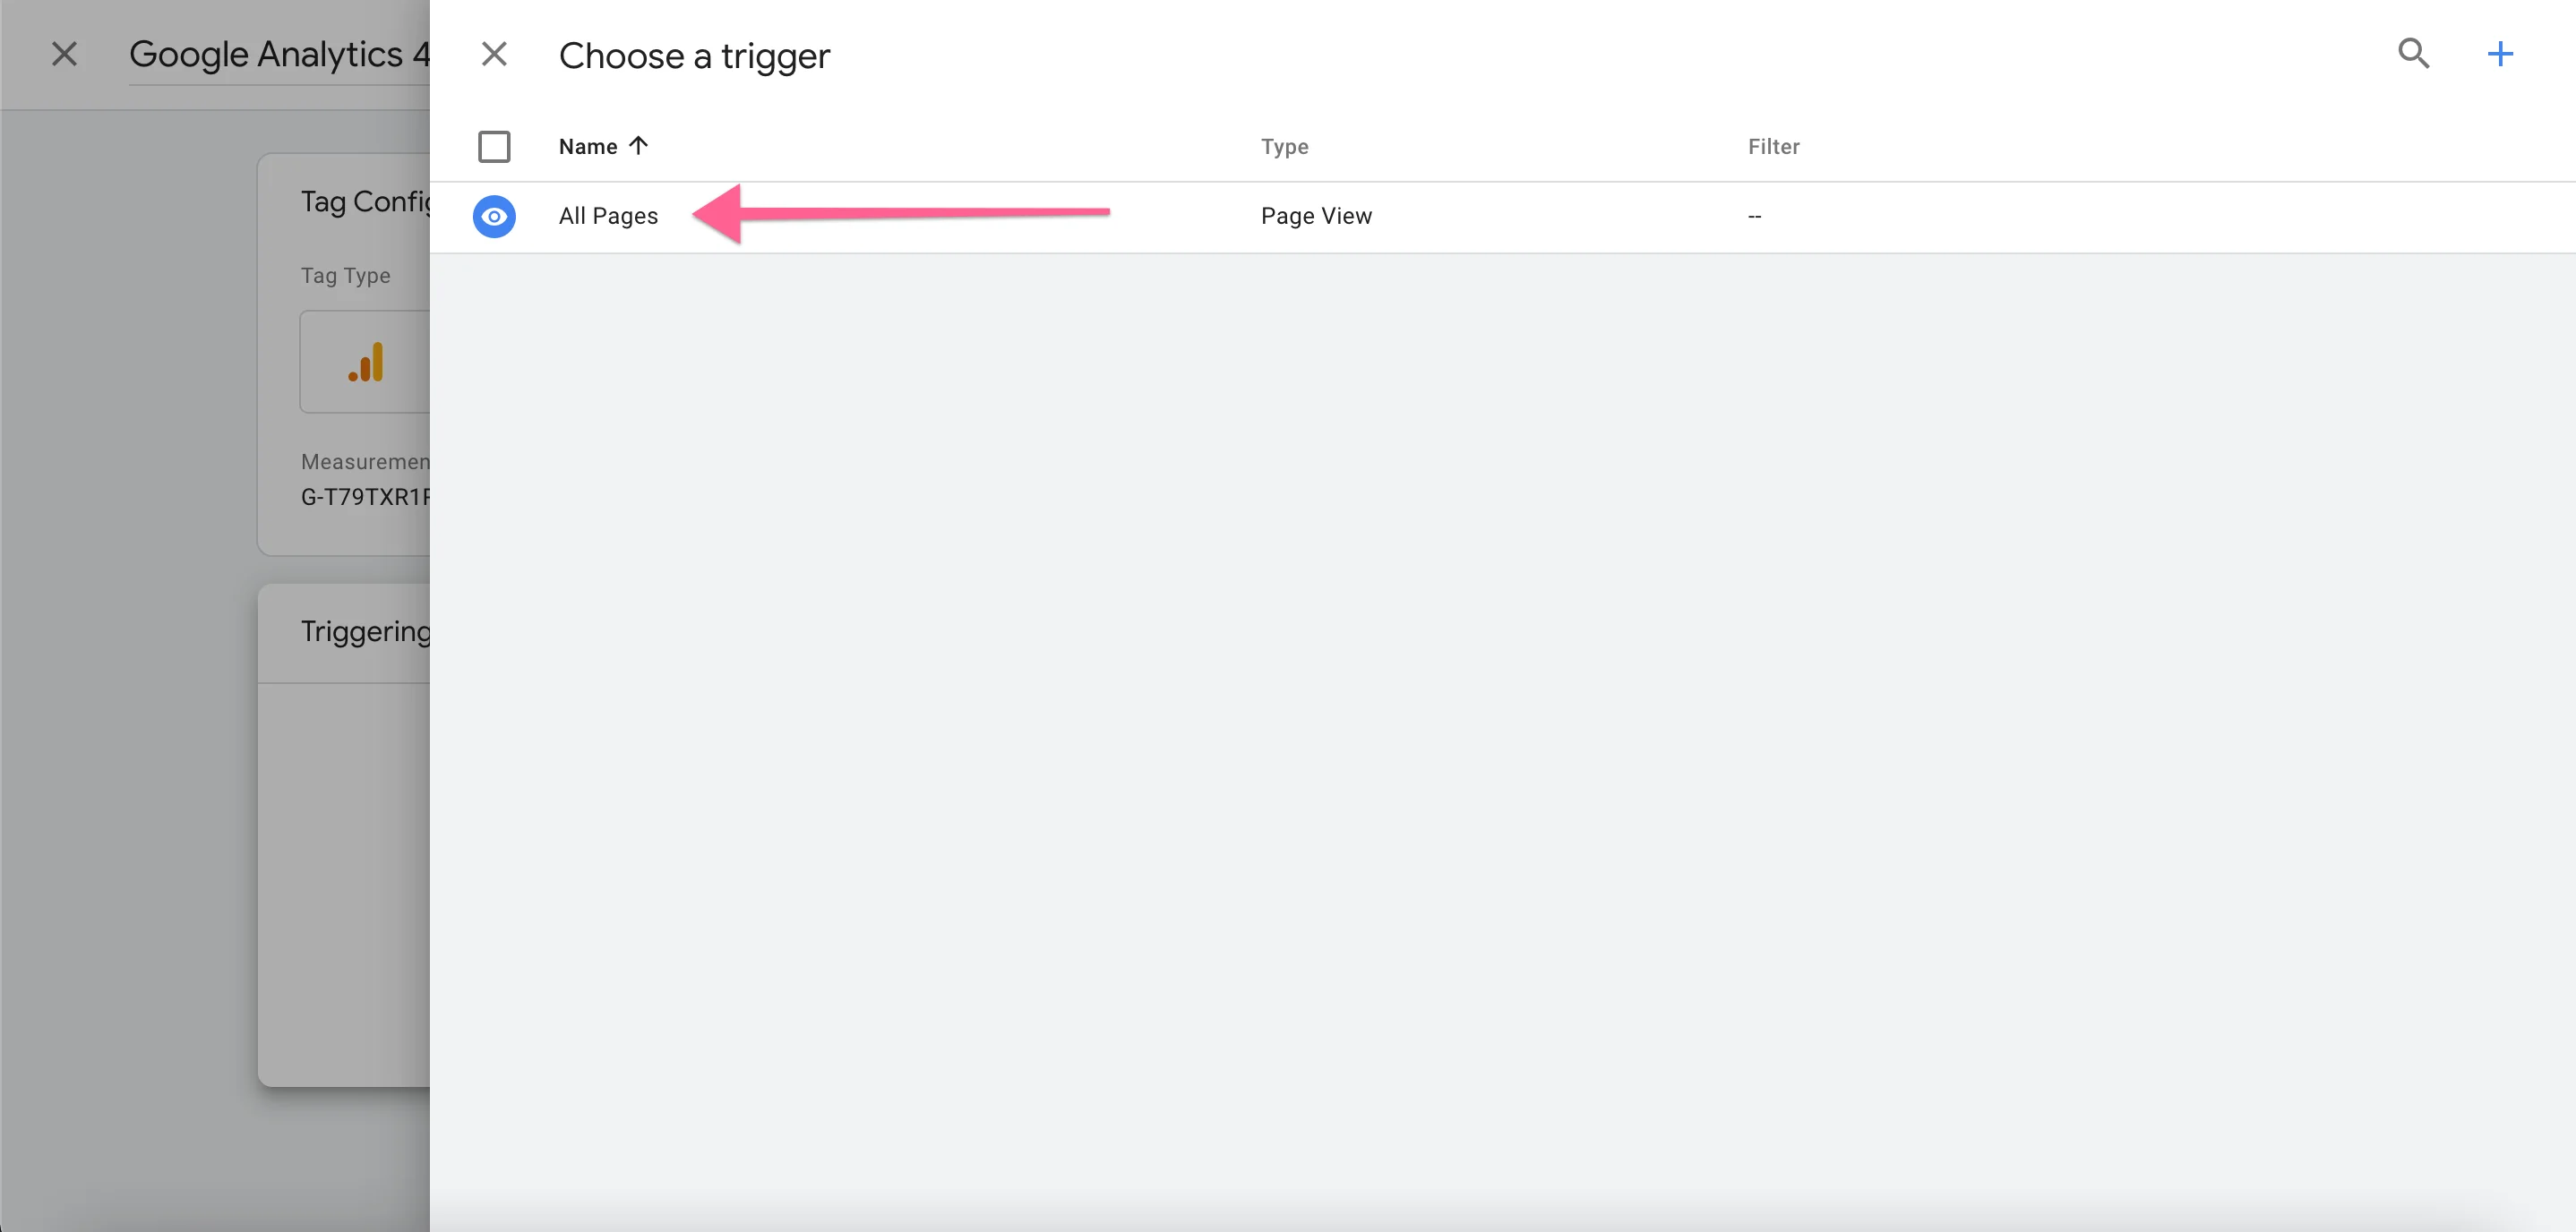
Select the All Pages Trigger.
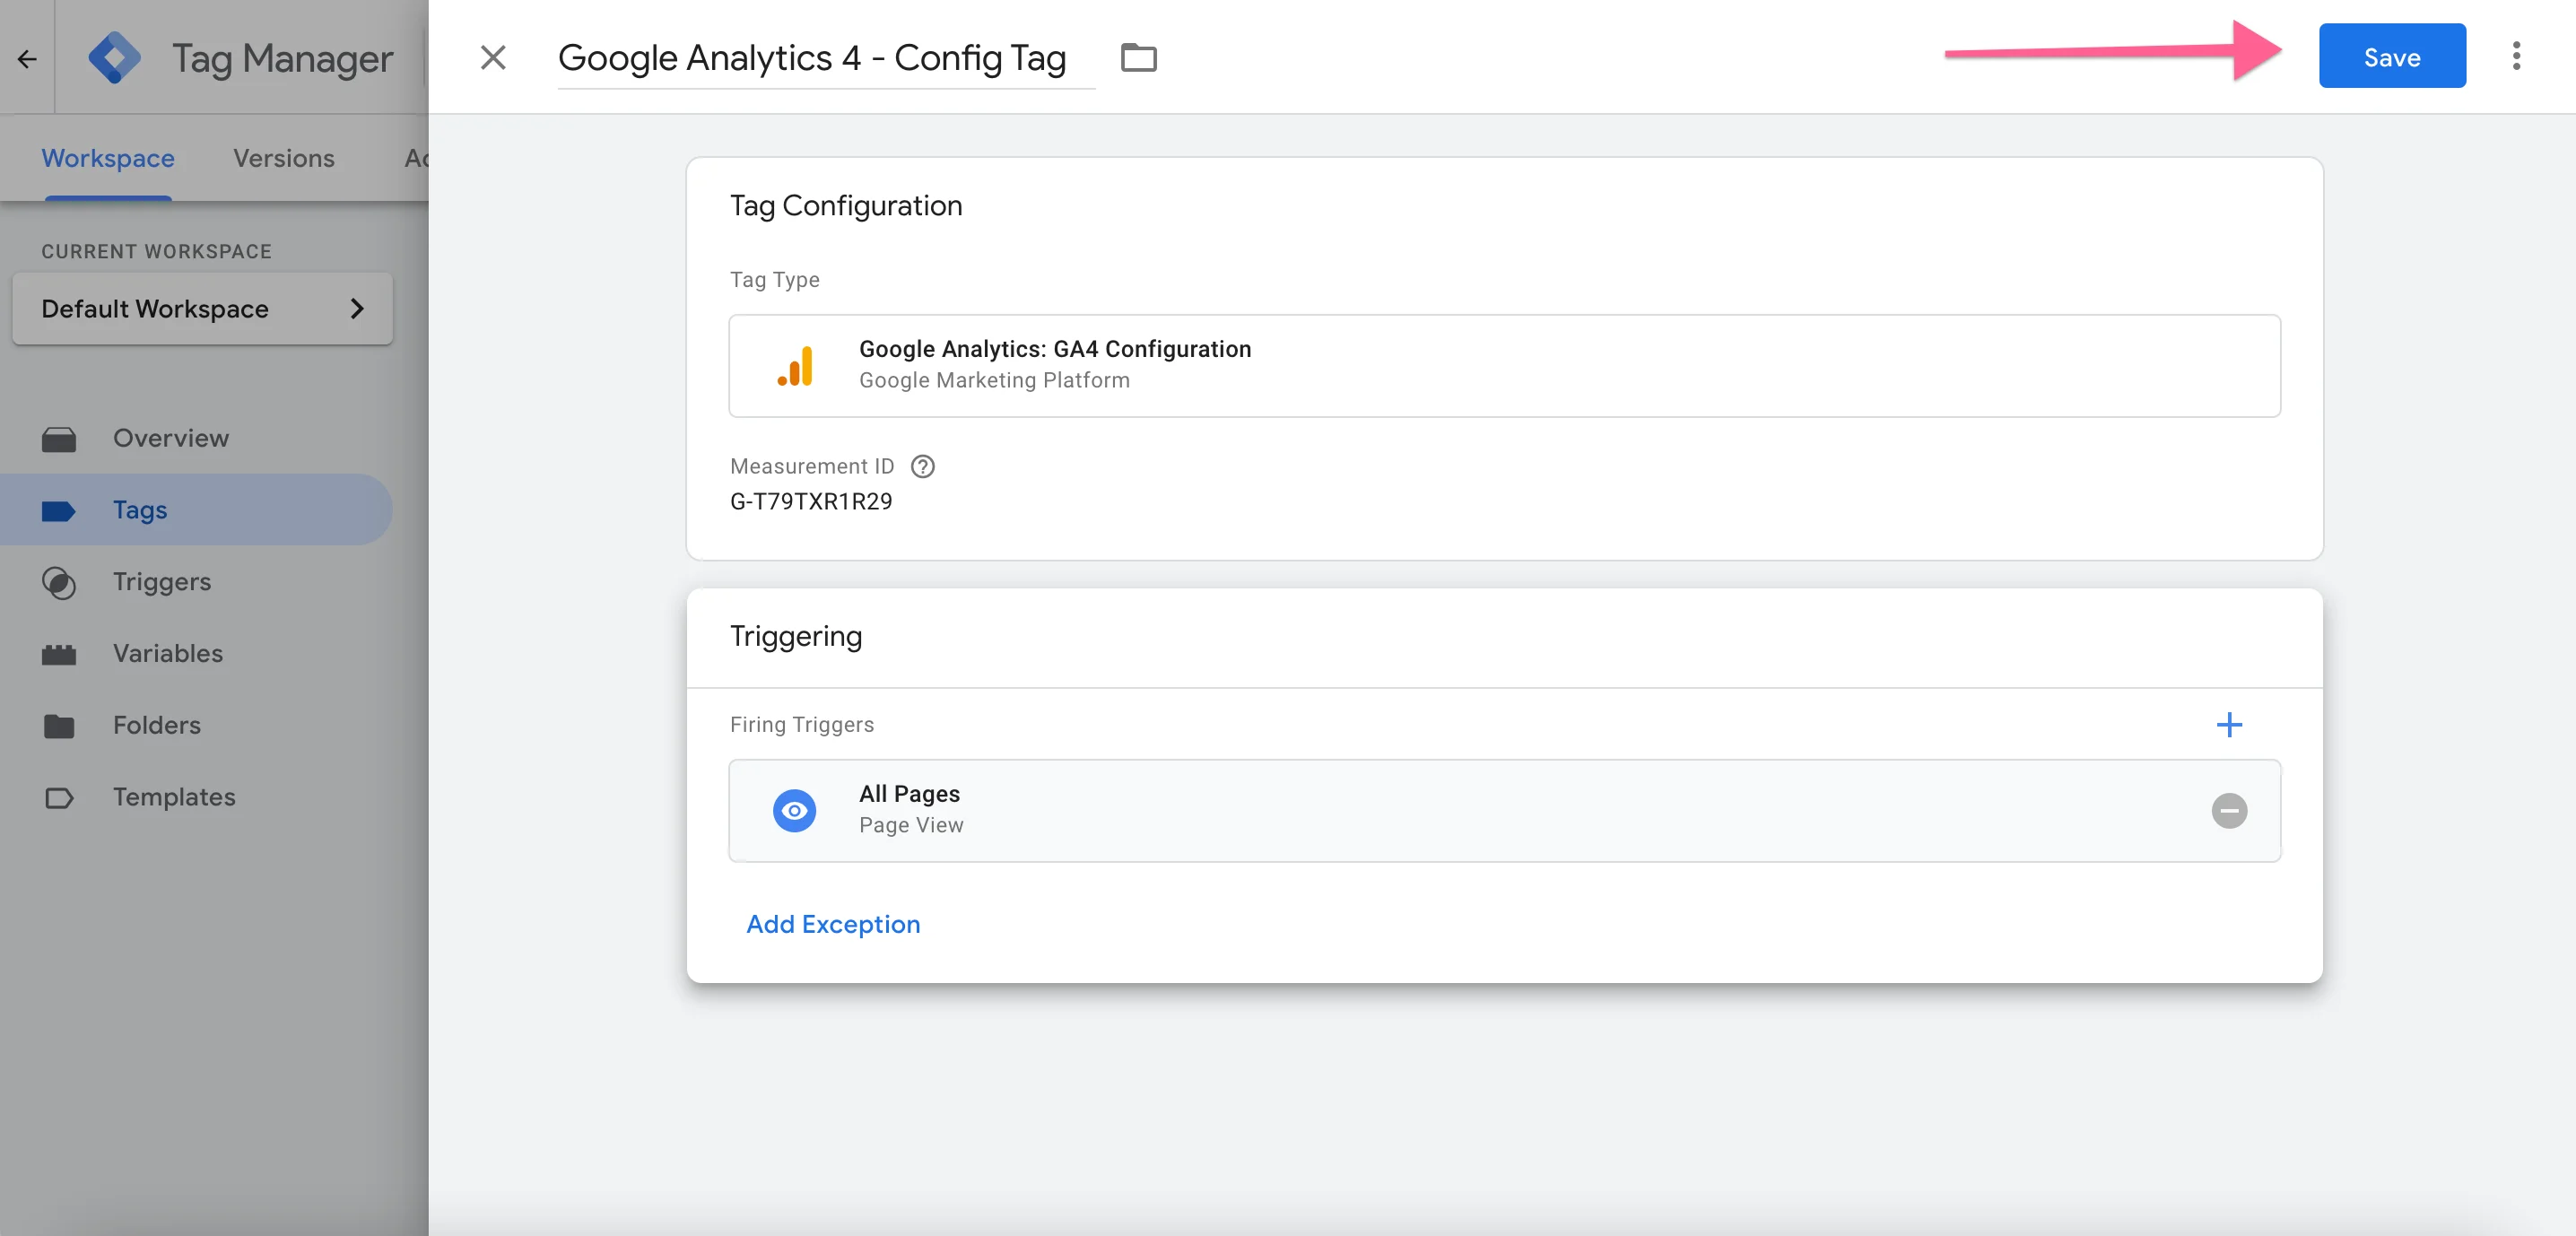
Now Save and create a new Tag if you're going to be adding a Universal Analytics account as well.
Adding Universal Analytics
If you're doing this step head back to Analytics, switch Properties, open Tracking and copy the UA tracking code.
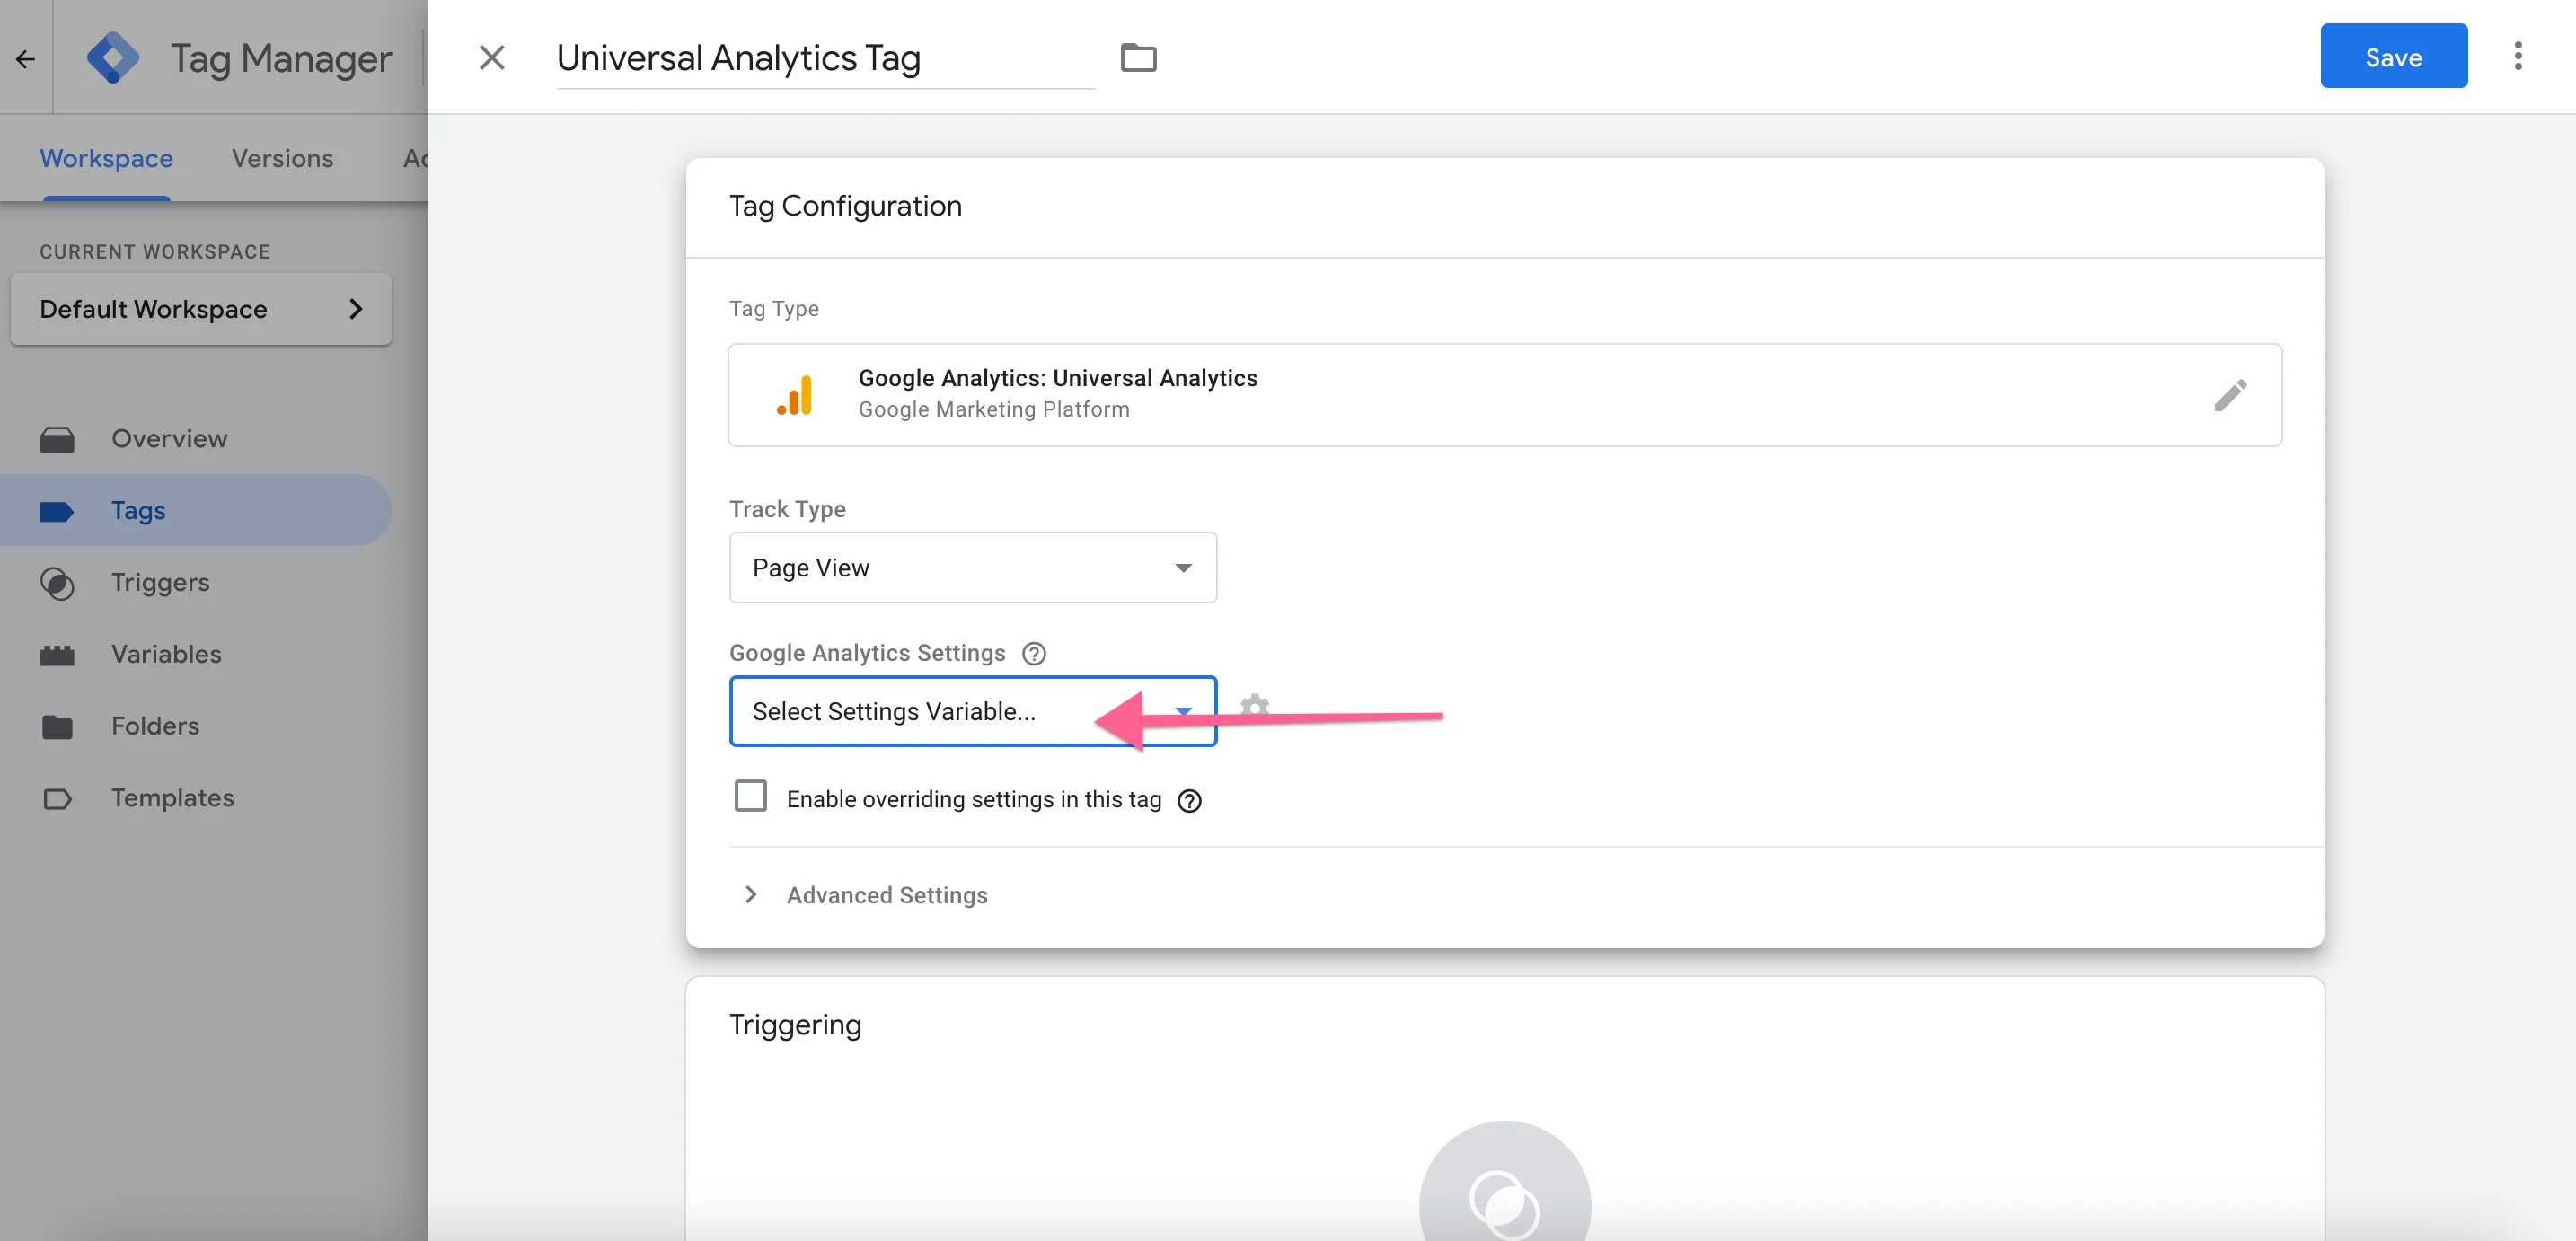
Now head on back to Tag Manager and create a new Tag, name it and select the Tag you want to use.

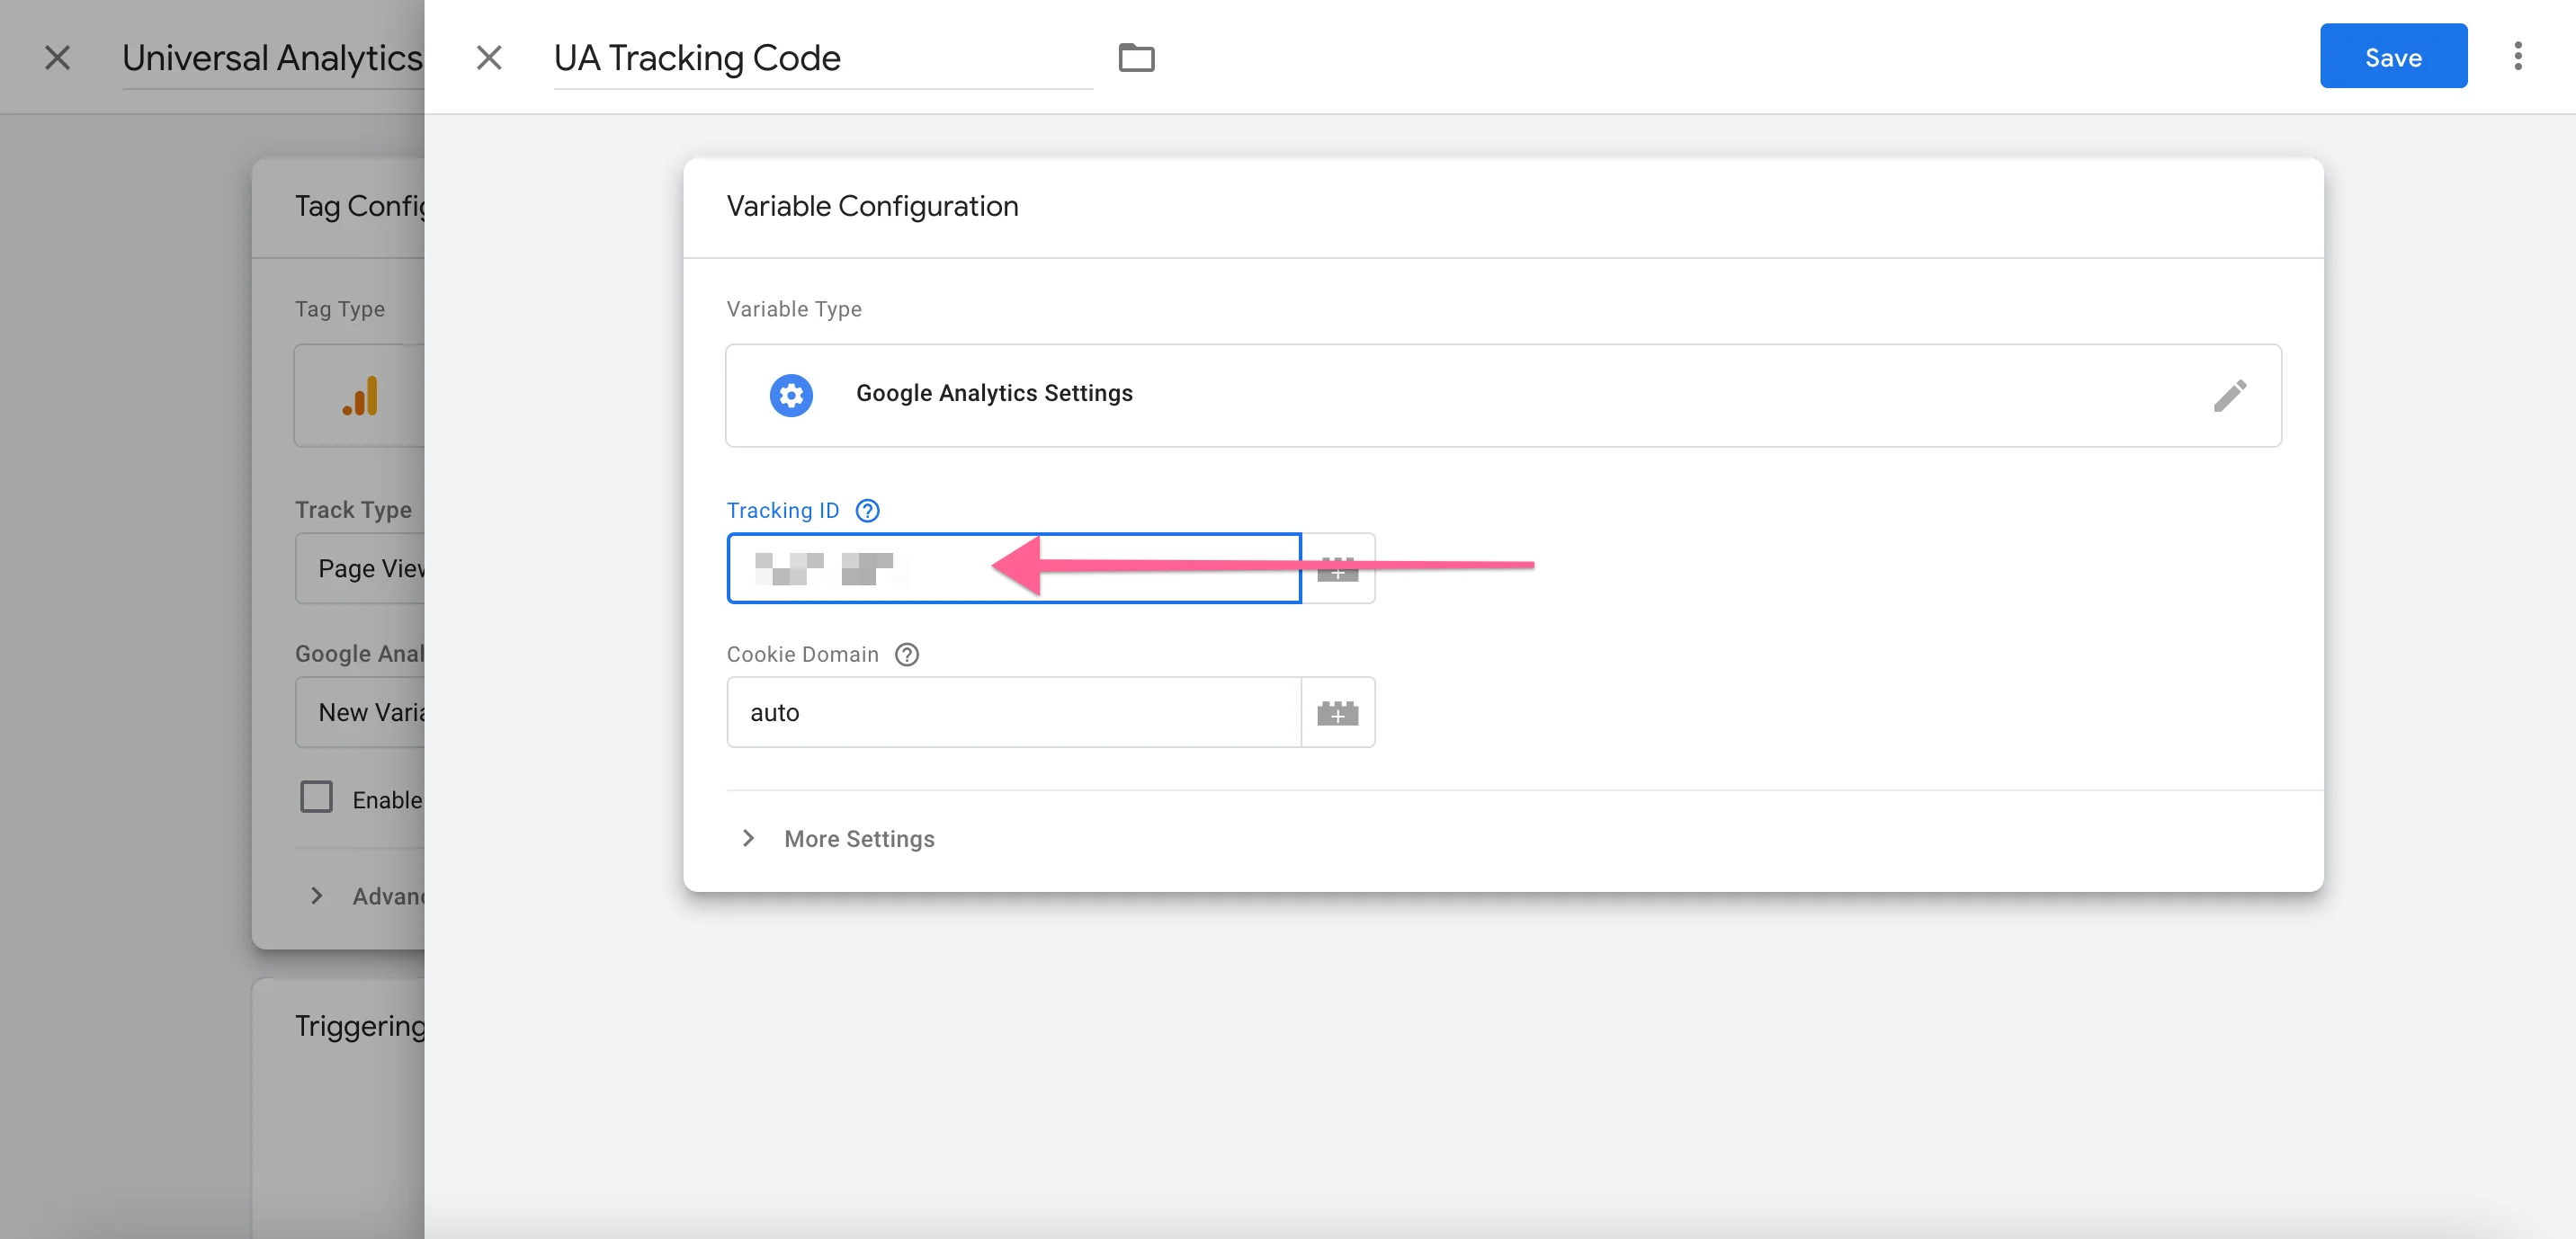
Create a new variable in the dropdown.
Give the variable a name and paste in the tracking code.
Hit save and select the All Pages Trigger.
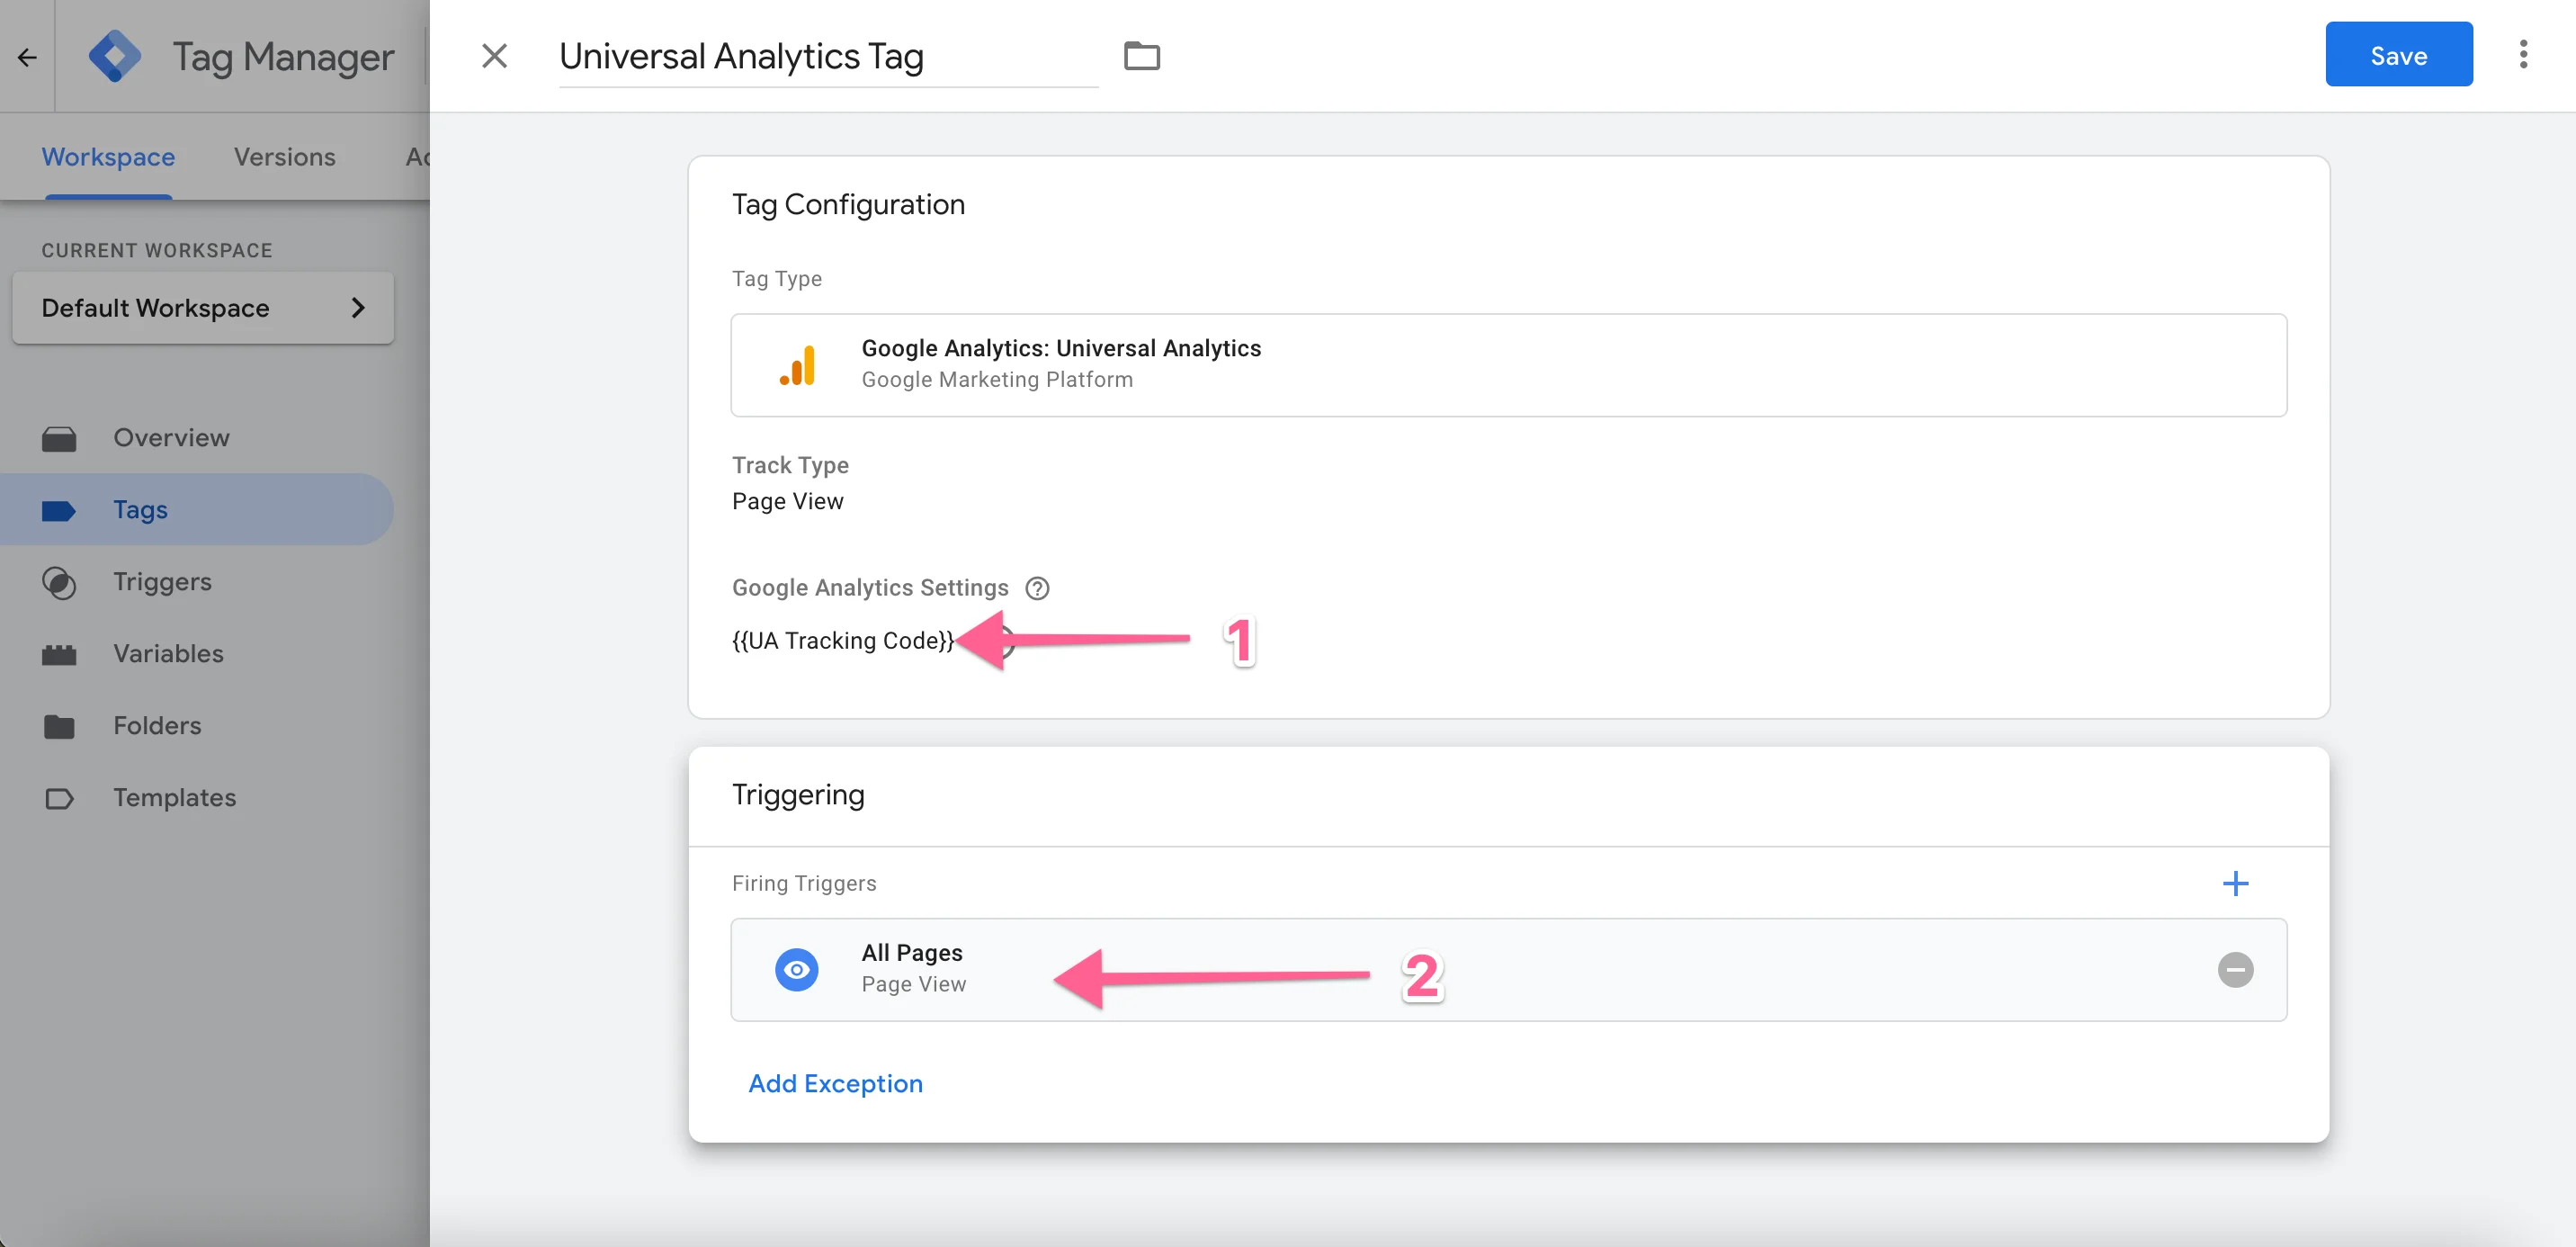
1 will be your variable and 2 will be the All Pages Trigger. Hit Save.
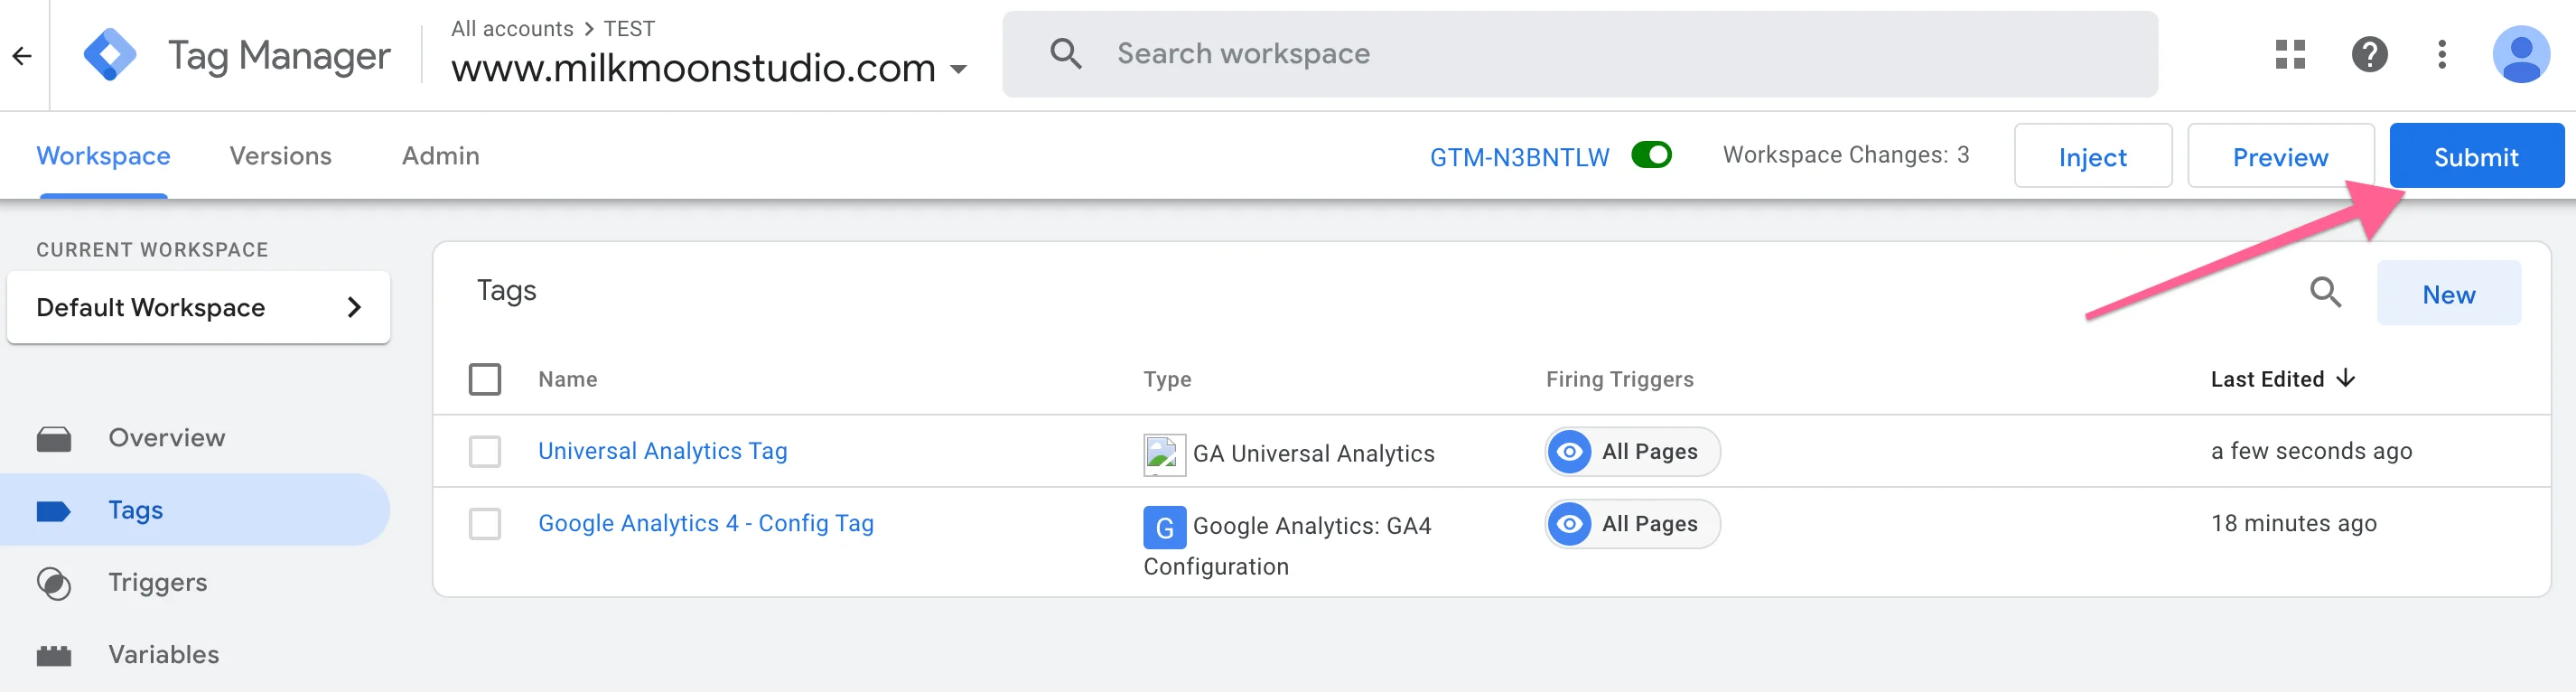
Now go ahead and publish by hitting Submit.
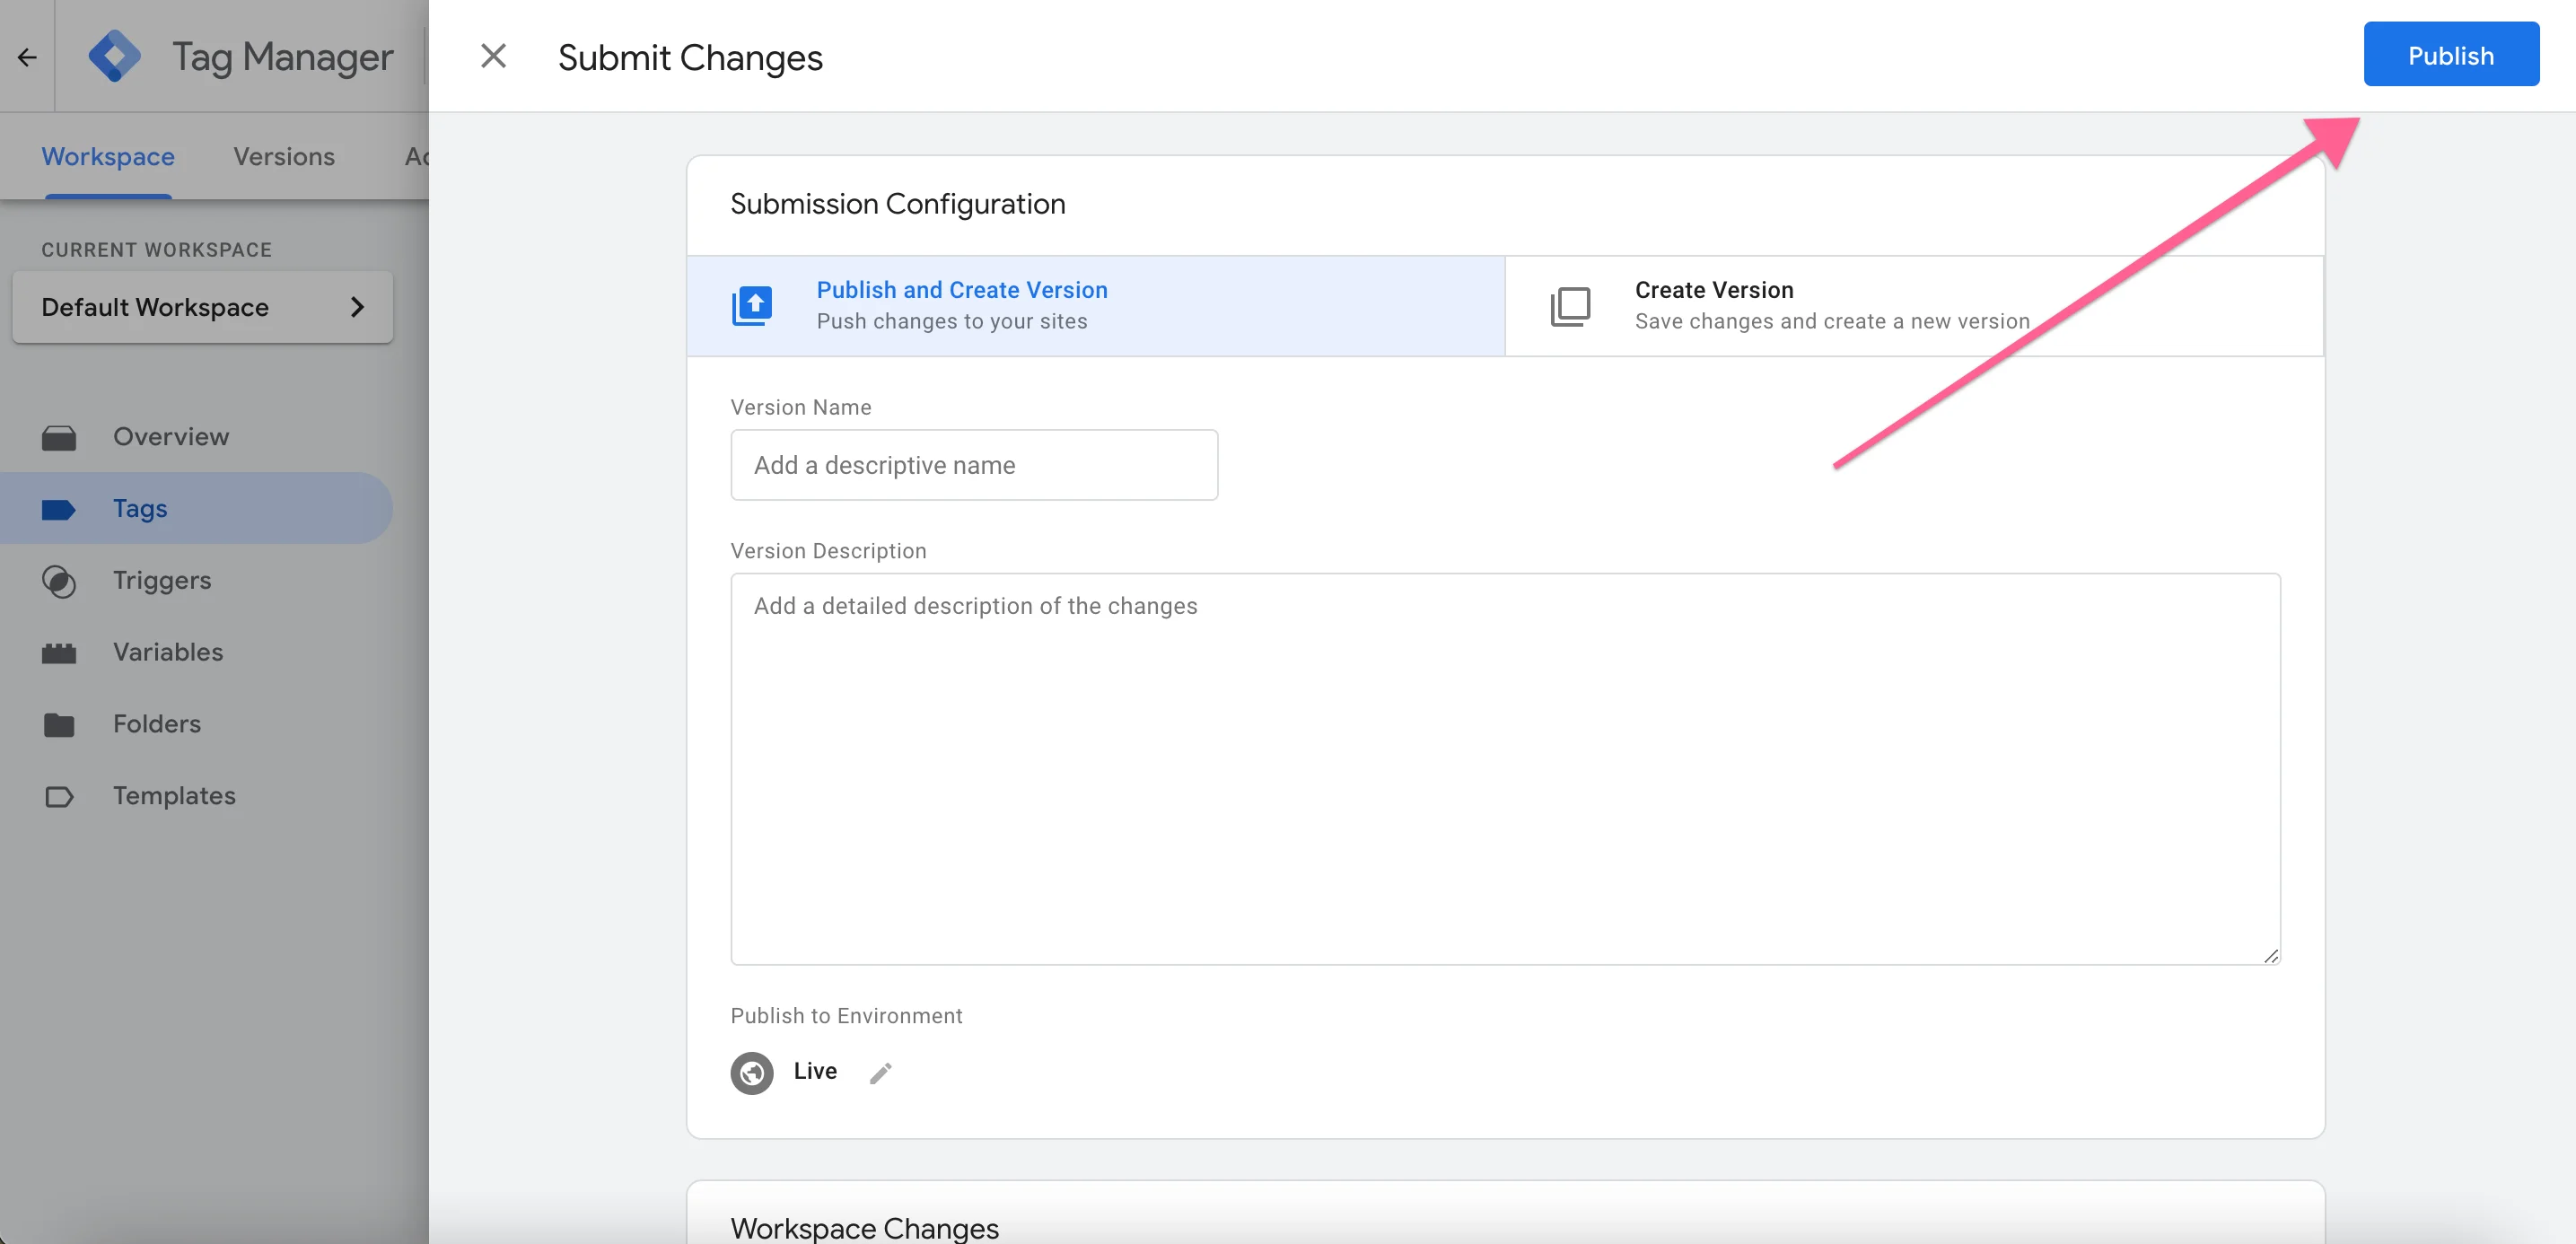
Then hit Publish and you're done.
Let's test
Make sure you've installed the Tag Assistant. More on that here in part 1. Go to your page. Hit Enable on the plugin and refresh the page (command+R). The Plugin should show a the number of tags it's picking up and your brand-new analytics tags.
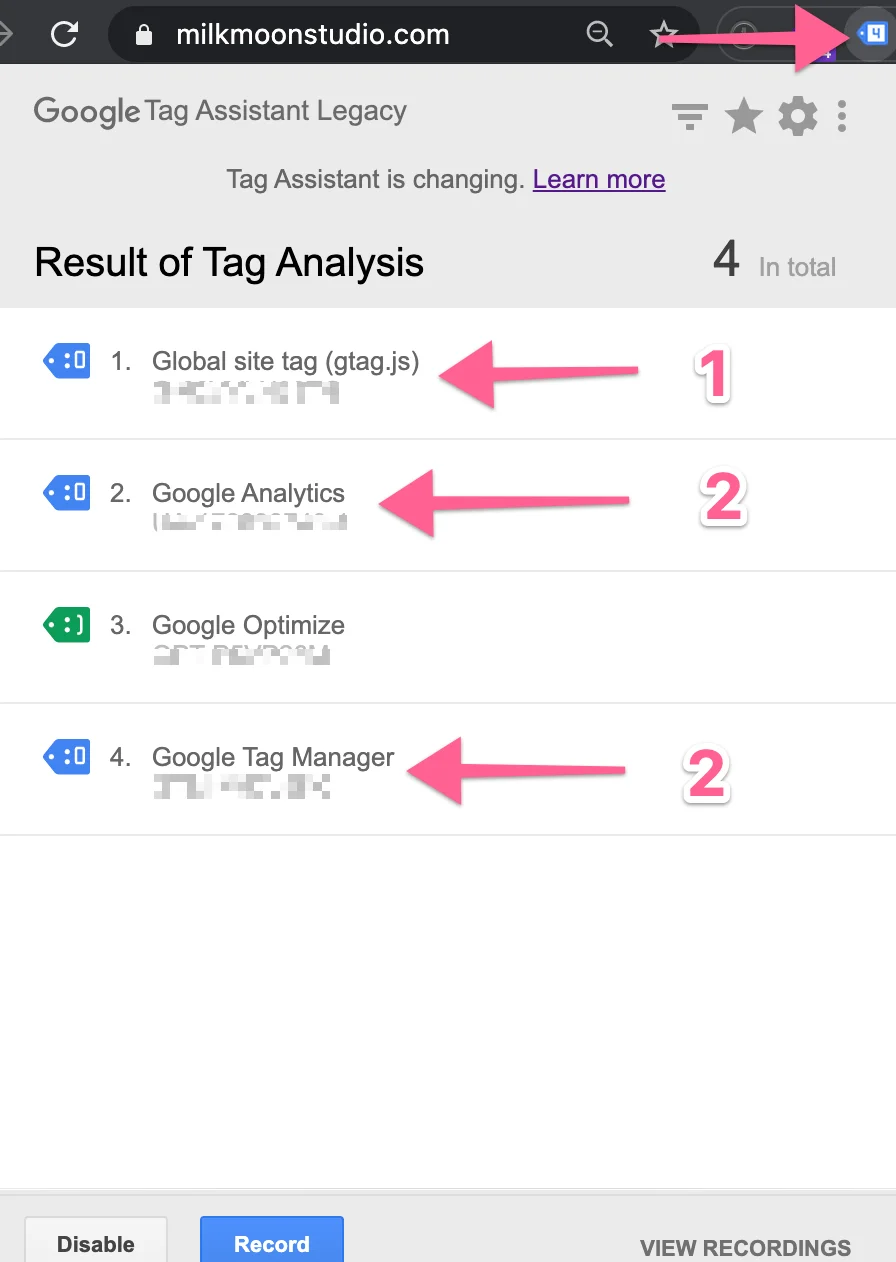
1 is my GA4 Tag, 2 is My Universal Analytics Tag and 3 is my Tag Manager Container. Below them you'll see the container IDs that'll match with what you have in Google Analytics.
Congrats, you're done. Hit me up in the comments if you have any questions, and remember to check out the How-To section of our blog for more tutorials. Your next should be linking your Google Analytics 4 account to BigQuery, you can find the how-to here. To find out more about speeding up Tags by deferring them, check out this post.
Update We have added some video content at the top of the post to make it easier to follow along, so hopefully that helps. Please subscribe to the channel to stay up to date with our latest how-to's and updates.