
In this how-to we'll show you how to create a summary paragraph, textblock or rich text element without the need to create a summary field in your CMS collection list using some custom CSS and a Combo Class in Webflow.
We recently had to migrate a massive amount of blog posts for a client to a Webflow site from Wordpress, but we ran into a problem, the content on Wordpress only had the title, post and an image. Now usually if you're doing it the Webflow way you'd need a field for a post summary, but neither us nor the client was going to write summaries for 500+ blog posts so that we could a have a 3 line summary on our blog page before someone clicked through to the post. So we though, why not just display 3 lines of text from the rich text field in the summary? Well, unlike the multitude of Wordpress plugins that'll give you a summary, there is no feature in Webflow to just display X amount of characters from your rich text field in your collection list. The solution, stick in a rich text field for the summary, connect it to the full blog post copy and only display a few lines of text, add an ellipse and do this with some custom code and a combo class.
Turns out this is surprisingly simple, so here we go, follow along and just copy an paste:
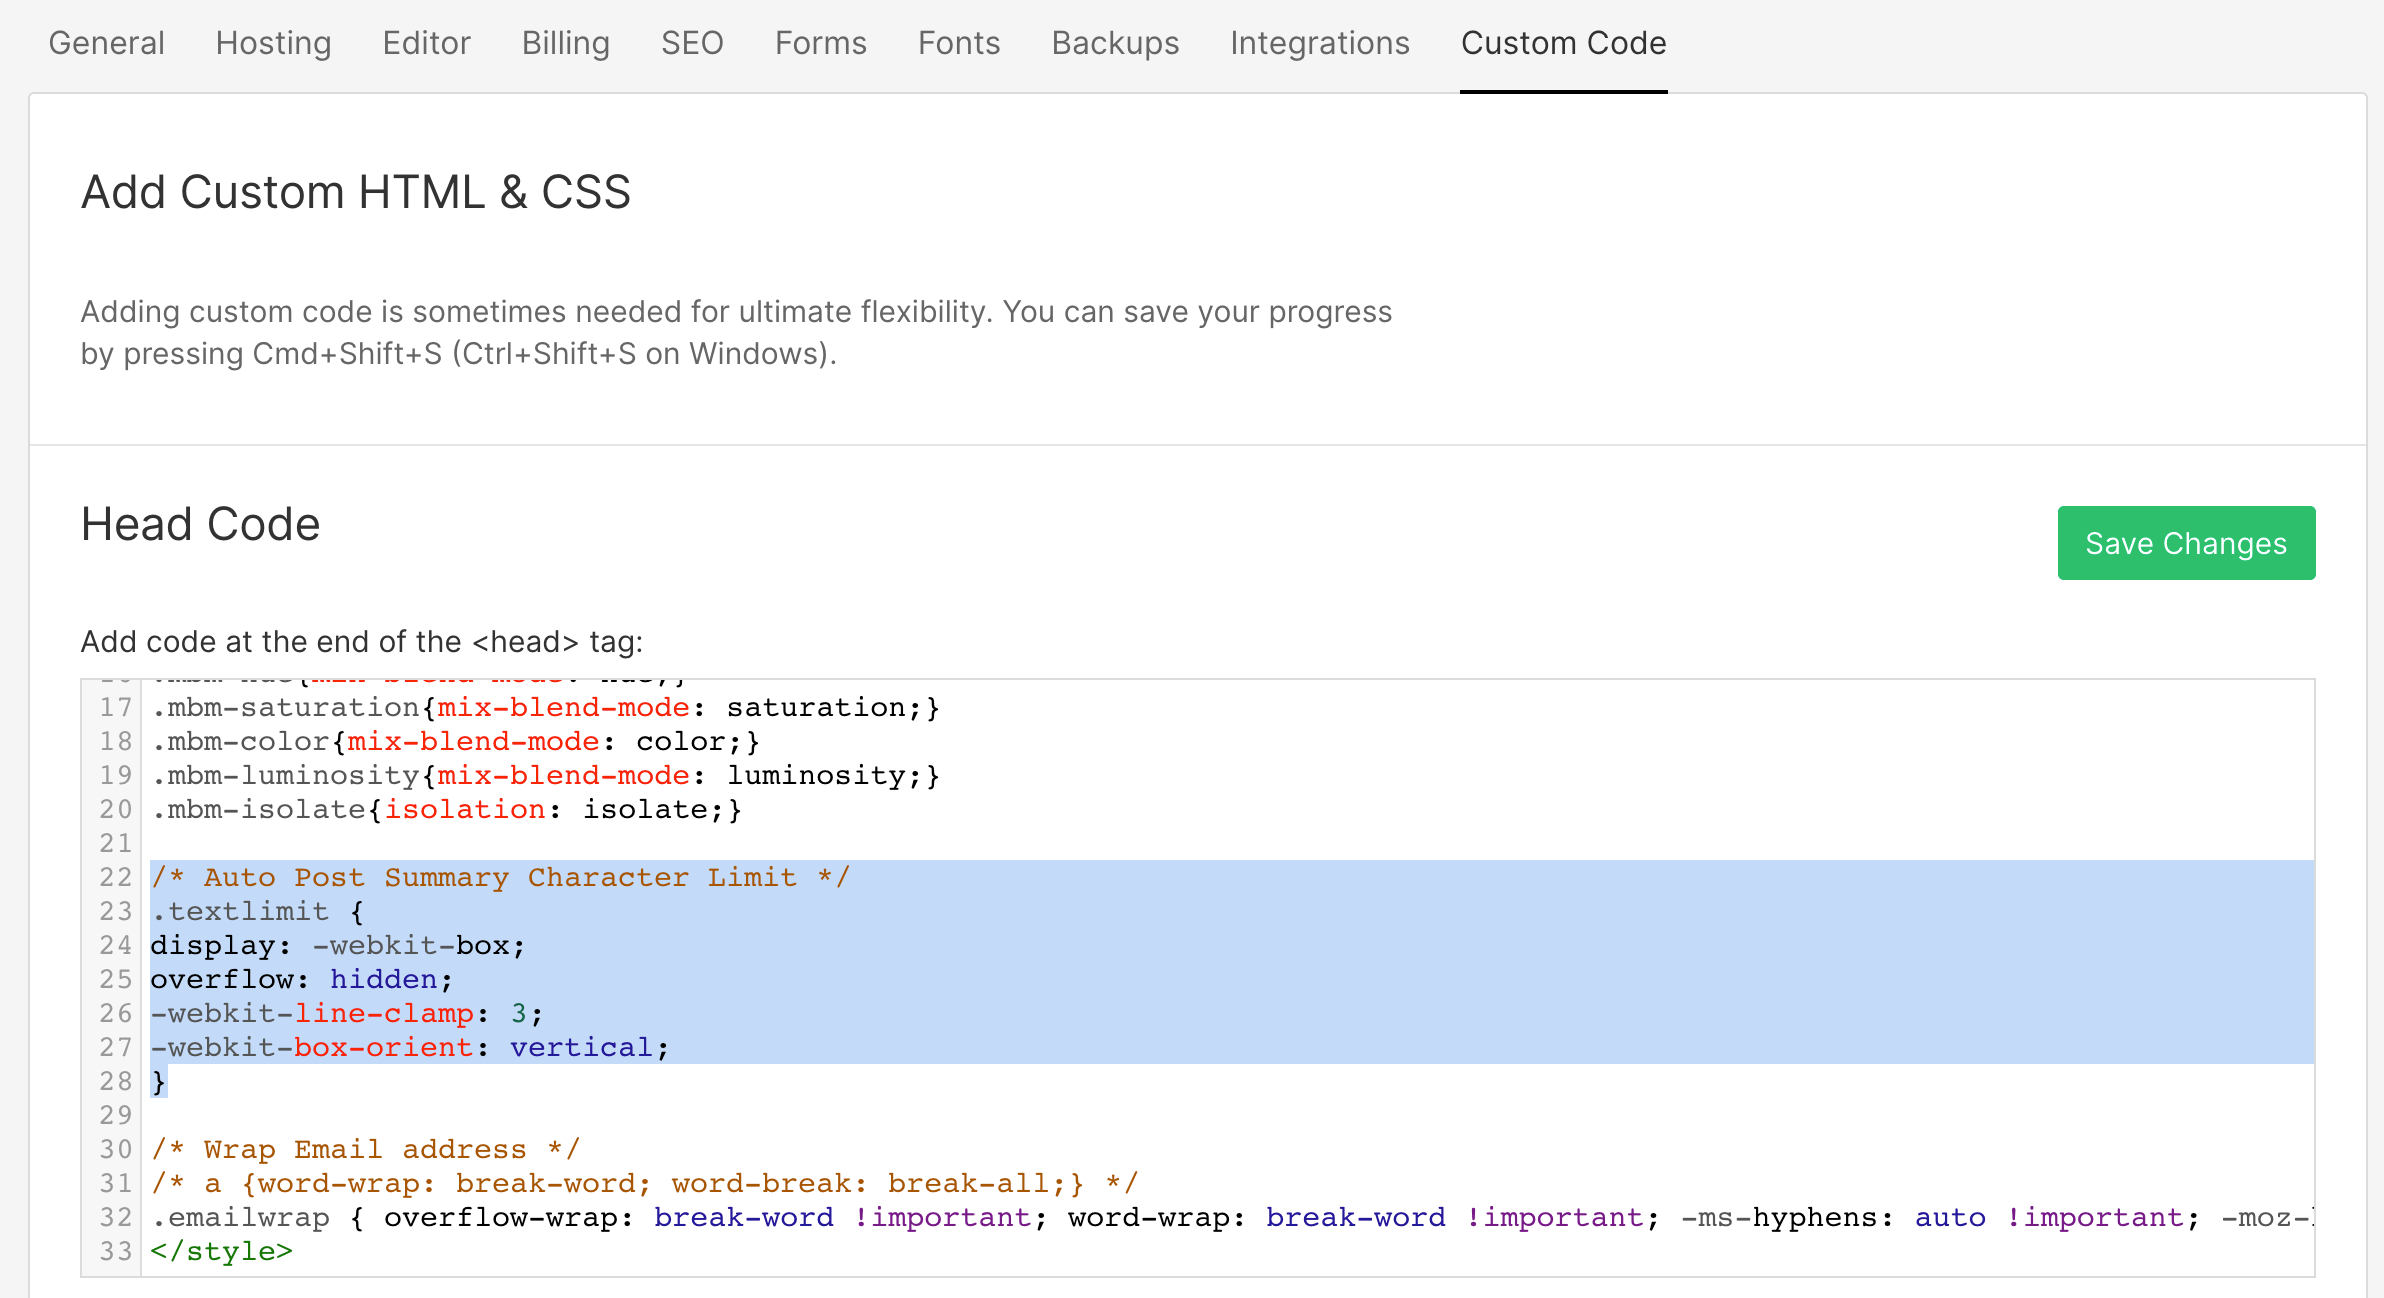
Step 1 - Add the custom CSS style to your site header
Head to project settings, custom code, and paste the style into your Head Code section:
<iframe height="300" style="width: 100%;" scrolling="no" title="Create a Blog Summary or Excerpt in Webflow " src="https://codepen.io/milkmoonstudio/embed/xxJmrrZ?default-tab=html&theme-id=light" frameborder="no" loading="lazy" allowtransparency="true" allowfullscreen="true">
See the Pen <a href="https://codepen.io/milkmoonstudio/pen/xxJmrrZ">
Create a Blog Summary or Excerpt in Webflow </a> by Jakes van Eeden (<a href="https://codepen.io/milkmoonstudio">@milkmoonstudio</a>)
on <a href="https://codepen.io">CodePen</a>.
</iframe>
There are a few ways to do this, but character limits are a bit hard as the easiest way to do that is measure the character width, set a limit etc etc, but that changes based on the font and whatnot which becomes hard to control, so we've gone with 3 lines in this example.
What will happen is that when you connect the rich text field in your collection list to the element is your designer it'll just display all the copy for that rich text field. You'll then apply the text limit combo class and it'll look the same in your designer, but once you publish, it'll limit the text displayed on the published site to three lines. So, next step:
Step 2 - Apply the Combo Class.
We're assuming you've already built the element for this step, but if you haven't, add a CMS collections list, stick a rich text field in the collection list item, bind to the rich text field in your collection list item that contains the blog post, style it in the designer and then just add the textlimit Combo Class and publish:
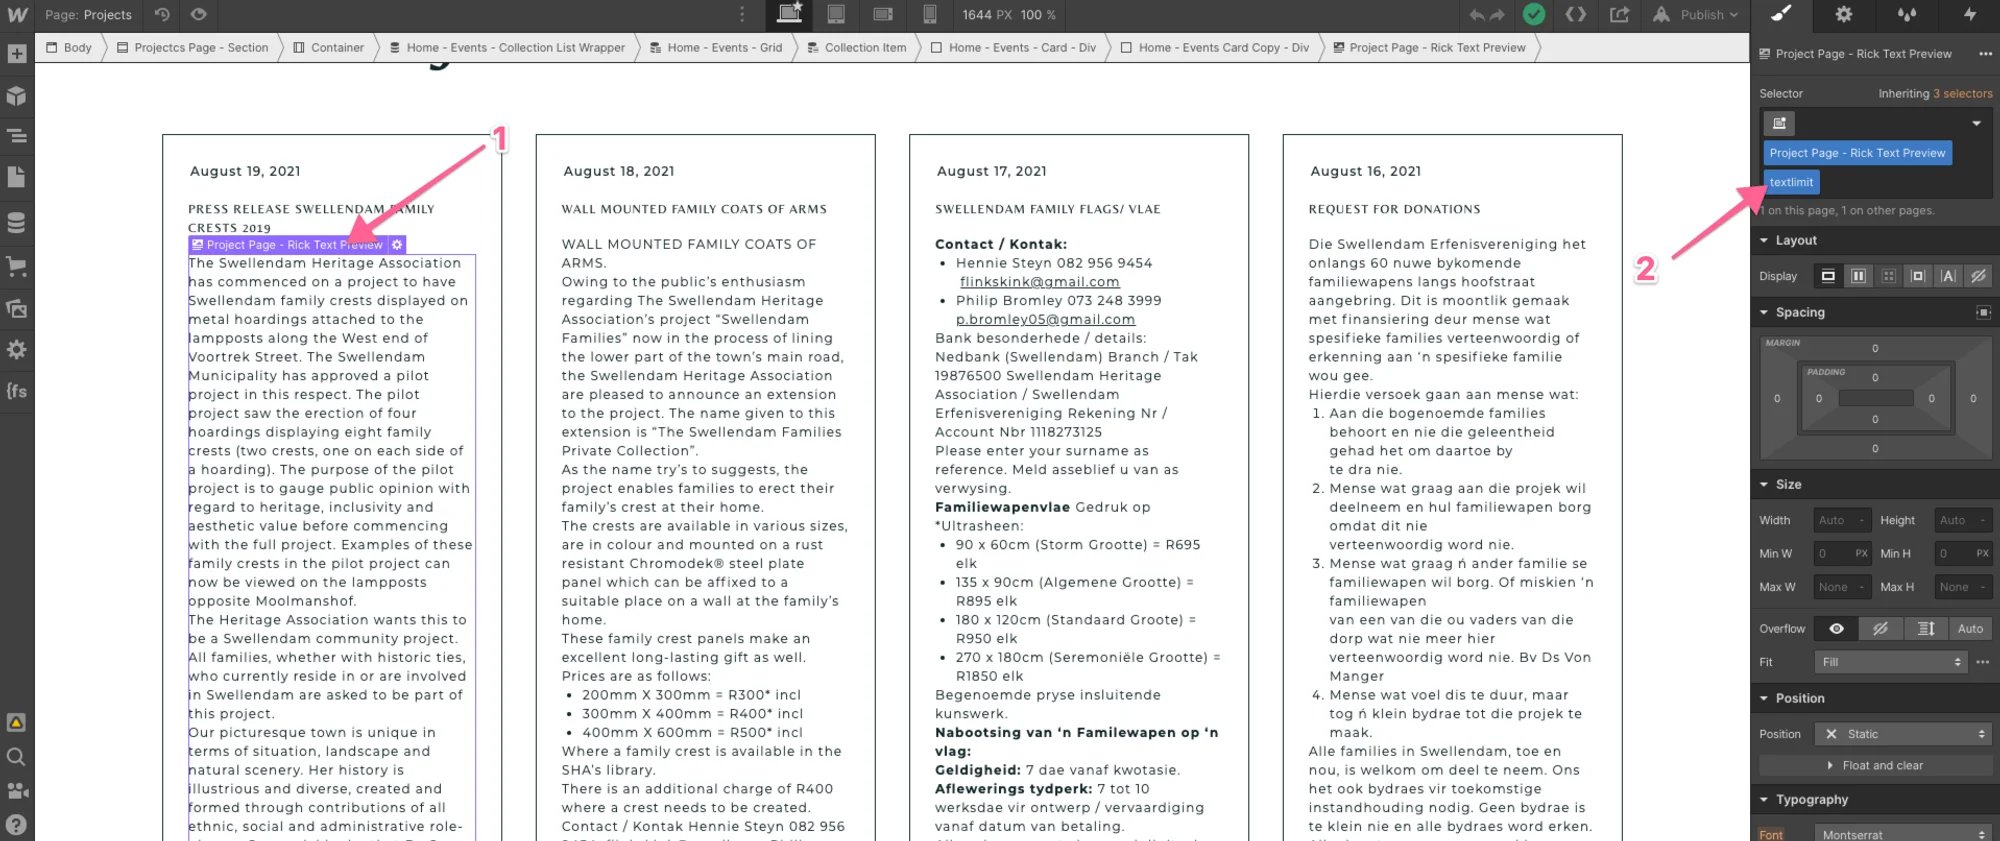
As we said before, in the designer you'll see alllll the copy for that field, so it won't look great, but don't worry, it'll look great once you publish.
Here's the live site after we publish:
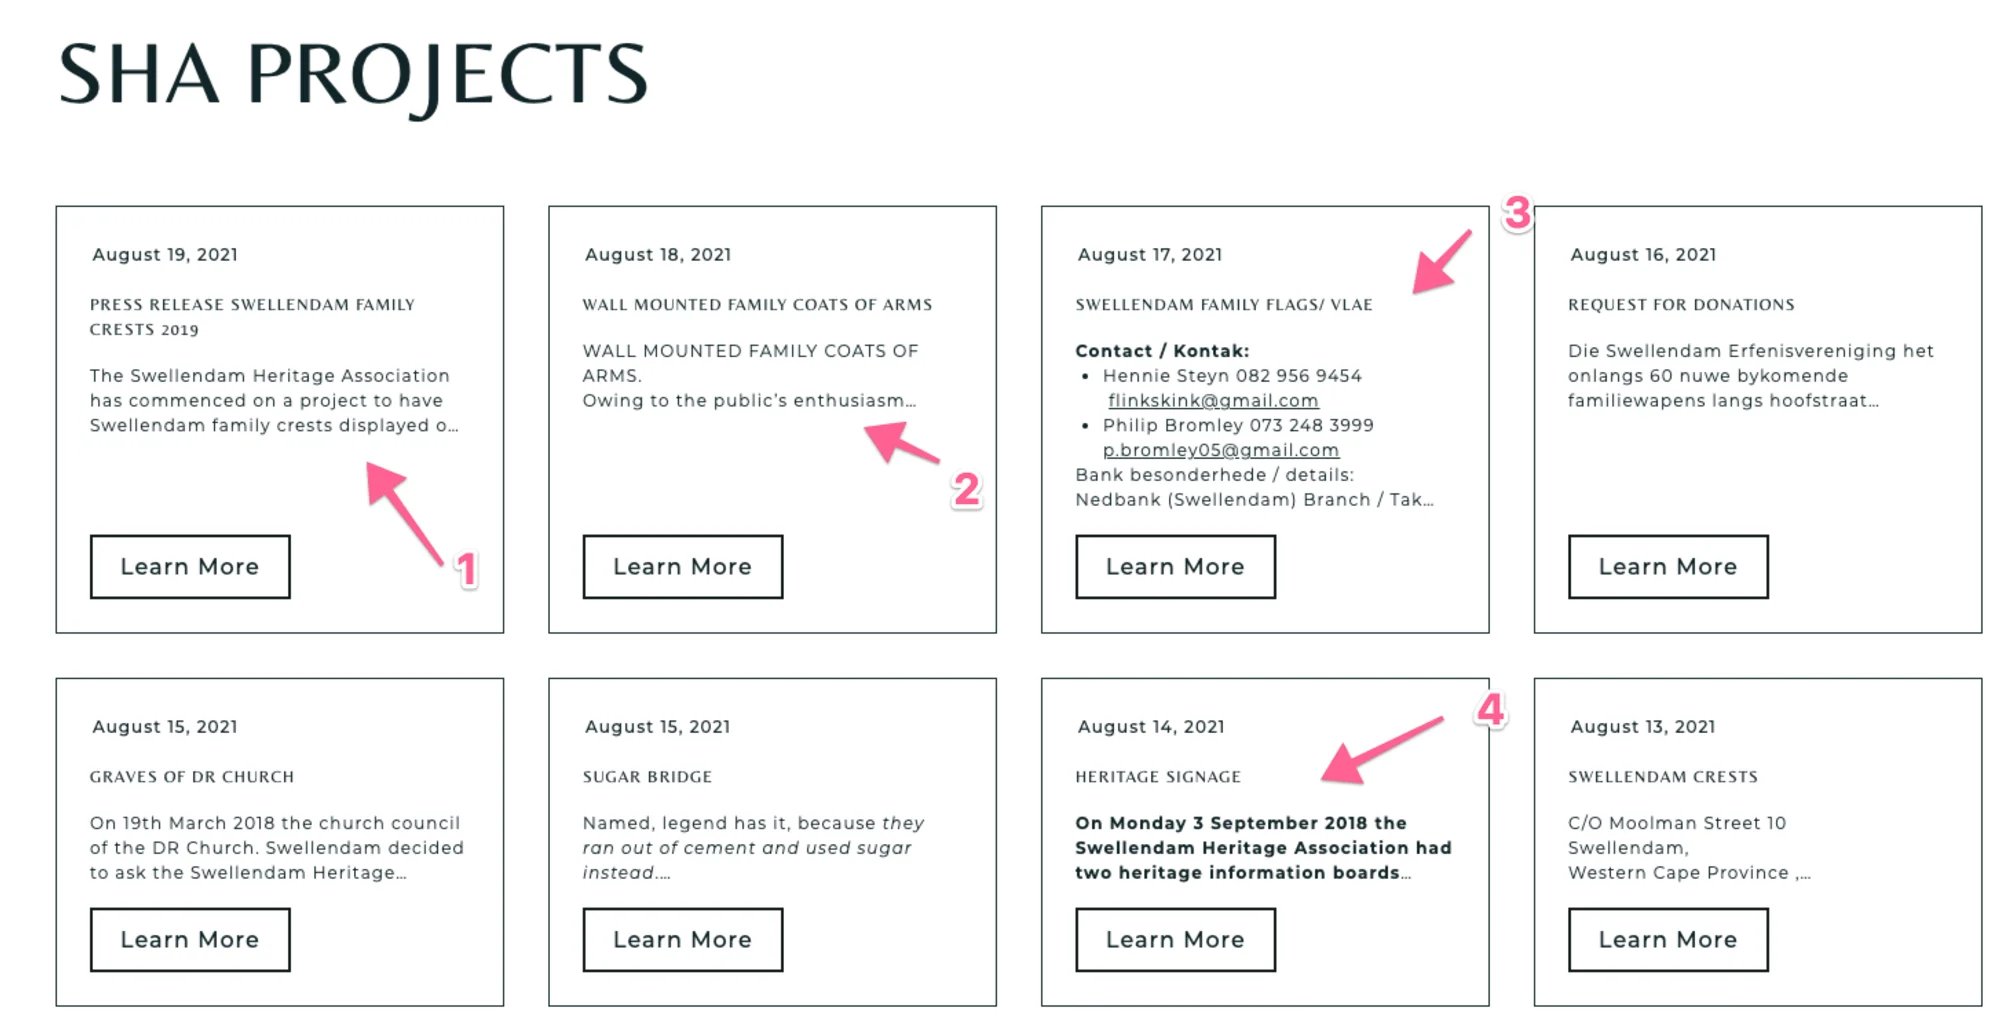
And there you go, check out no1, 3 lines of text and then ellipse and that's it. Just remember to go style that Rich Text element properly in the designer. If you look at no 2, 3 and 4 you can see that I haven't done that yet. You basically want to go ahead and give headings, and just about every element is that rich text field the same styling as the default paragraph style you want to display.
We'll admit, this isn't perfect and it doesn't always come out 100% correct, just look at the unstyled no 3, but when you have 500 legacy blog posts it'll do.
A quick note on how you go ahead and solve the problem going forward. For this client we did create a summary field and made it a required field, so that going forward they have to fill it in. Then we added conditional formatting and stuck the summary paragraph field under the rich text summary field. The conditional formatting on the paragraph that was linked to summary field in the CMS collection list was set to show if the summary was set and the rich text field's conditional formatting was set to show if the summary was not set. So it'll only display the rich text summary on the legacy posts where the summary was not set and the it would hide that and show the actual summary on newer posts where the summary was set in the newer posts.
Jef S raised and interesting point on the Webflow forum that you'll take a performance and SEO hit which I didn't explain above. To combat as far as possible the elements were styled to not load images, only paginate 6 items and in terms of SEO I used a meta tag on the site: <!-- fs-richtext-ignore --><META NAME="ROBOTS" CONTENT="NOINDEX, FOLLOW"> that will allow Google to crawl the links on the page but ignore the content bypassing any canonical issues etc in terms of SEO. So for Google the page is pretty much invisible, but it allows it to follow the links and crawl the actual blog posts.
Pop a comment below if you have any questions and don't for get to check out our other Webflow and analytics how-tos here.