


Add any CSS blend mode to a Webflow element with a combo class, including isolate, plus a plain-English guide to what every blending mode does.
Update, October 2026: Webflow now has blending modes built in (Style panel > Effects > Blending), and they preview live in the Designer, so for a single element you no longer need custom code. The combo class method below still works, and it's still a way to get isolate, which isn't one of the 16 blending modes in the Style panel.
This is a really simple how-to and we hope you go ahead and use it in Webflow as CSS blend modes can add a lot of flexibility and overall sexy elements to your designs, and when we wrote this it wasn't something Webflow supported out of the box without custom code. As a small Webflow studio mainly focussed on Webflow design, Milk Moon Studio always tries to find the simplest way of doing something, so this copy-paste solution can be a real help. It's not something new for the Webflow experts out there, but it works well with combo classes and even lets you exclude assets in your design from the blend.
Implementing this will be super easy as you're only going to be pasting in one piece of custom code in the <head> section of your project settings and then you'll simply be adding a combo class to any element you want a specific blend mode applied to.
First things first, what are blend modes? If you've ever played around in Photoshop you've probably used blend modes, and while blend modes were mainly used in image editing for a long time, they've been supported in CSS for some time, but until recently many builders, Webflow included, didn't support them natively.
Blend modes are used to determine how two layers are blended with each other. There is a base layer and a blend layer, and when combined they produce a specific result. The key point here is that there must be more than one layer in order for blending to work. The layer on top blends with the layer below producing a specific result depending on the blend mode. In Webflow you might say that an image in a div with a background colour blends down to that colour, or 'layer', so the image is just a layer on top of the div, which is the layer below in this example.
In Webflow 'layers' can be stacked as well. Let's say you have a Section with an image for a background, on top of that you have a Container and then some divs in that. If you have an image in one of the divs 'on top' and apply, for example, the Darken blend mode to it, in our experience it often won't blend with the image in the section at the bottom, because the layers in between can form their own stacking context. The image blends down, but often only as far as the div below it. How do we solve this? Simple: we apply the blend mode to the entire 'stack' on top of the div you want it to blend down to. Now it all blends down. But oops, not all of it was supposed to blend. There might be some text or other images in that 'stack' that are not supposed to blend. No problem, just apply isolate to those and they won't blend with what is behind them. Don't worry, it's all part of this tutorial and just like the blend mode you choose you'll be able to apply isolate to anything by simply adding a combo class.
At the bottom of this post we'll also be adding a list of all available blend modes and what each one does.
So let's kick it off.
Step 1: Add CSS styles
- Head to your Webflow Project Settings.
- Open Custom Code and paste the code below into the Head section, then save:
<iframe height="300" style="width: 100%;" scrolling="no" title="CSS Blend Modes In Webflow with Combo Classes" src="https://codepen.io/milkmoonstudio/embed/dyjwRZv?default-tab=html&theme-id=light" frameborder="no" loading="lazy" allowtransparency="true" allowfullscreen="true">
See the Pen <a href="https://codepen.io/milkmoonstudio/pen/dyjwRZv">
CSS Blend Modes In Webflow with Combo Classes</a> by Jakes van Eeden (<a href="https://codepen.io/milkmoonstudio">@milkmoonstudio</a>)
on <a href="https://codepen.io">CodePen</a>.
</iframe>
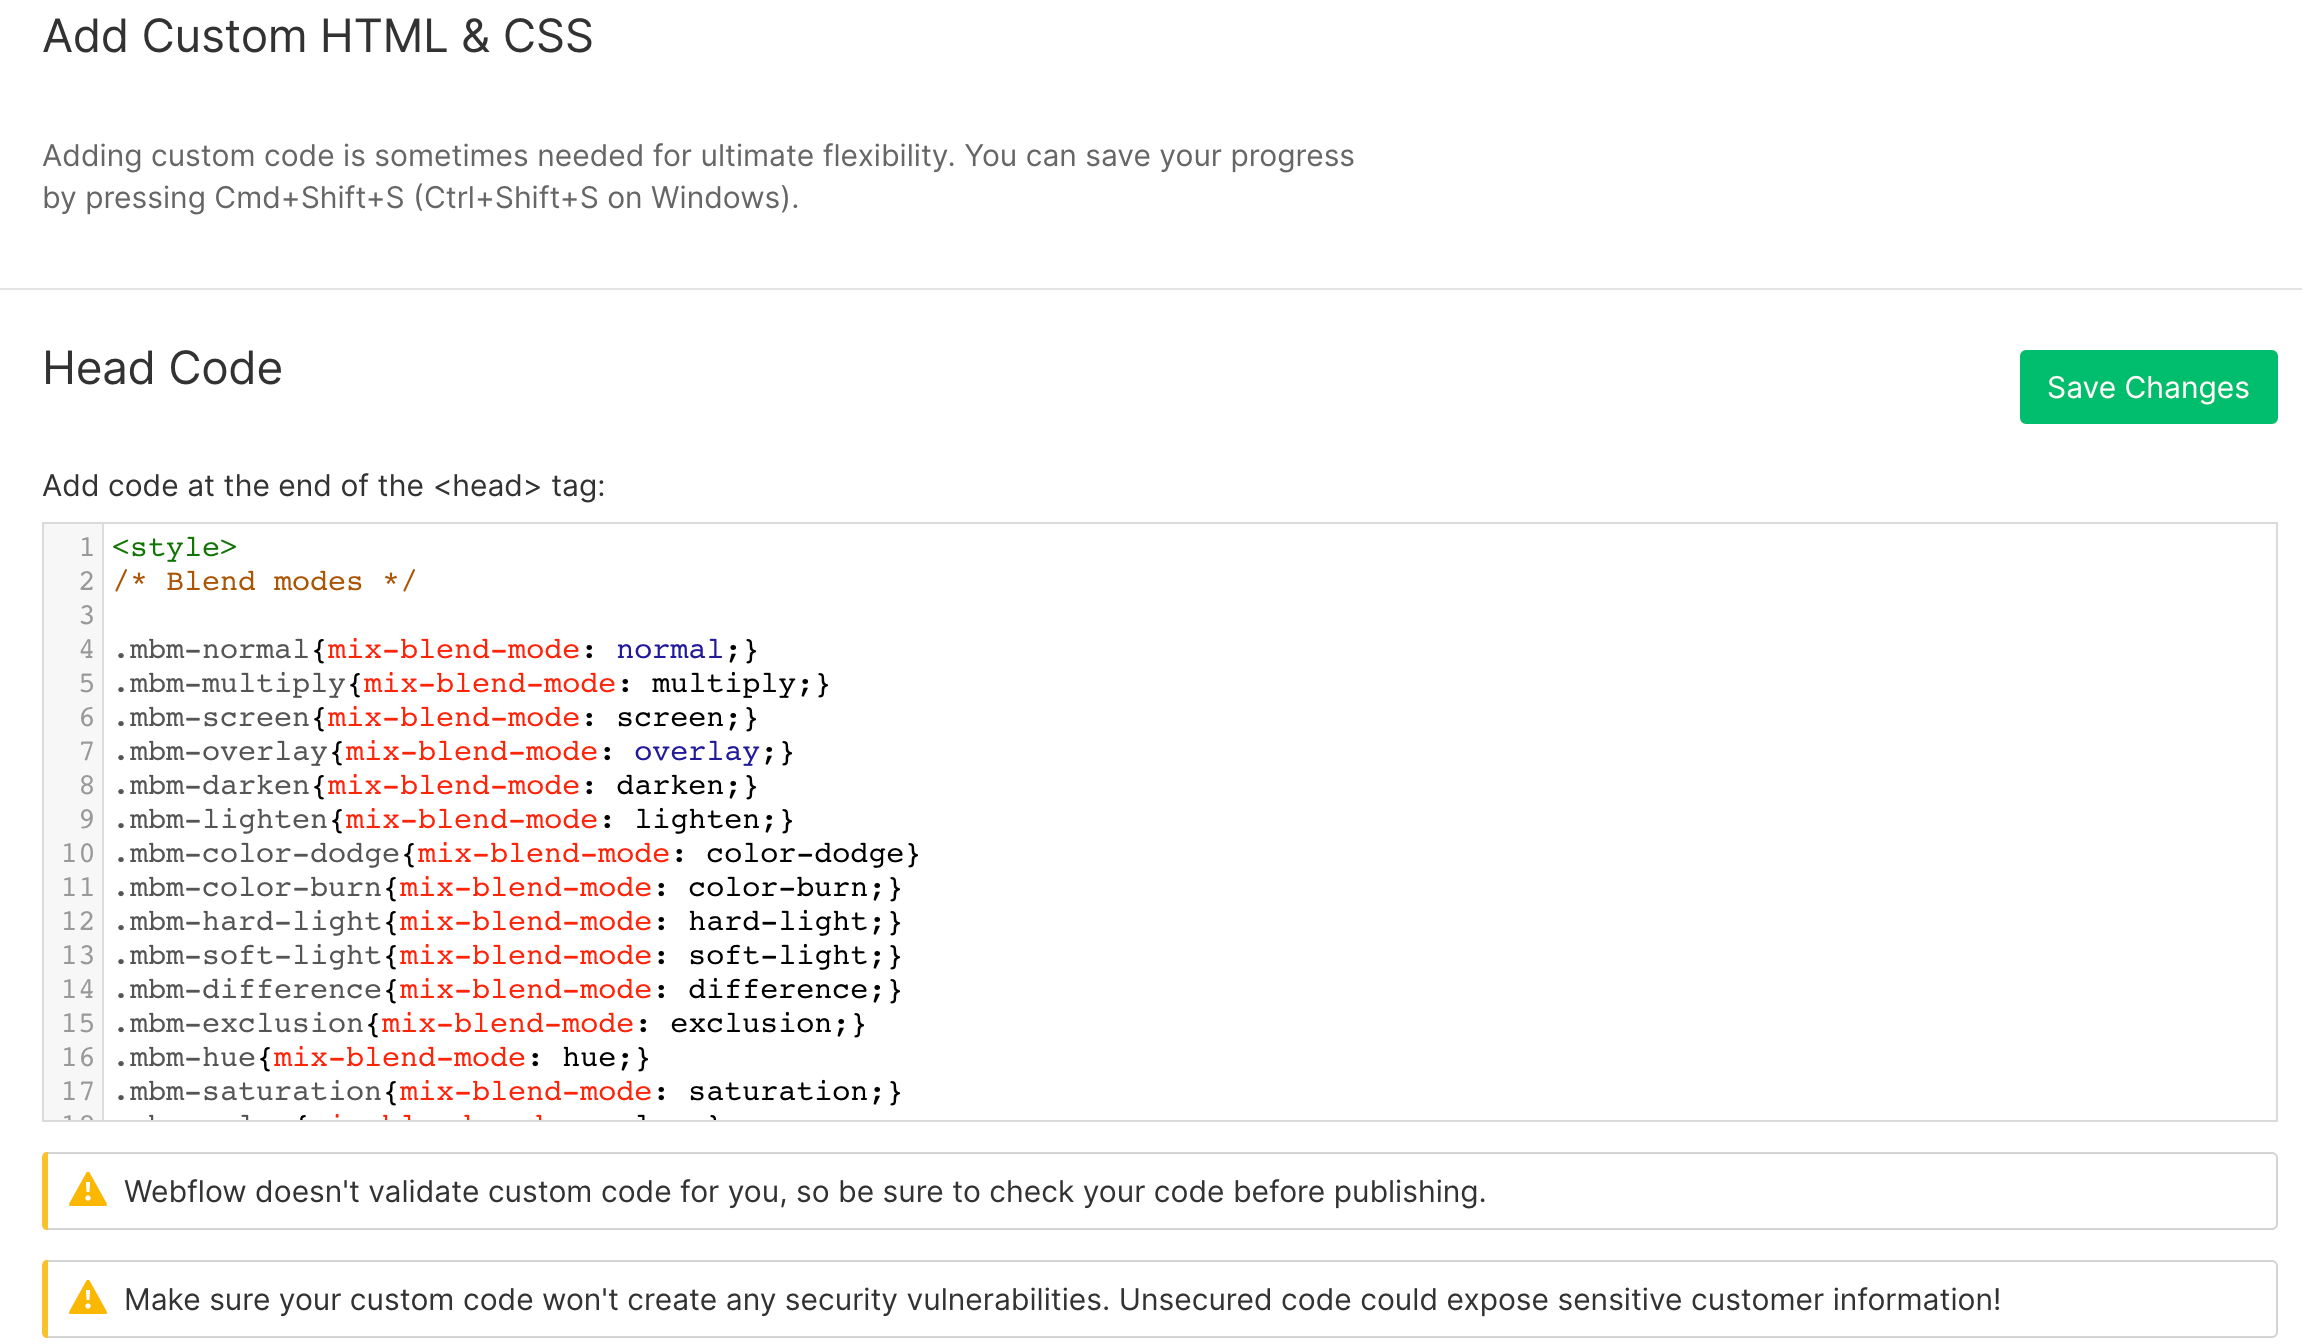
If you already have a style tag in there, just add the code inside the tag, and remember to keep this list of blend modes handy so you know which is which when you're adding combo classes.
The code is now available on any page on your site as you've applied it to the <head> code in your project settings. If you wanted to, you could have it on a single page only by adding it to the <head> section in the page's settings in the Designer, but if you're going to be using blend modes on a number of pages, just add it to the project settings to make life easier.
As an aside, just note that you won't be able to see the actual blending effect in the Designer, as it's custom code, so if you want to see what's happening you have to publish and look at the live site.
Step 2: Apply the combo class
You're basically set, so let's use a blend mode. For this example we're going to say you have a div with a set background colour and in that div you have an image that you'd like to apply the Multiply Blend Mode to. Here's what you've got to do:
- Give the image 'selector' a name like you usually would and style it as per usual. Our image is full width and has some absolute positioning applied to it to get it in just the right spot. Now to apply the blend mode.
- Add a Combo Class for Multiply, using the styles you pasted in as a reference the combo class should be: mbm-multiply
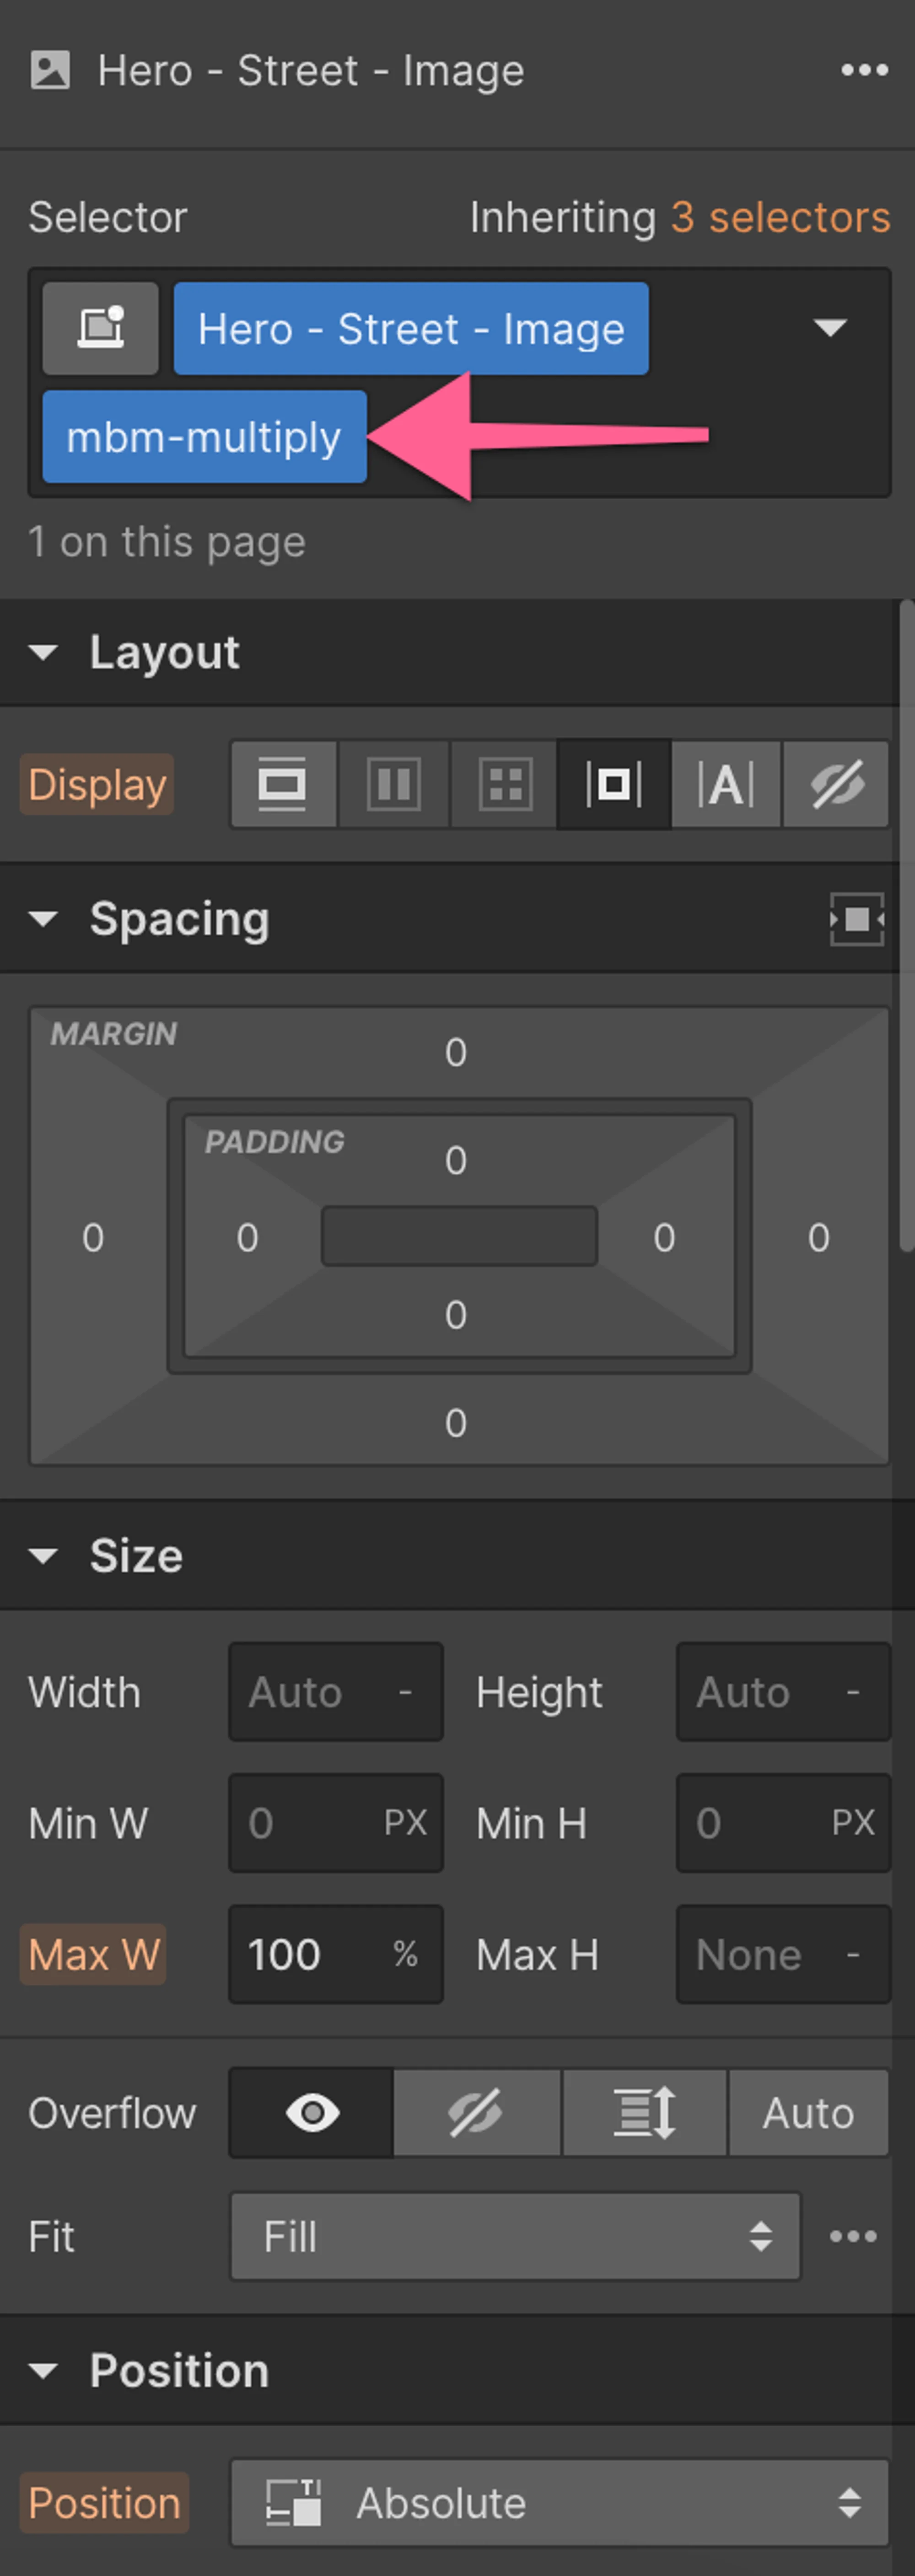
That's it, your image will now blend using the Multiply blend mode when you publish, so go ahead and publish and preview the URL of the page.
Let's see what our example looks like in the Designer and on the live site:
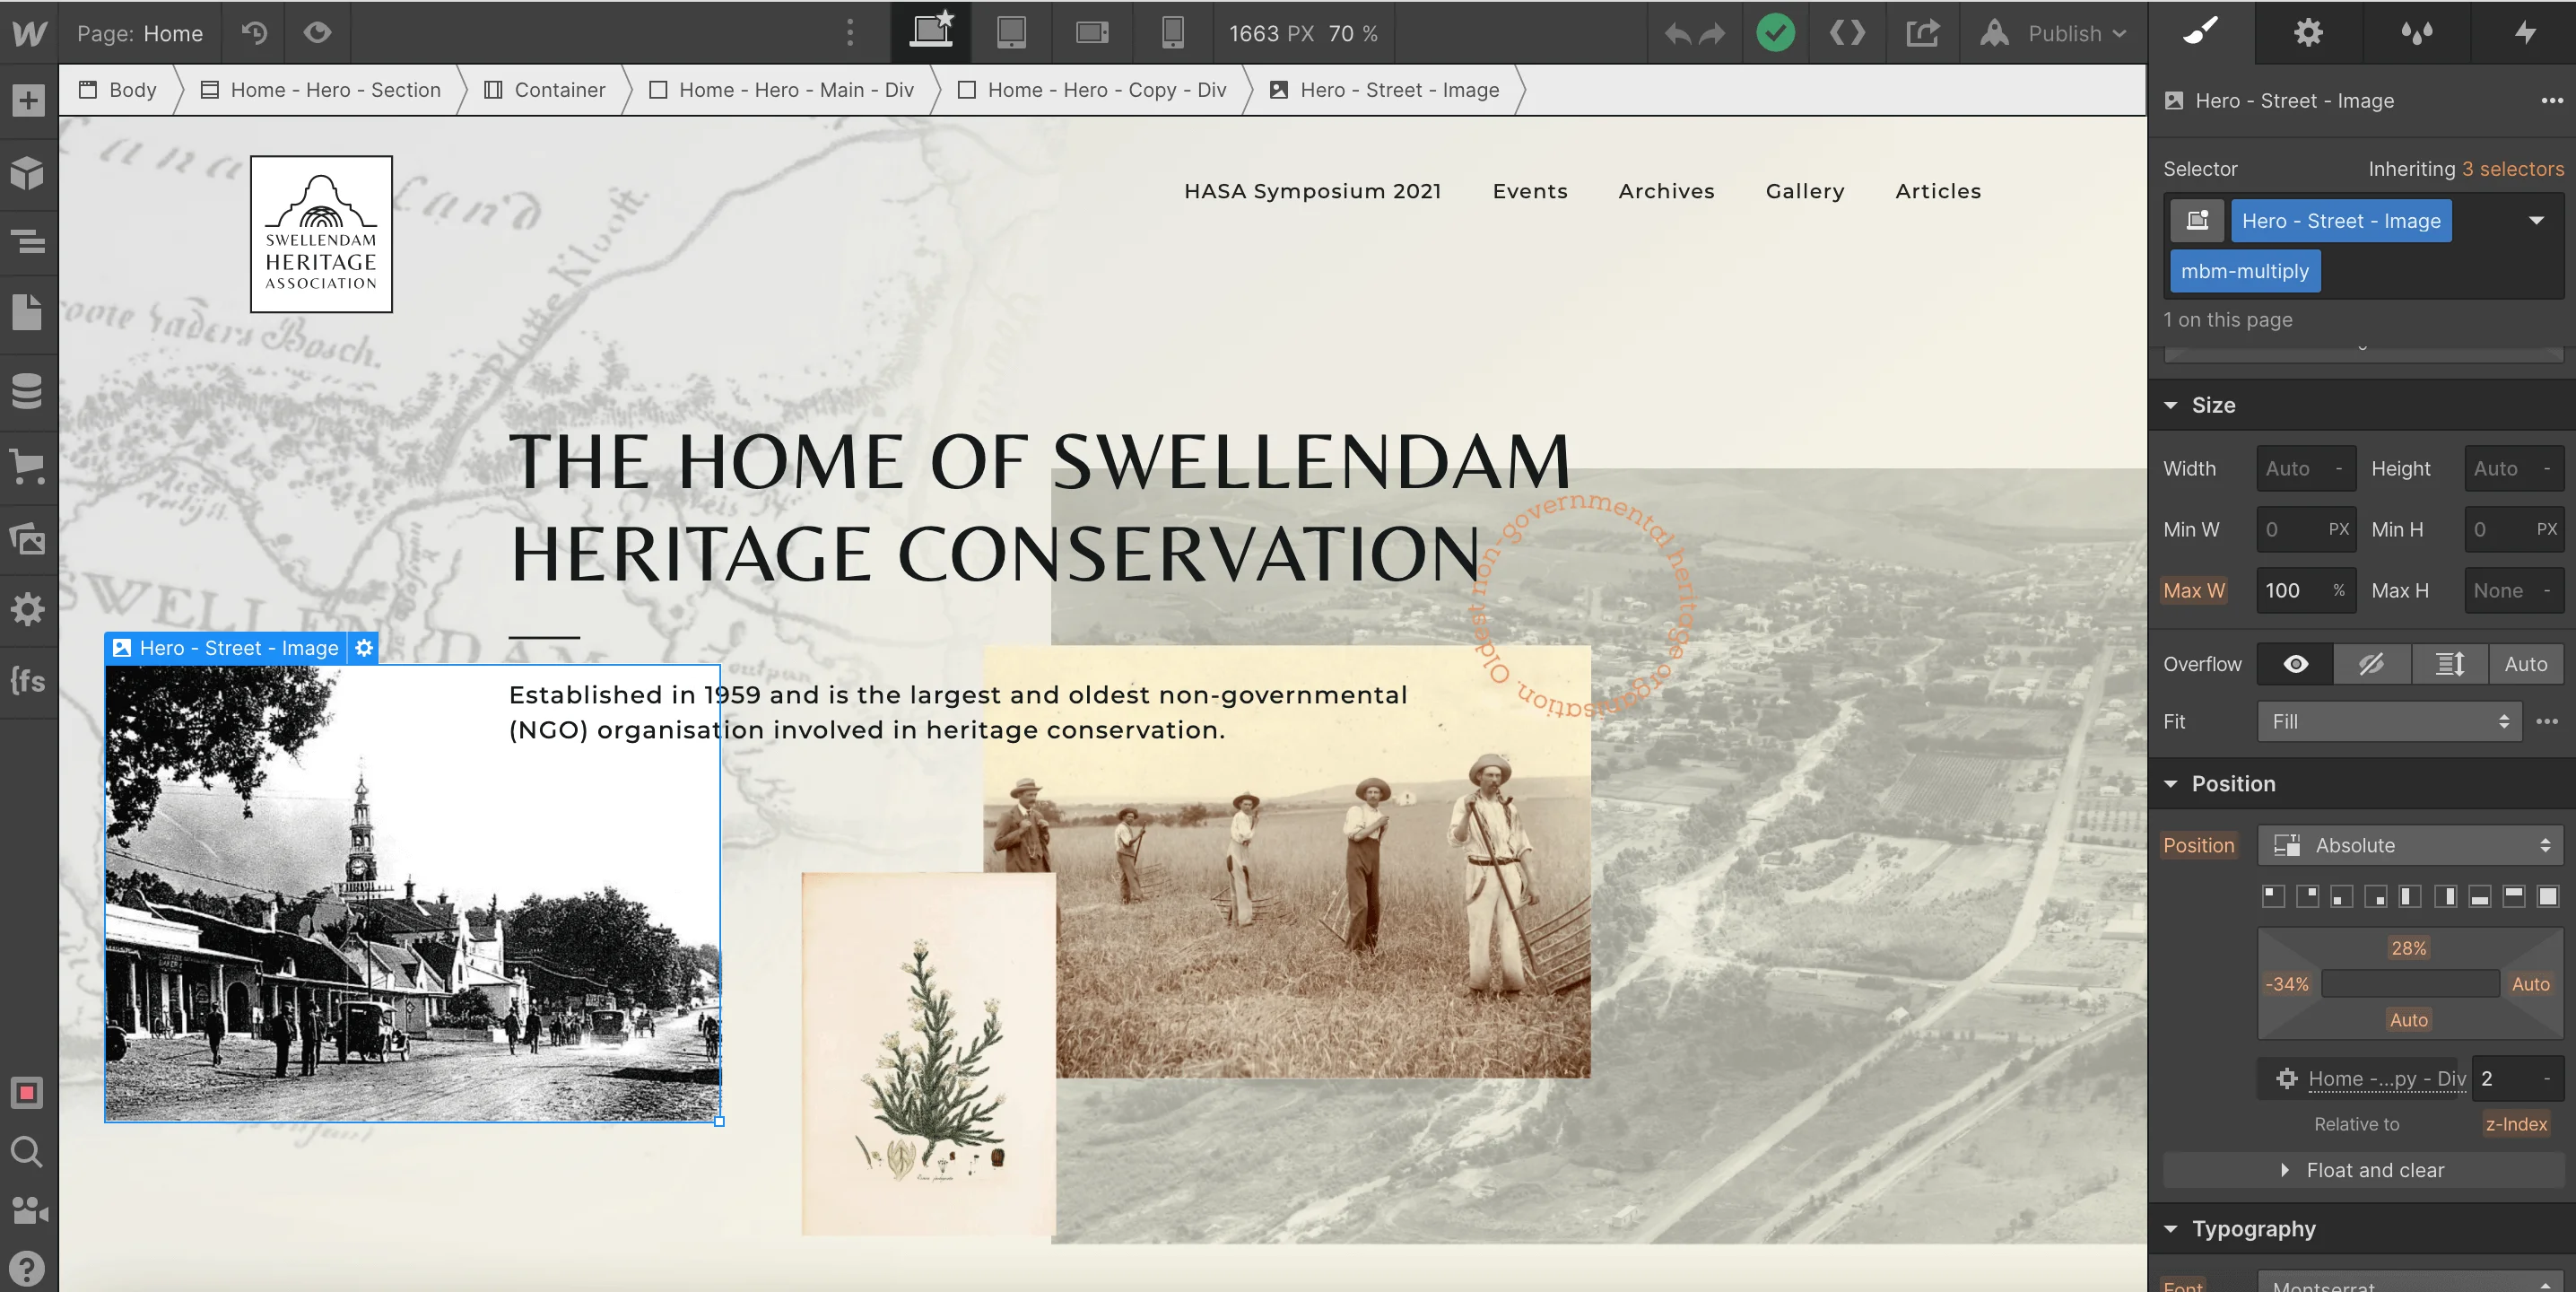
Note: you won't see the blending here because of the custom code. You need to publish and view the link.

On this live site we can see the blend modes all working nicely.
Note in the example above we've stacked some 'layers'. At the very bottom we have a sepia-toned colour as the background on the section, then we have a map with the Darken blend applied to it, and on top of that the image of the street we applied the Multiply blend to so we can now see the map 'through' the street image.
Here's a handy list of the combo classes you should use for each blend mode:
- mbm-normal
- mbm-multiply
- mbm-screen
- mbm-overlay
- mbm-darken
- mbm-lighten
- mbm-color-dodge
- mbm-color-burn
- mbm-hard-light
- mbm-soft-light
- mbm-difference
- mbm-exclusion
- mbm-hue
- mbm-saturation
- mbm-color
- mbm-luminosity
- mbm-isolate
You'll notice the last one is isolate, and we mentioned this at the beginning of the post. Just to recap, let's say you have three 'layers' or divs that need to blend down. The bottom div has a background colour, and you want an image or whatever in a div within a div above that div. Now we're going down the rabbit hole: a div in a div in a div with an image. The image blends down when you apply the blend mode, but in our experience often only one layer down, to the div it's in, so you need to apply the blend mode to that div as well, and so on until you apply it to the div that's above the layer (the div with the background colour, in this case) you want to blend with. That's easy enough: you just keep applying the same blend mode down as a combo class until you get there. Then, to avoid any issues, if there are elements you don't want blending, just apply the mbm-isolate combo class to that element or image or whatever it may be, so it doesn't blend with what is behind it. (Isolate on a parent keeps its children's blending inside that parent.)
And that's it, you're done, you're a blend mode expert.
Blend modes
And as we promised, here's the list of blend modes, their groupings, and what they do:
Darken
The modes in this group turn the final colours darker. This group contains three values as follows:
Darken:
It blends pixels based on luminance values in each colour. The result is either the base colour or the blend colour, depending on which is darker.
Multiply:
It blends the luminosity of the base colour by the blend colour. The result is always a darker colour, or no change if the blend colour is white.
Color burn:
It gives darker colours than Multiply mode because it increases the contrast between the base and blending layer.
Lighten
The modes in this group turn the final colours brighter. This group contains three values.
Lighten:
It takes the lighter colour between the base and the blending layer.
Screen:
It blends lighter colours of both layers, but this one has a greater blending range than Lighten, depending on the luminosity of the image.
Color dodge:
It works like Lighten, but it gives a brighter effect than Screen because it decreases the contrast between the base and blending layers.
Contrast (complex):
This group has three values and it performs blending based on the contrast of the blending layer.
Overlay:
It blends pixels using mid-tones. It combines Multiply and Screen at half strength, with the bottom layer staying dominant. Darker colours in the top layer push the mid-tones darker, lighter colours push them brighter, and 50% grey becomes transparent.
Soft light:
A softer version of Overlay, without the harsh contrast, which applies either a darkening or a lightening effect depending on the luminance values.
Hard light:
A version of Overlay that blends layers depending on the brightness of the top layer.
Colours darker than 50% grey darken the result and colours lighter than 50% grey lighten it. Overlay and Soft light are the gentler ones; Hard light can be intense, so lowering the element's opacity often helps.
Inversion
The modes in this group (Webflow calls them Comparative) look for differences between the two layers. With a white blend colour the base layer is inverted, which simply means the colours jump to their opposites: red becomes cyan, green becomes magenta and blue becomes yellow.
Difference:
Produces a result by finding the difference between pixels of blending layer and the base layer.
Exclusion:
Blends white colour values by inverting the colours of the base layer.
Modes in this group invert colours depending on their brightness values. So black is mostly unaffected and white will 100% invert the colours.
Composite
These modes blend layers as per their names:
Hue:
It takes the hue of the blend layer and keeps the saturation and luminosity of the base layer.
Saturation:
It preserves the luminosity and hue of the base layer and blends colours based on the colour strength value.
Color:
It preserves the luminosity of the base layer. It will just overlay the colour on top of the base layer, removing the base layer's colours.
Luminosity:
Luminosity keeps the hue and saturation of the base layers but blends the luminosity of the blending layer.
This group works on the HSL model, so blacks, whites and greys have no greater effect on the blending.
Blend mode FAQ
How do I use mix-blend-mode in Webflow?
The quickest way today is the Style panel: select your element, open Effects > Blending and pick a mode. If you need a mode applied to a whole stack of elements with the same class, or you want isolate, you can still paste our CSS into the project settings and add a combo class such as mbm-multiply, as shown above.
What does the multiply blend mode do?
Multiply multiplies the colours of the top and bottom layers. Black stays black, white leaves the bottom layer unchanged, and everything in between gets darker, which makes it handy for darkening elements or creating shadows.
What are the CSS blending modes?
There are 16 you can pick in Webflow: normal, darken, multiply, color burn, lighten, screen, color dodge, overlay, soft light, hard light, difference, exclusion, hue, saturation, luminosity and the mode called Color. The list above explains each one, and mbm-isolate is our extra class for elements that should ignore the blend.
Special thanks to Jignesh Patel for the original definitions (his post at imjignesh.com/blending-modes-in-css has since gone offline). For visual examples, head to the MDN page on mix-blend-mode.
If you like this kind of Webflow CSS trick, have a look at how we create a blog summary with combo classes, how we build CMS powered background gradients, or our visual guide to easing functions.
For more how-to's related to Webflow and things like analytics etc. in Webflow check out the how-to section on our blog.